Star Wars Treat: Wampa Bars
Star Wars Treat: Wampa Bars
Happy May 4th… May the 4th be with you!
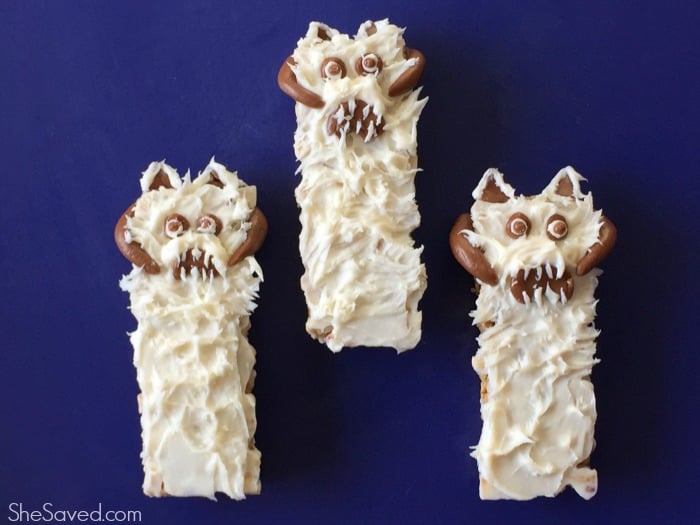
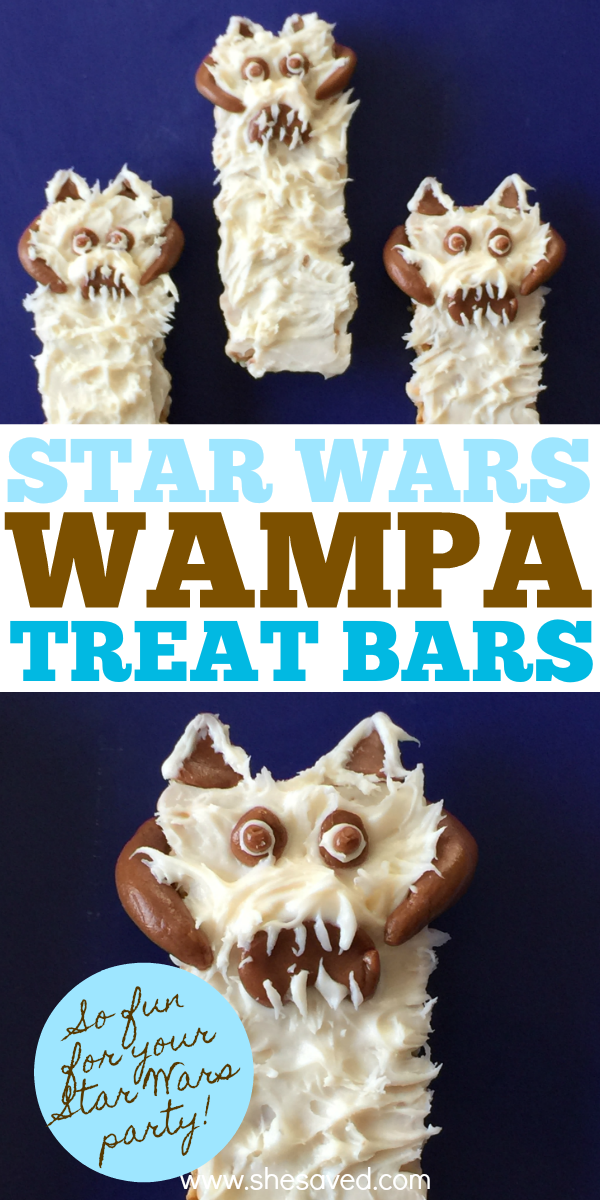
If you are planning a party or just want to impress your fellow Star Wars fans, these Wampa Star Wars Treat bars will be a sure hit. The poor Wampa kind of gets a bad rap but he sure makes for a cute treat!
These Wampa Star Wars Treat bars will add some really fun decor to your Star Wars themed party table, and they are also actually quite easy to make. This might even be a fun party activity for the kids if you set them up and let them make their own!
Also, make sure to check out some of my other Star Wars treats like my Chewbacca Snack Bars and don’t forget about my BB-8 Droild Quesadillas and of course any fan will love this Yoda Star Wars breakfast.
What You’ll Need to make this Star Wars Treat
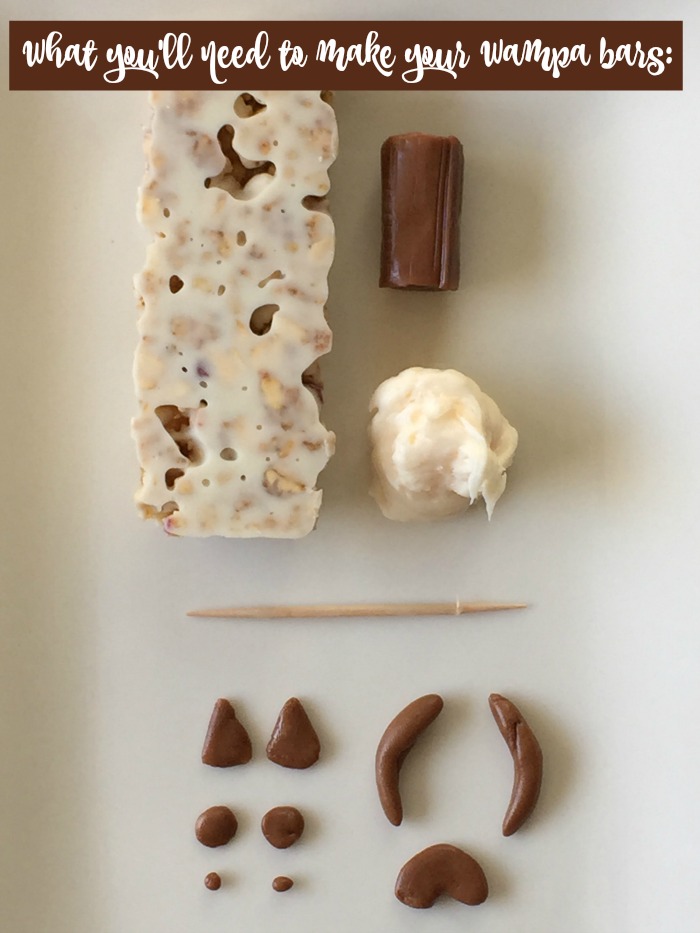
(Special K Greek Yogurt & Fruit was the brand I used)
Pre-packaged white frosting
Tootsie Rolls candy
Toothpick

How to Assemble these Star Wars Treat Wampa Bars
Pinch off two equal sections and roll until you have formed the Wampa’s tusks.
Pinch off another section and shape it into a flat crescent to form the mouth.
Do this again with two more equal sections until you have formed two flat triangular ears, disk eyes and rounded pupils.
Unwrap a granola bar.
Use a knife to spread white frosting liberally over the top of the bar.
Place a small mound of frosting near the top of the granola bar to form the snout.
Place the Wampa’s tootsie roll eyes just above the snout.
Use your toothpick to place a small dab of white frosting on the eyes and then place the tootsie roll pupils on top of the white frosting.
Press the triangular ears onto the top of the granola bar. If the candy isn’t tacky enough you can use some frosting as glue.
Affix the tusks on each side of the face so that they point inward towards the snout.
Next place the Wampa’s mouth under the eyes and snout.
You are then going to use the toothpick to lift up and outward all over the Wampa’a frosting body. This will form peaks that will look like fur.
Be sure to do this on the tips of the ears as well.
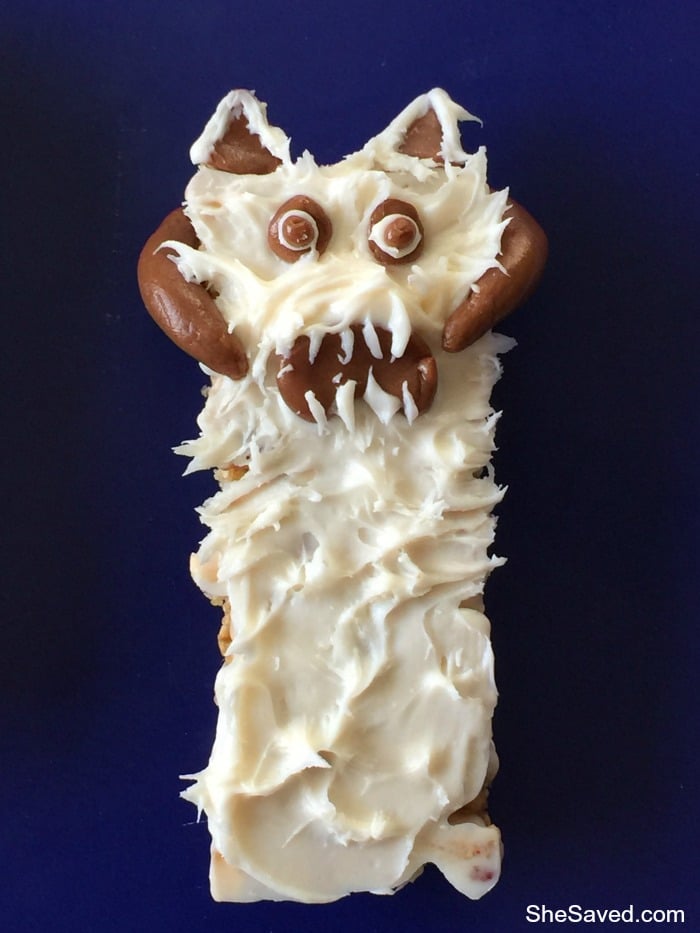
Now we are going to make the razor sharp teeth. This can be accomplished by pulling up on the frosting until you have a small peak on your toothpick and then placing that peak onto the mouth to form teeth.
Repeat this process for as many Wampa bars as needed.
Print the Recipe for Wampa Treats
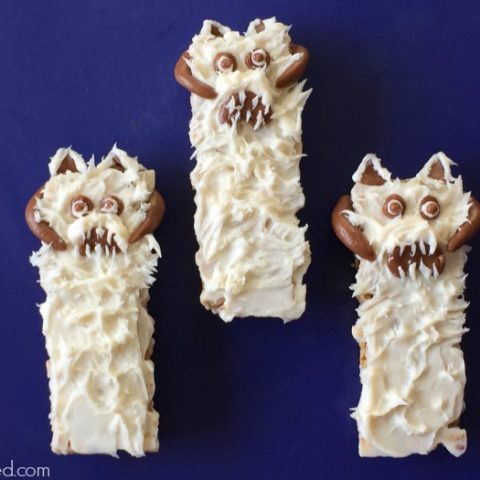
Wampa Star Wars Treat Bars
So fun for your Star Wars themed party or event, these Wampa bars will be a hit with kids and adults alike! Made from granola bars, they are super easy to make and so much fun!
Ingredients
- Pre-packaged granola bars (I used Special K Greek Yogurt & Fruit)
- - Pre-packaged white frosting (I used Pilsbury Cream Cheese)
- - Tootsie Rolls candy
- - Toothpick
Instructions
- Unwrap your tootsie roll.
- Pinch off two equal sections and roll until you have formed the Wampa's tusks.
- Pinch off another section and shape it into a flat crescent to form the mouth.
- Do this again with two more equal sections until you have formed two flat triangular ears, disk eyes and rounded pupils.
- Unwrap a granola bar.
- Use a knife to spread white frosting liberally over the top of the bar.
- Place a small mound of frosting near the top of the granola bar to form the snout.
- Place the Wampa's tootsie roll eyes just above the snout.
- Use your toothpick to place a small dab of white frosting on the eyes and then place the tootsie roll pupils on top of the white frosting.
- Press the triangular ears onto the top of the granola bar. If the candy isn't tacky enough you can use some frosting as glue.
- Affix the tusks on each side of the face so that they point inward towards the snout.
- Next place the Wampa's mouth under the eyes and snout.
- You are then going to use the toothpick to lift up and outward all over the Wampa'a frosting body. This will form peaks that will look like fur.
- Be sure to do this on the tips of the ears as well.
- Now we are going to make the razor sharp teeth. This can be accomplished by pulling up on the frosting until you have a small peak on your toothpick and then placing that peak onto the mouth to form teeth.
- Repeat this process for as many Wampa bars as needed.

Meet the author – Keri Lyn
The creative and frugal mind behind She Saved for over 12 years now, Keri Lyn shares her adventures in parenting along with her love for family travel, country living and brand marketing. A self-proclaimed “brand loyalist”, Keri Lyn is known for her strong and enthusiastic voice when it comes to the products and brands that she loves. She Saved has become a community for like-minded consumers who appreciate saving money, time and sanity by getting the best deals on quality products and experiences.


