No Churn Unicorn Ice Cream Recipe
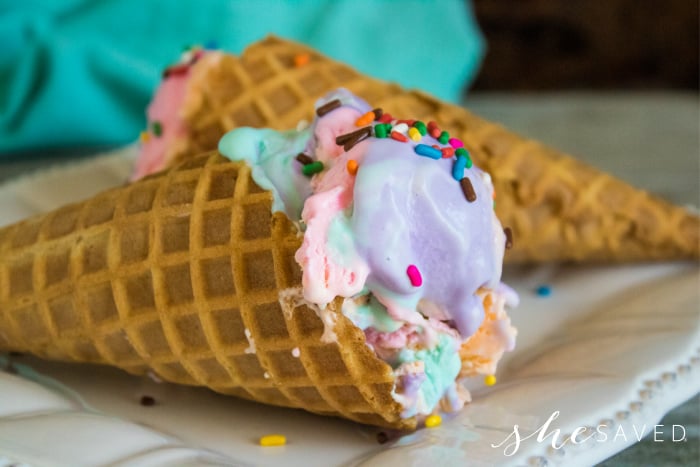
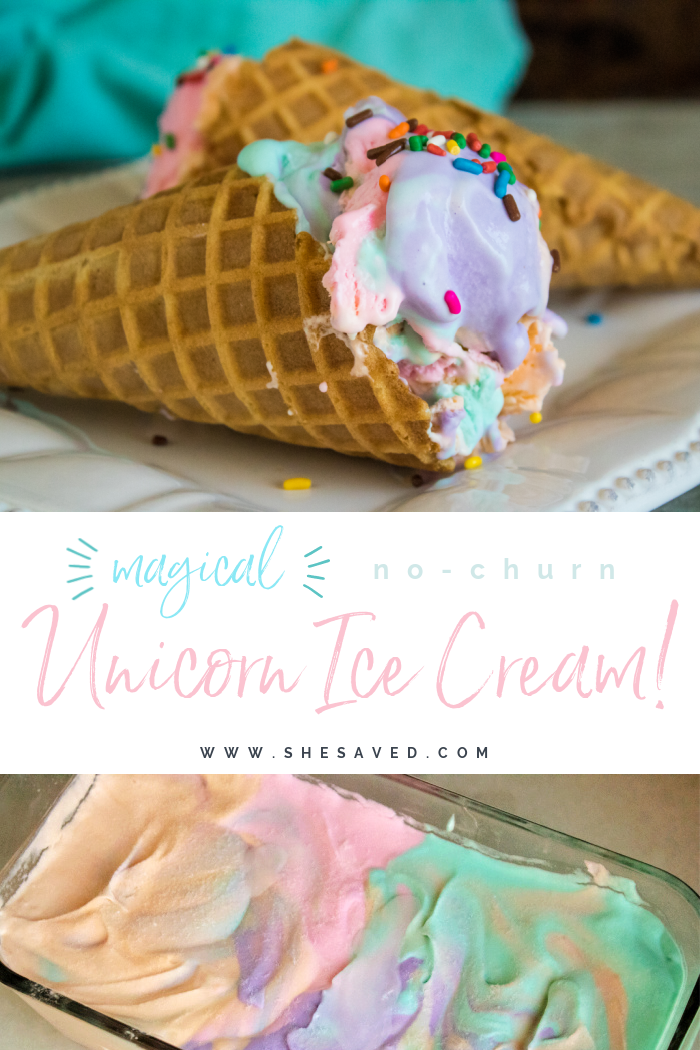
Looking for some unicorn magic for a unicorn birthday party or event? You don’t need an ice cream maker to make this no-churn homemade unicorn ice cream, just a few ingredients and some rainbow sprinkles!
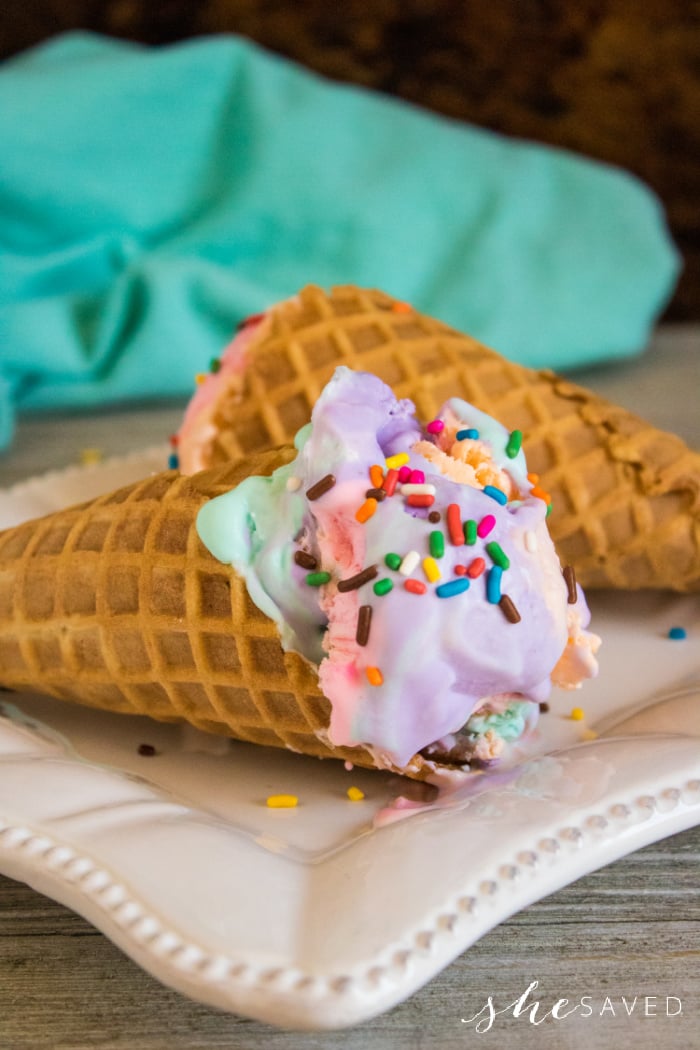
If you’ve been a She Saved reader for very long, you know that we love unicorn recipes – and if you have a child with a unicorn obsession like I do, this is the perfect ice cream for that themed unicorn party, but it’s also perfect for hot summer days, playdates and sleepovers – any time you want to bring out a little of that unicorn magic!
Ingredients for Homemade Unicorn Ice Cream (no-churn ice cream)
1 14-oz. can sweetened condensed milk
2 cups cold heavy cream
1 teaspoon vanilla extract (or almond extract), to taste
1-2 drops each 4 different colors gel food coloring
Candy toppings / unicorn sprinkles / glitter candy bits
This no-churn ice cream recipe will be vanilla ice cream unless you decide to add flavoring, but I like to keep that part simple – and everyone seems to love vanilla ice cream, so it works. You are basically making a rainbow ice cream with vanilla flavors – perfect for any sweet tooth!
Select any colors that you like, but you might also consider using a favorite color or two to match your party colors. I like the bright colors (think sherbet icecream) because it makes these unicorn ice cream recipes look so magical, especially if you top them with candy confetti pieces – magical!
How to make Homemade No-churn Unicorn Ice Cream
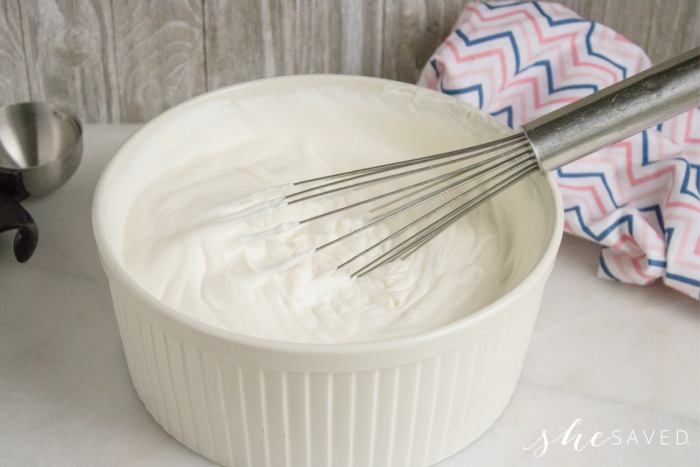
With a hand mixer, beat heavy whipping cream until thick. (if you use a bowl mixer than use the whisk attachment)
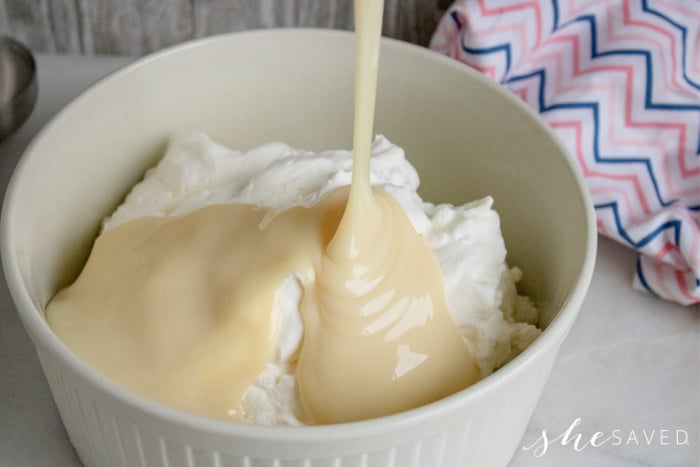
Pour in sweetened condensed milk, vanilla or other extracts and fold in until smooth. I like to use a hand whisk for this.
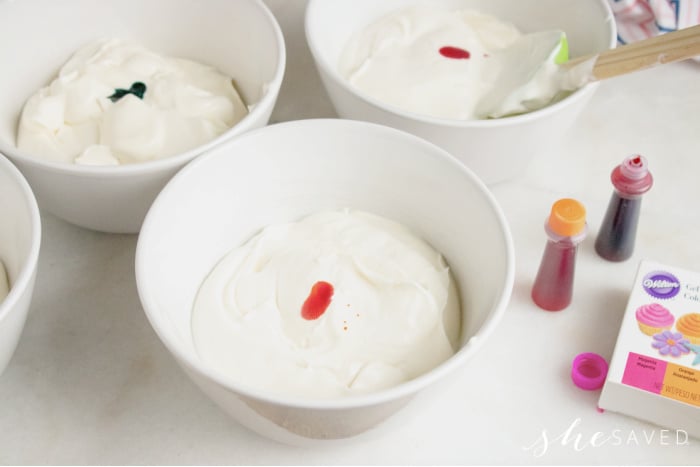
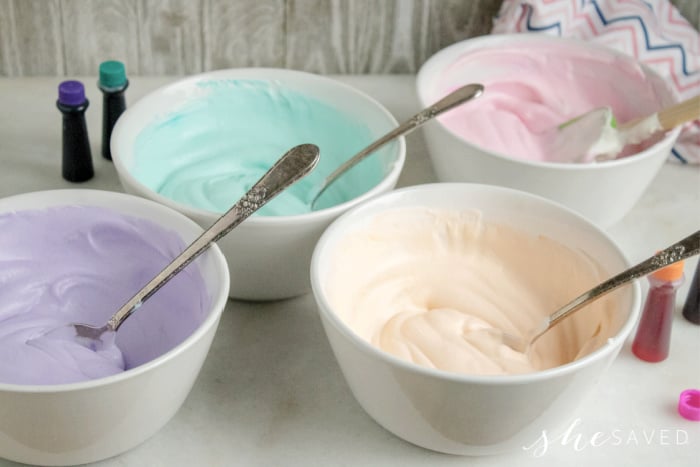
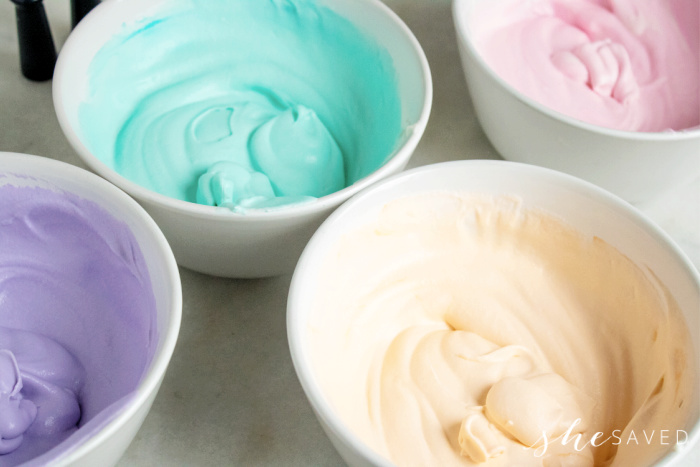
Divide into 4-5 separate bowls and add food coloring to all but one of them. Add in food coloring and stir.
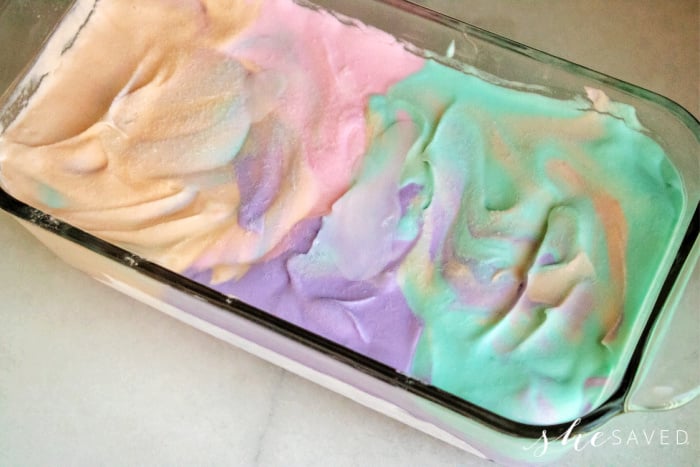
Next, pour ice cream mixture into a freezer safe container or loaf pan.
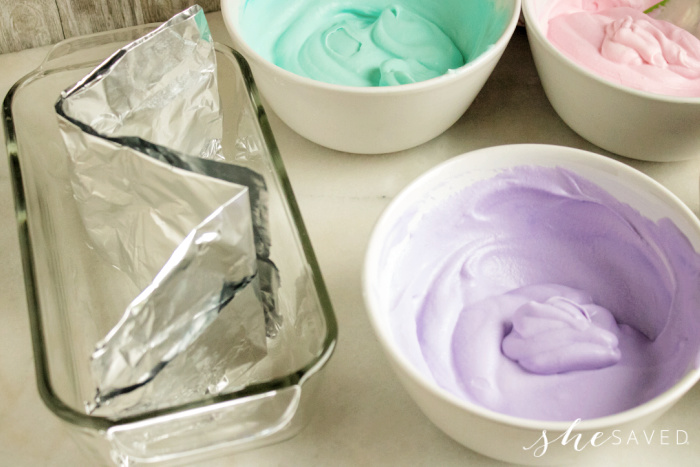
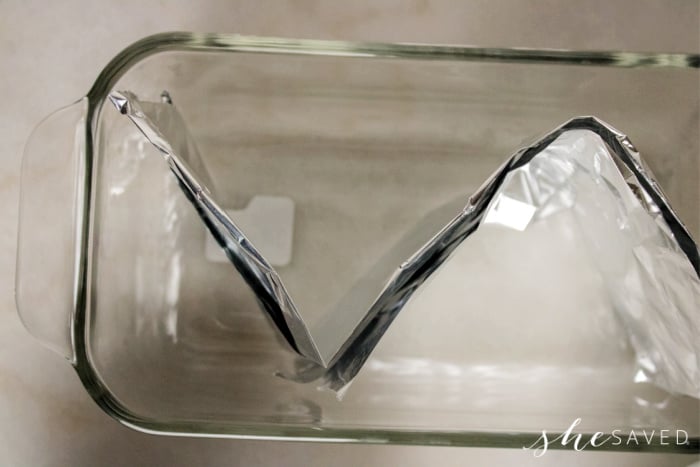
As you can see, I like to use tinfoil to separate colors but you don’t need to do this. This will still work nicely if you just drop spoonfuls in by alternating colors. You can also use a spoon to kind of swirl them together a little bit.
How Long Does it Take to Freeze No Churn Homemade Ice Cream
Freeze for 5-6 hours or overnight. When it is time to serve, remove from freezer and let sit on the counter to soften for 5-10 minutes before.
Waiting for ice cream to freeze is kind of like “a watched pot never boils” – if you get my drift. My kids lose their minds waiting for the ice cream to freeze, so I usually try to make it in advance so we don’t have to open the freezer 100 times to check to see if our homemade ice cream is frozen.
We love to serve this magical unicorn ice cream in a waffle cone or wafer cone – sugar cones will also work. Top with sprinkles to complete your unicorn sparkle ice cream which will be a hit with unicorn fans young and old! If you are including this as part of a unicorn themed birthday party, maybe let the kids create their own unicorn ice cream creation by providing an ice cream bar full of magical toppings and sprinkles!
The possibilities are endless – we love making our own ice creams because not only is it simple and affordable, but I don’t have to worry about artificial flavors or coloring, I can select my own and feel good about the homemade ice cream that I’m serving.
More Unicorn Themed Recipes and DIY Crafts Ideas
We love unicorn themed recipes and crafts – so fun for tweens and teens and a great way to fill your unicorn themed parties with magical fun! Here are some of our other favorite unicorn posts:
DIY Unicorn Bookmark Printable
FREE Unicorn Printable Calendar
How to Make a Quilled Paper Unicorn
No-Sew Unicorn Felt Pouch Project
Follow She Saved on Pinterest to keep up with the latest fun shares coming from the blog!
More No-Churn Ice Cream Recipes
No Churn Chocolate Brownie Fudge Ice Cream
No Churn Homemade Root Beer Float Ice Cream
Unicorn Ice Cream FAQS
Does Unicorn Ice Cream taste good?
We think it’s does! Actually, almost everyone will love this ice cream because it’s all vanilla flavored, it’s just the magical colors of this ice cream fools your mind into thinking it has other flavors!
What is the best container for making Unicorn Ice Cream (or any no-churn ice cream) in?
We love to make our no-churn ice creams in glass loaf pans or glass pyrex dishes. Glass containers just seem to work well with the freezing process and they are a great way to store your ice cream. Glass containers also seem to keep ice cream more solid when sitting out while you serve it.
What is the best food coloring to use for no-churn ice cream?
You can really use any food coloring, but we really like the gel food colorings – there are several varieties and many neon color options that will make your unicorn ice cream colors even more magical and fun!
Print the Recipe for Homemade No-Churn Unicorn Ice Cream
No Churn Unicorn Ice Cream Recipe
Easy to make and so yummy, this magical homemade no-churn unicorn ice cream recipe will be a hit for your unicorn themed birthday party or event, but it's also perfect for those hot summer days. Kids and adults alike will love this colorful ice cream that comes together quickly and is super affordable to make!
Ingredients
- 1 14-oz. can sweetened condensed milk
- 2 cups cold heavy cream
- 1 teaspoon vanilla extract (or almond extract), to taste
- 1-2 drops each 4 different colors gel food coloring
- Candy toppings / unicorn sprinkles / glitter candy bits
Instructions
With a hand mixer, beat heavy whipping cream until thick. (if you use a bowl mixer than use the whisk attachment)
Pour in sweetened condensed milk, vanilla or other extracts and fold in until smooth. Divide into 4-5 separate bowls and add food coloring to all but one of them. Add in food coloring and stir.
Next, pour ice cream mixture into a freezer safe container or loaf pan. As you can see, I like to use tinfoil to separate colors but you don't need to do this. This will still work nicely if you just drop spoonfuls in by alternating colors. You can also use a spoon to kind of swirl them together a little bit.
Freeze for 5-6 hours or overnight. When it is time to serve, remove from freezer and let sit on the counter to soften for 5-10 minutes before.

Meet the author – Keri Lyn
The creative and frugal mind behind She Saved for over 12 years now, Keri Lyn shares her adventures in parenting along with her love for family travel, country living and brand marketing. A self-proclaimed “brand loyalist”, Keri Lyn is known for her strong and enthusiastic voice when it comes to the products and brands that she loves. She Saved has become a community for like-minded consumers who appreciate saving money, time and sanity by getting the best deals on quality products and experiences.

