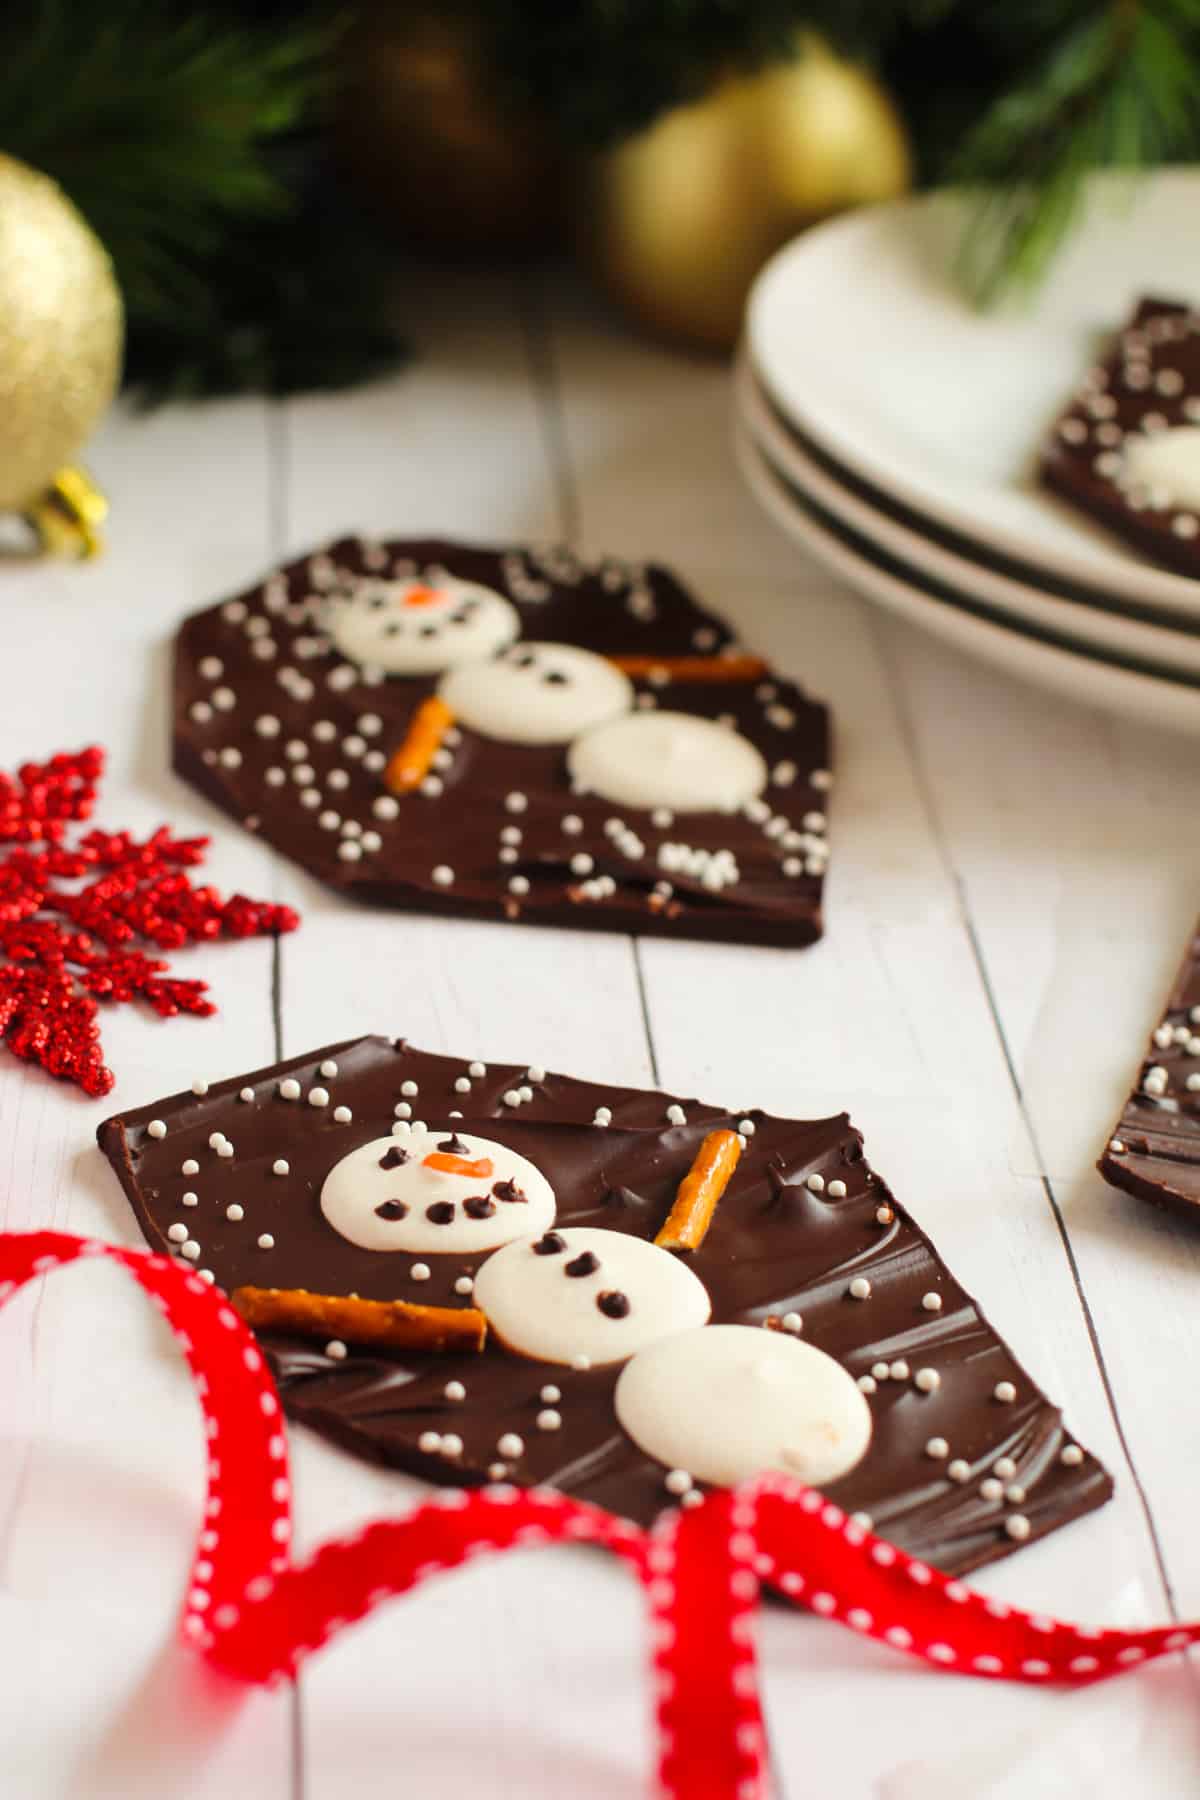
Easy Snowman Chocolate Bark Recipe
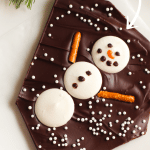
It’s that time of year! If you are looking for the perfect easy recipe ideas for your holiday season baking, this homemade chocolate bark recipe will be a great addition to your baking lineup.
Such an easy and fun delicious dessert and great gift idea, this snowman chocolate bark is a must try and the perfect sweet treat!
Easy Snowman Chocolate Bark Recipe
So simple, this is my favorite chocolate bark recipe. All you need are a few ingredients
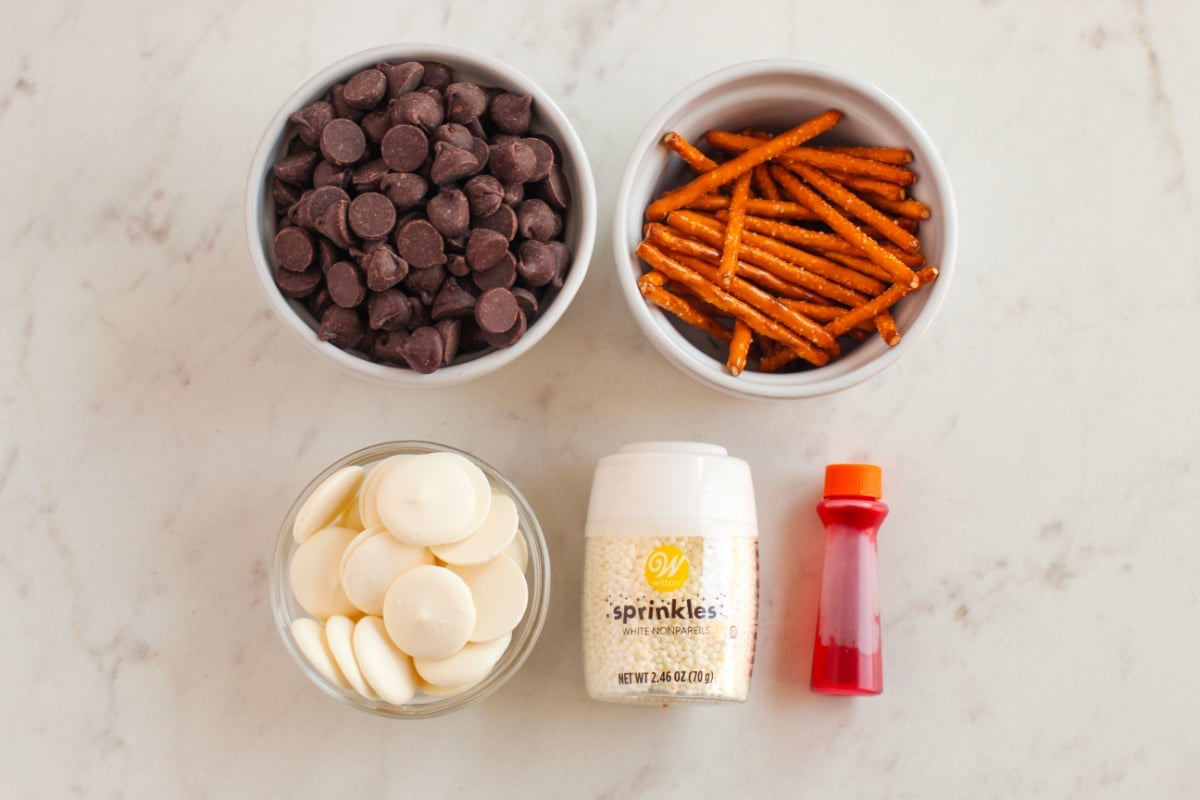
Ingredients for this Easy Chocolate Bark Recipe
- Dark Chocolate chips, divided (save ¼ cup for decorating)
- Pretzel Sticks
- white candy melts
- Orange food coloring
- White nonpareils
Other materials:
- 2 toothpicks
How to make Snowman Chocolate Bark
Step 1 – Line a square rimmed baking sheet with wax paper (or piece of parchment paper) and set aside.
Step 2 – In a medium microwave-safe bowl, add 1 ¾ cups of chocolate chips. Microwave for 1 minute, stir, and microwave for an additional 30 seconds, repeating this process until all chocolate is smooth and melted.
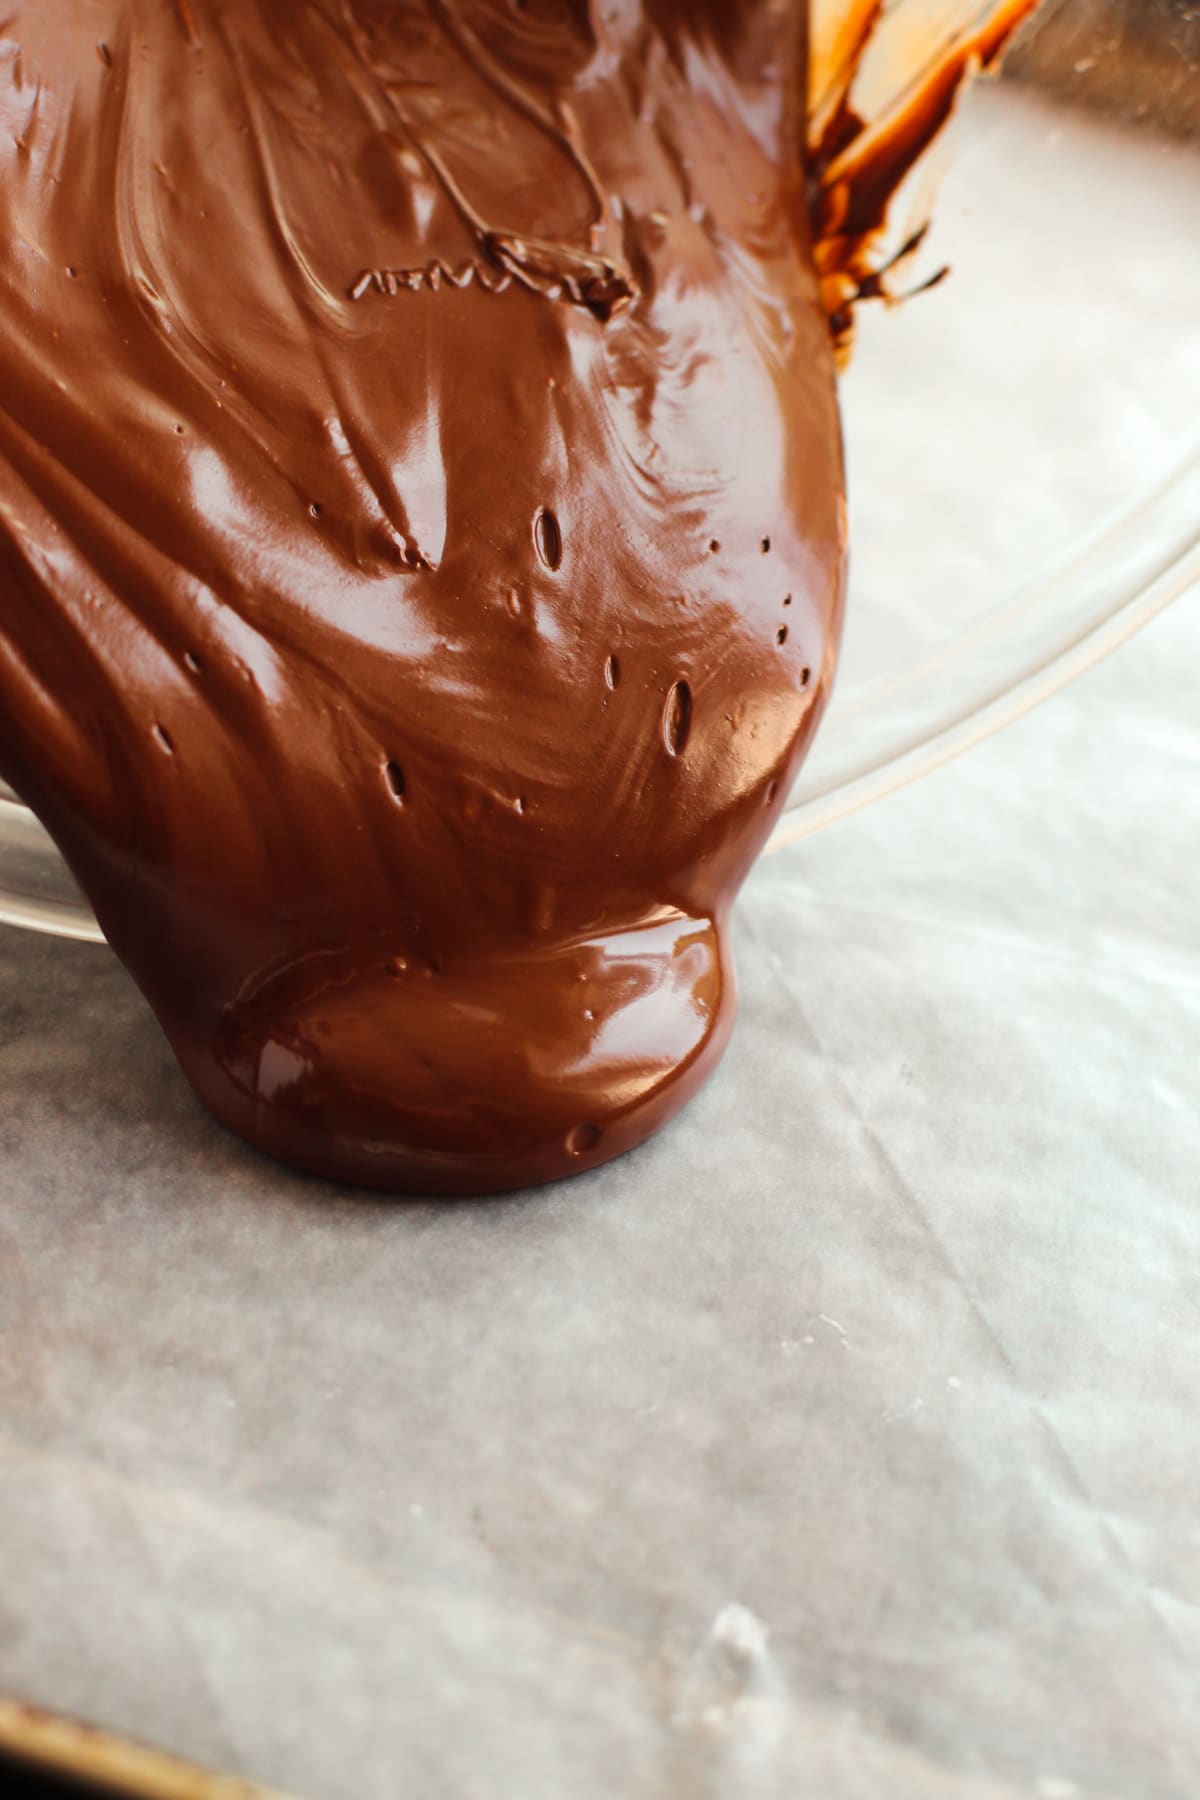

Step 3 – Pour the melted dark chocolate onto the prepared baking sheet pan, using a rubber spatula to spread the chocolate into a smooth even layer.
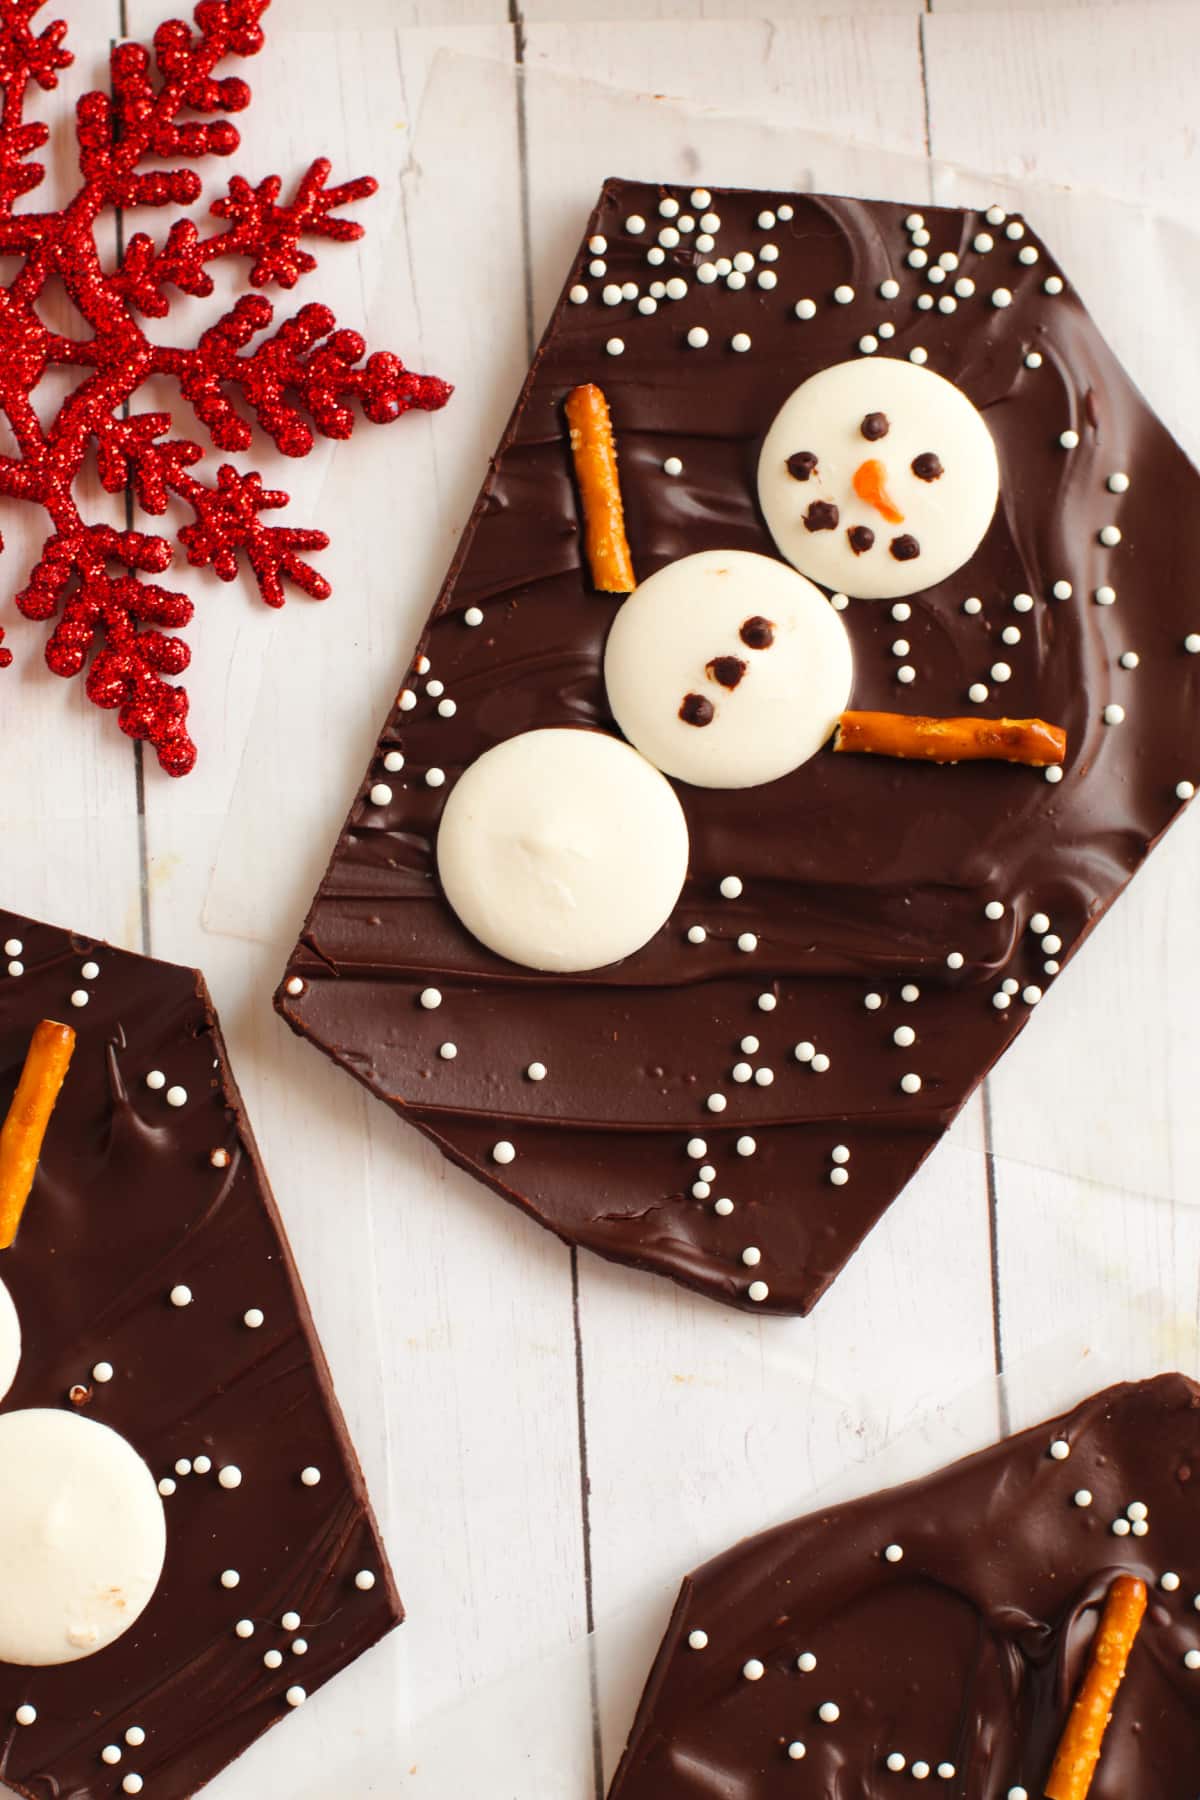
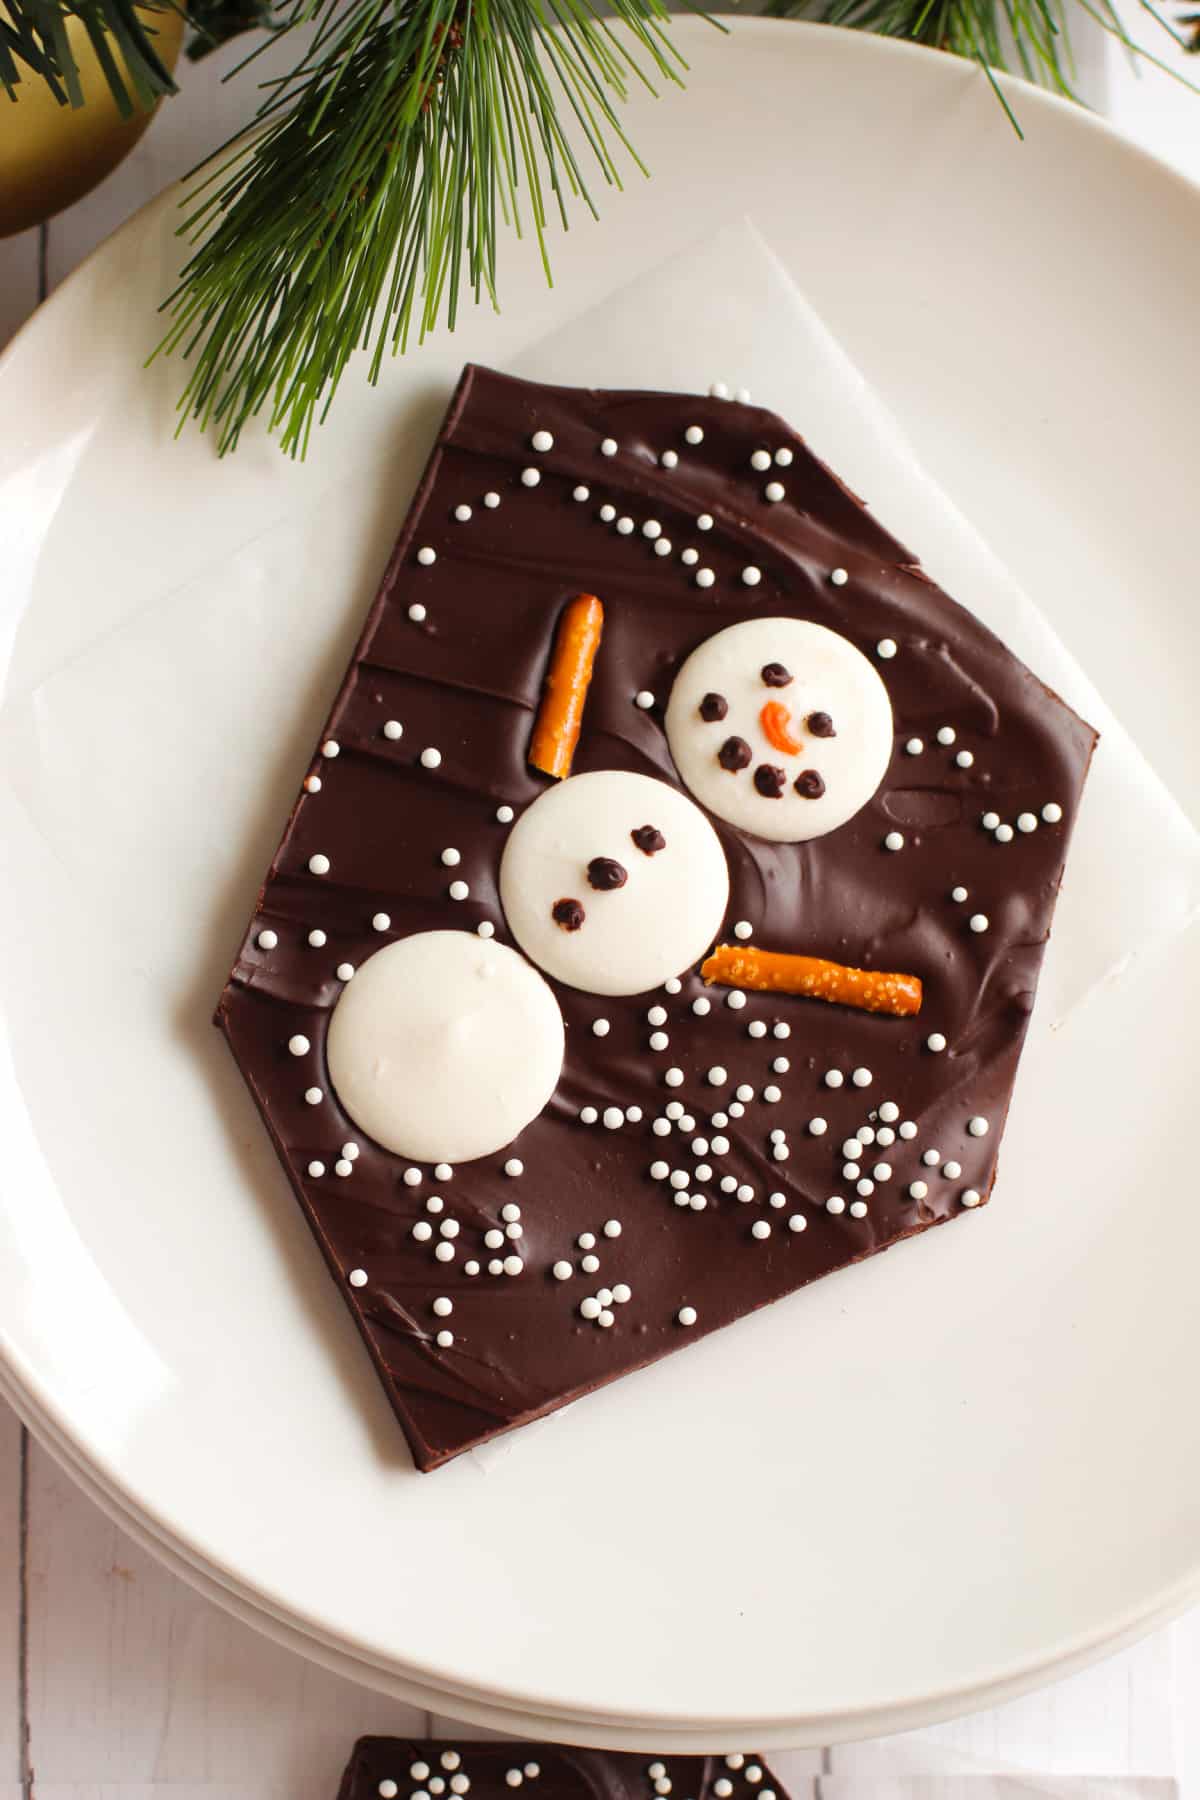
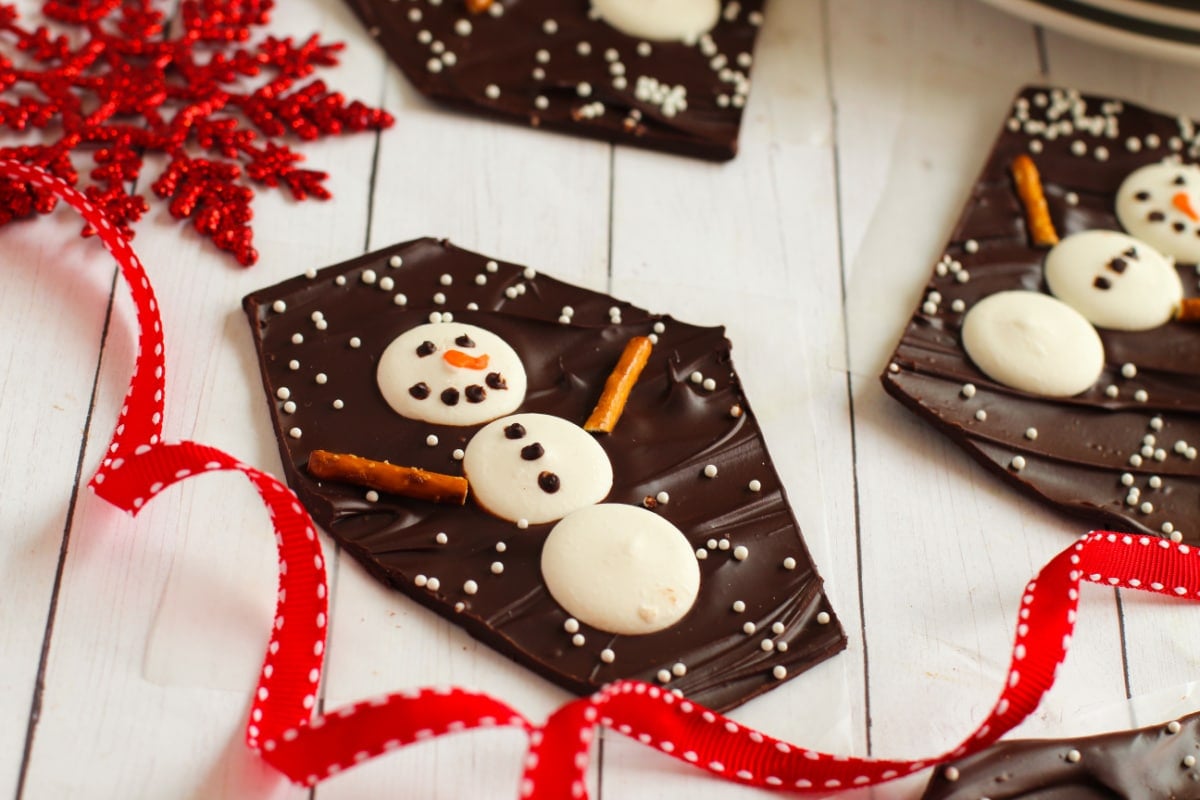
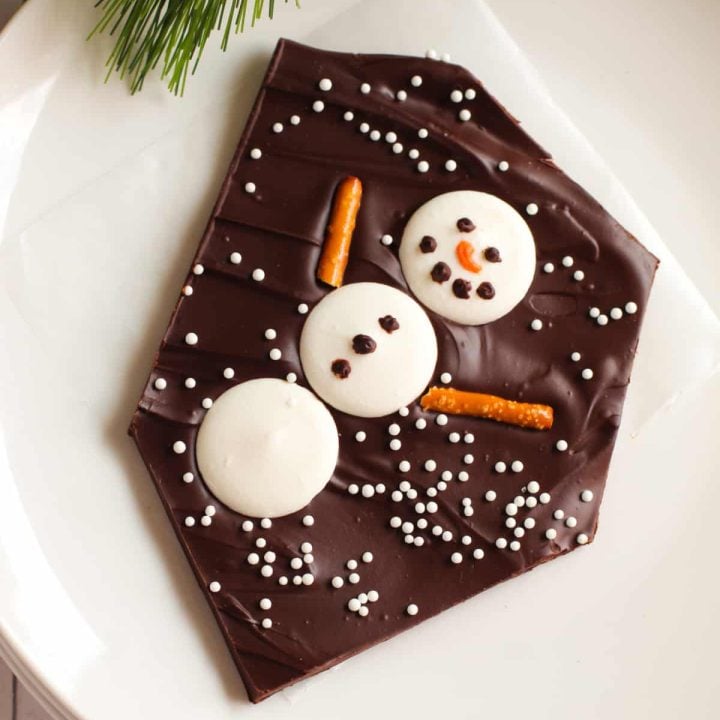
Step 4 – Immediately begin creating the snowmen by adding three white candy melts for each snowman. Repeat this process of adding the white chocolate melts, giving the snowmen a little room between them.

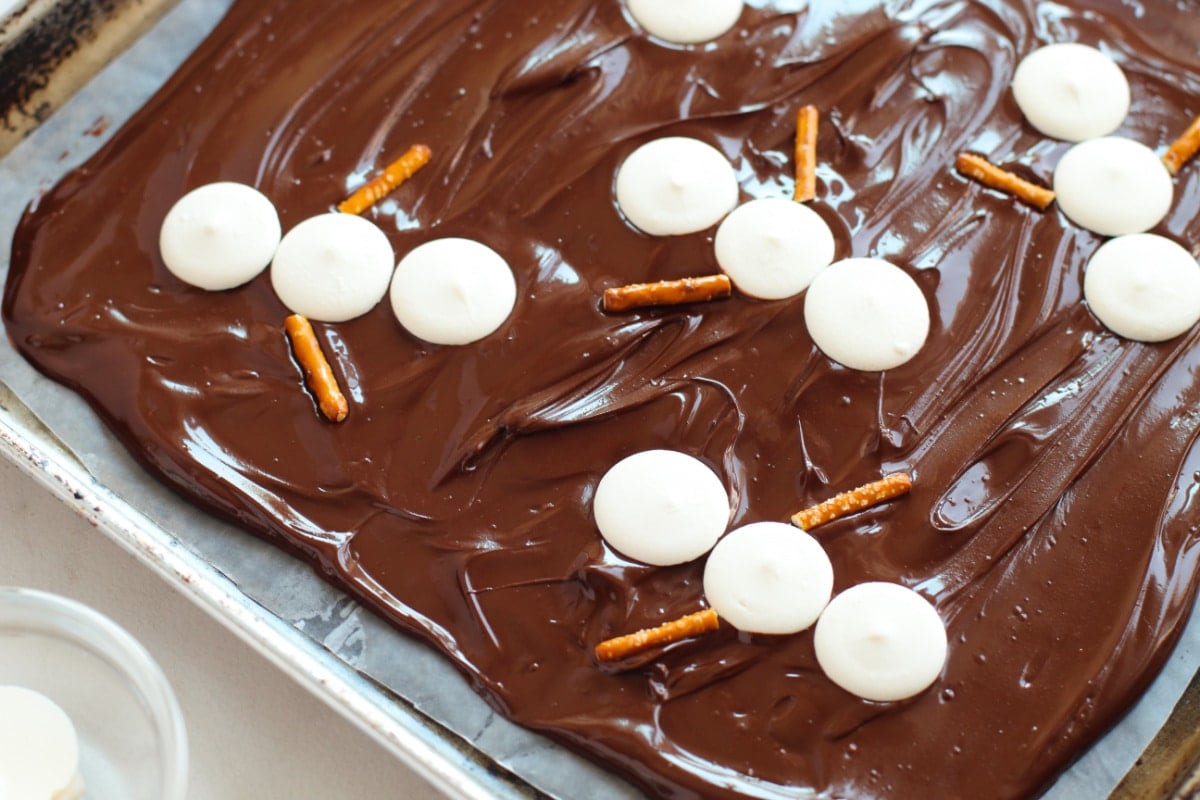
Step 5 – Break off pieces of pretzel stick and add two arms for each snowman.
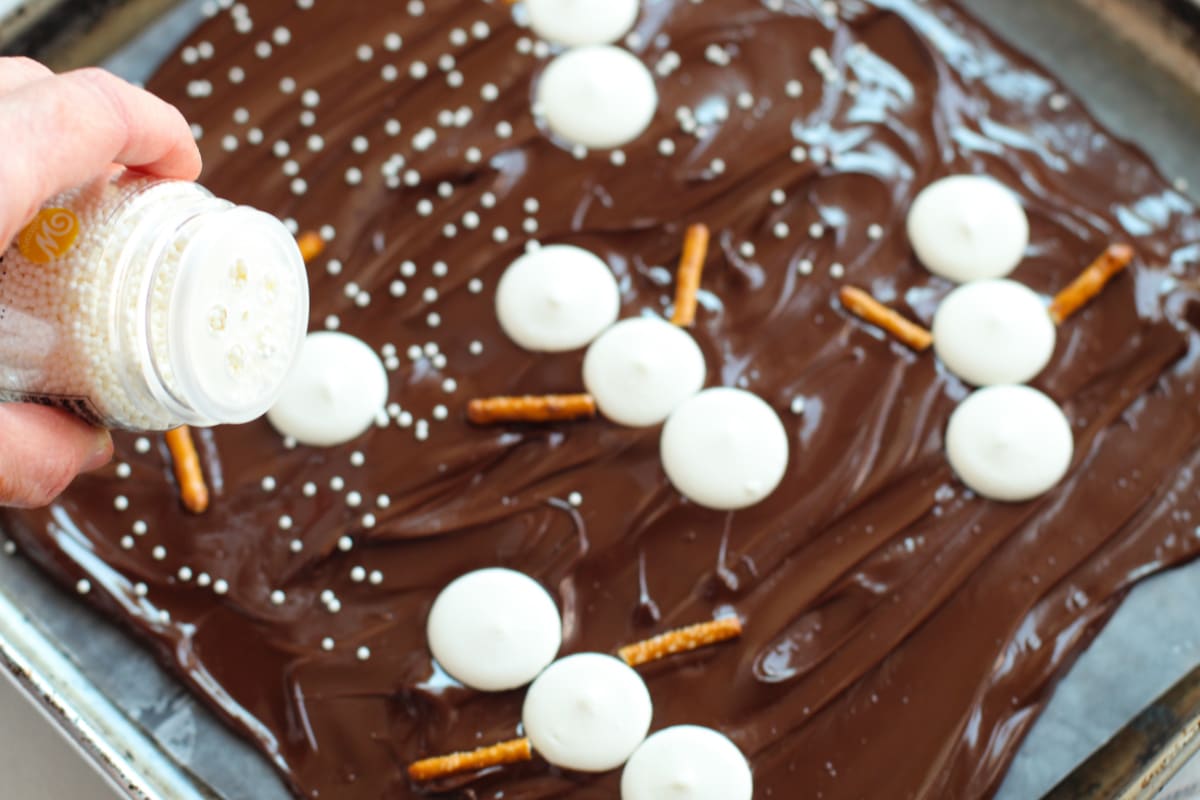
Step 6 – Sprinkle on white nonpareils to give the effect of snow.
Step 7 – Place the bark and the cookie sheet in the fridge to firm up for 20 minutes.
Step 8 – Melt the remaining ¼ cup of dark chocolate chips in a small bowl.
Step 9 – Add white candy melts to a small microwave-safe bowl. Microwave for 30 seconds at 50% power, stir, and repeat this process until chocolate is melted. Stir in 2-3 drops of food coloring. Add a few drops (or more if necessary) of avocado oil or coconut oil if chocolate begins to seize up, stirring until smooth.
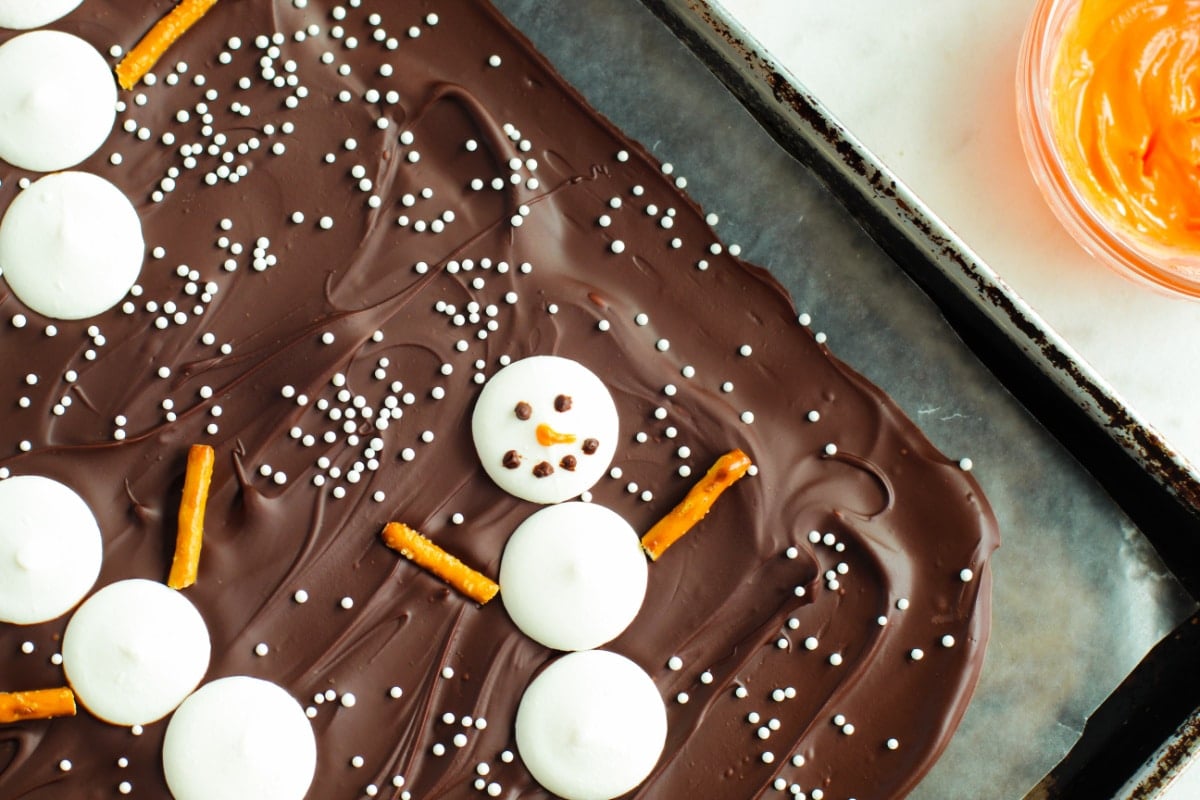
Step 10 – Now for the fun part! Add faces to the snowmen on the chilled chocolate bark. Dip a toothpick into the dark chocolate and dot eyes, charcoal mouth and 3 buttons down the center of each snowman.
Step 11 – Use a separate toothpick to dip into the orange chocolate and draw a nose onto each snowman.
Step 12 – Use a sharp knife to chop the bark into servings, being sure to include one snowman per piece.
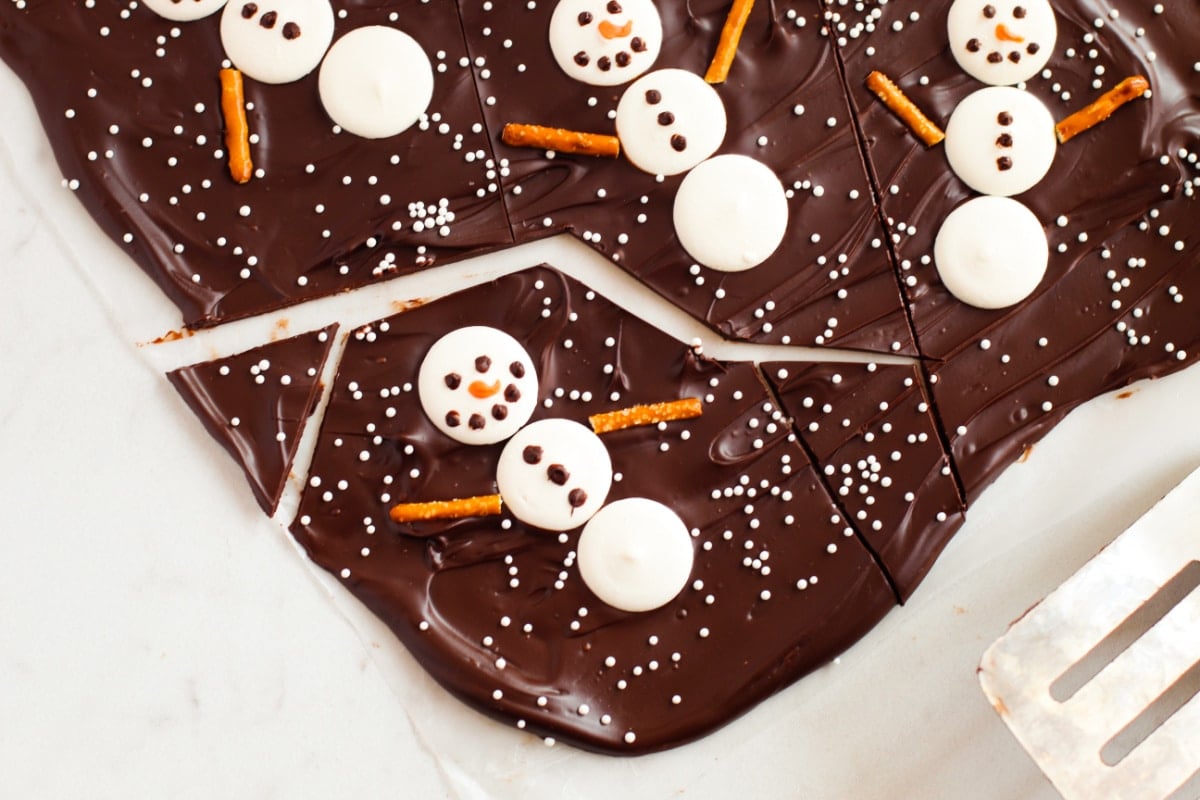
Step 13 – Place in treat bags, Christmas treat tins, an airtight container or enjoy immediately for a fun winter treat!
Notes:
- Store bark in the fridge until ready to serve
- Food pens may instead be used to draw the details onto the snowmen
- Semisweet chocolate chips would work as well if you don’t want dark chocolate bark / use white chocolate chips for a white chocolate bark
- Experiment making this snowman chocolate bark with different types of chocolate – use different kinds of melted chocolate to create different kinds of bark.
- The best way to store your snowmen chocolate bark is in a covered container. You can store at room temperature but I like to store them in the fridge.
- Get creative with your chocolate bark toppings: coconut flakes, small pieces of dried fruit or add a sprinkling of sea salt.
Recipes like this are a great option for easy dessert ideas for holiday parties because there is so little work involved. The festive look of this chocolate snowmen bark will be a big hit on your holiday dessert table or Christmas cookie platters. A great treat item to make for holiday bake sales and craft bazaars as well!
More fun Easy Snowman Dessert and Craft Ideas:
- Snowman Cupcakes
- Homemade Gift: Snowman Parts Treat
- Snowman Playdough
- Easy Snowman Cheese Ball
- Candy Bar Snowman Craft
Print the Recipe for Snowman Bark
Easy Snowman Chocolate Bark Recipe
Such a wonderfully festive holiday dessert treat idea, this easy to make snowman chocolate bark recipe is perfect for your baking line up! A great recipe for young chefs, there is very little prep or time involved in making these cute snowmen and they will look so wondering on your holiday cookie platter. You can make this snowman chocolate bark for bake sales, holiday bazaars or Christmas gift giving. Such a cute and easy dessert idea!
Ingredients
- Ingredients for this Easy Chocolate Bark Recipe
- 2 cups Dark Chocolate chips, divided (save ¼ cup for decorating)
- Pretzel Sticks
- white candy melts
- Orange food coloring
- White nonpareils
Other materials:
- 2 toothpicks
Instructions
Line a square rimmed baking sheet with wax paper (or piece of parchment paper) and set aside.
In a medium microwave-safe bowl, add 1 ¾ cups of chocolate chips. Microwave for 1 minute, stir, and microwave for an additional 30 seconds, repeating this process until all chocolate is smooth and melted.
Pour the melted dark chocolate onto the prepared baking sheet pan, using a rubber spatula to spread the chocolate into a smooth even layer.
Immediately begin creating the snowmen by adding three white candy melts for each snowman. Repeat this process of adding the white chocolate melts, giving the snowmen a little room between them.
Break off pieces of pretzel stick and add two arms for each snowman.
Sprinkle on white nonpareils to give the effect of snow.
Place the bark and the cookie sheet in the fridge to firm up for 20 minutes.
Melt the remaining ¼ cup of dark chocolate chips in a small bowl.
Add white candy melts to a small microwave-safe bowl. Microwave for 30 seconds at 50% power, stir, and repeat this process until chocolate is melted. Stir in 2-3 drops of food coloring. Add a few drops (or more if necessary) of avocado oil or coconut oil if chocolate begins to seize up, stirring until smooth.
Now for the fun part! Add faces to the snowmen on the chilled chocolate bark. Dip a toothpick into the dark chocolate and dot eyes, charcoal mouth and 3 buttons down the center of each snowman.
Use a separate toothpick to dip into the orange chocolate and draw a nose onto each snowman.
Use a sharp knife to chop the bark into servings, being sure to include one snowman per piece.
Place in treat bags, Christmas treat tins, an airtight container or enjoy immediately for a fun winter treat!
Notes
Store bark in the fridge until ready to serve
Food pens may instead be used to draw the details onto the snowmen
Semisweet chocolate chips would work as well if you don't want dark chocolate bark / use white chocolate chips for a white chocolate bark
Experiment making this snowman chocolate bark with different types of chocolate - use different kinds of melted chocolate to create different kinds of bark.
The best way to store your snowmen chocolate bark is in a covered container. You can store at room temperature but I like to store them in the fridge.
Get creative with your chocolate bark toppings: coconut flakes, small pieces of dried fruit or add a sprinkling of sea salt.
Nutrition Information:
Yield: 12 Serving Size: 1Amount Per Serving:Calories: 173Total Fat: 9gSaturated Fat: 5gTrans Fat: 0gUnsaturated Fat: 3gCholesterol: 2mgSodium: 37mgCarbohydrates: 21gFiber: 2gSugar: 15gProtein: 2g
*This is just an estimate. Results may vary.

Meet the author – Keri Lyn
The creative and frugal mind behind She Saved for over 12 years now, Keri Lyn shares her adventures in parenting along with her love for family travel, country living and brand marketing. A self-proclaimed “brand loyalist”, Keri Lyn is known for her strong and enthusiastic voice when it comes to the products and brands that she loves. She Saved has become a community for like-minded consumers who appreciate saving money, time and sanity by getting the best deals on quality products and experiences.