Snowman Cheese Ball Recipe
If you are looking for holiday appetizers that will not only be perfect for a holiday party, but are delicious, then this snowman cheese ball is the perfect choice!
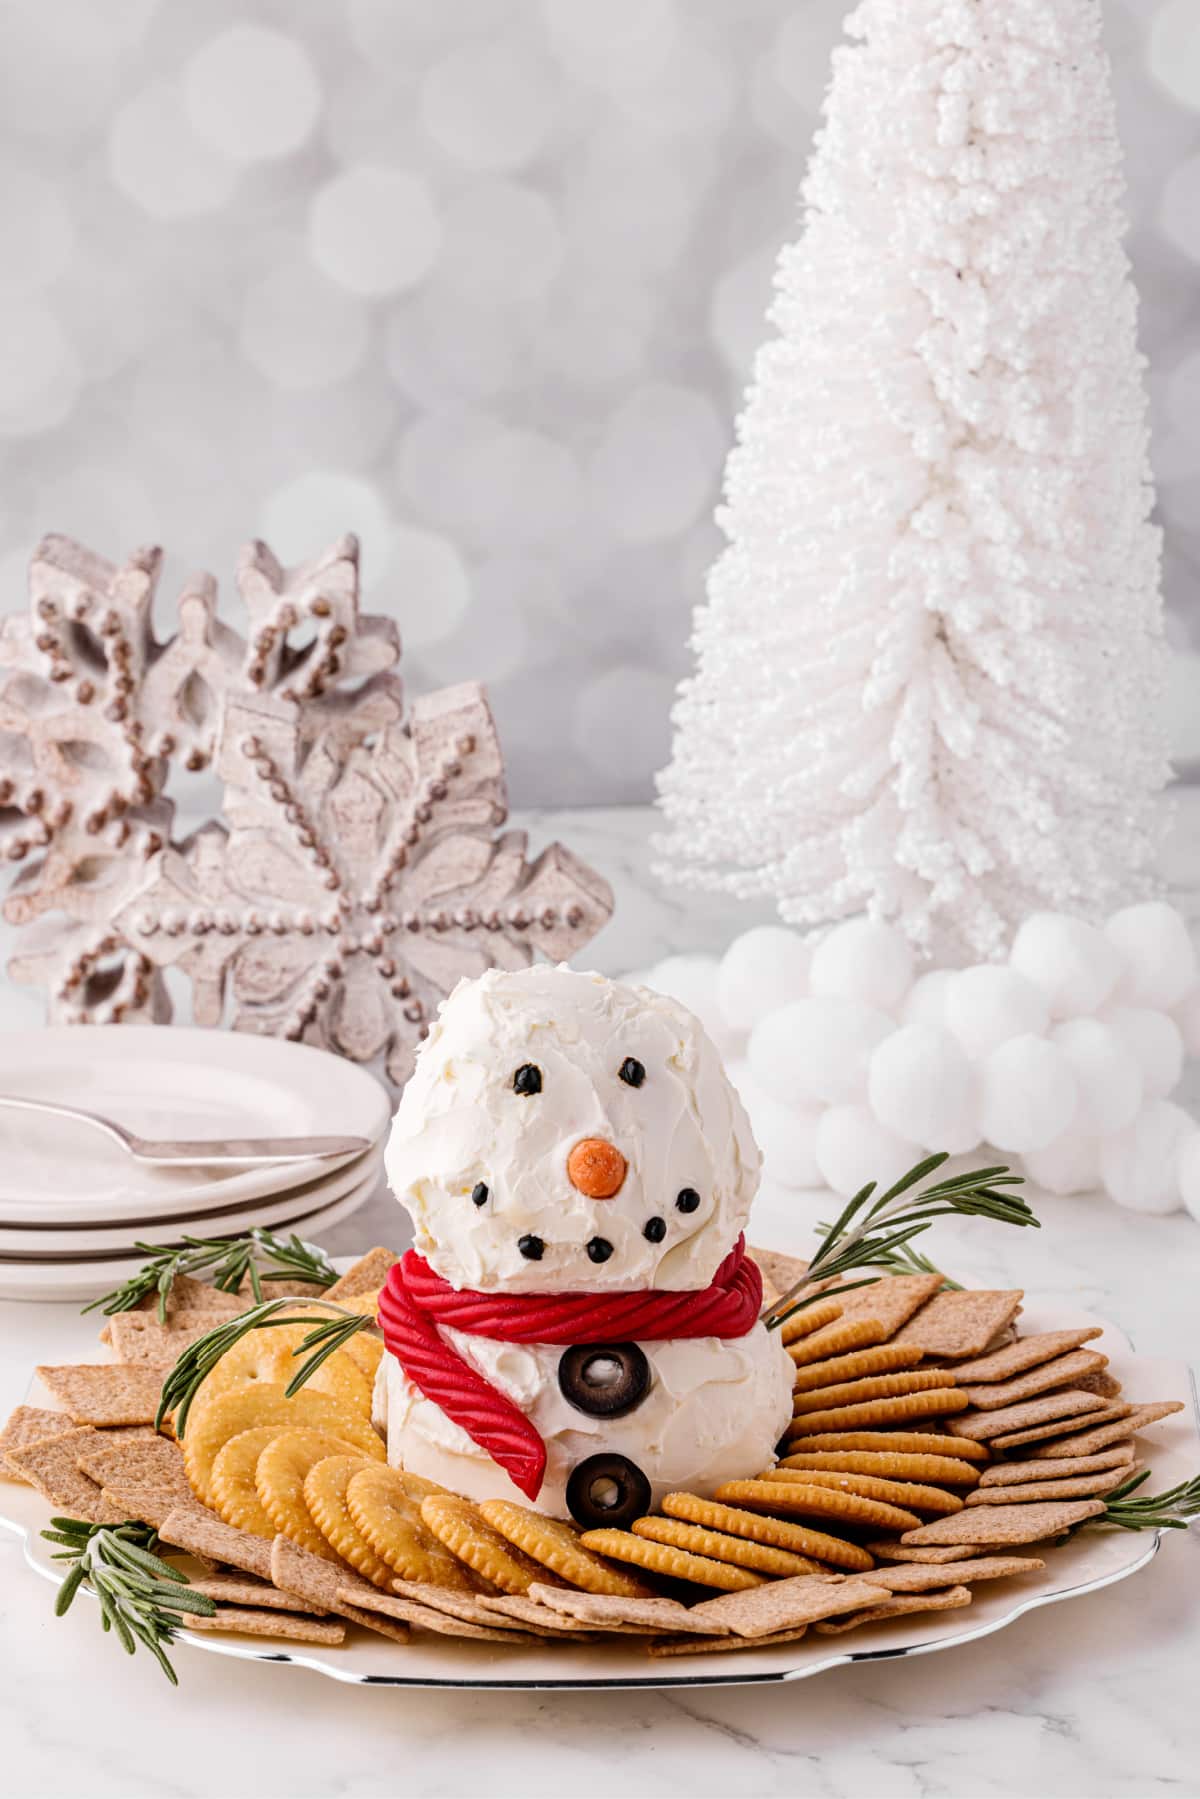
A adorable snowman creation that serves as both party decor and delicious creation! The best part, he’s affordable and easy to make, which means this snowman cheese ball is the perfect party appetizer!
Snowman Cheese Ball
This cute little guy will look darling on your holiday table and is also the perfect appetizer to take to a holiday party!
We had a ball making him and he is so easy that the kids are able to jump right in and help. Such an easy recipe, you could even have the kids attempt this easy snowman cheese ball recipe all by themselves!
We’ve tried several cheeseball recipes and this one is so simple and uses only one kind of cheese shredded cheese, combined with cream cheese.
Ingredients for making a Snowman Cheese Ball
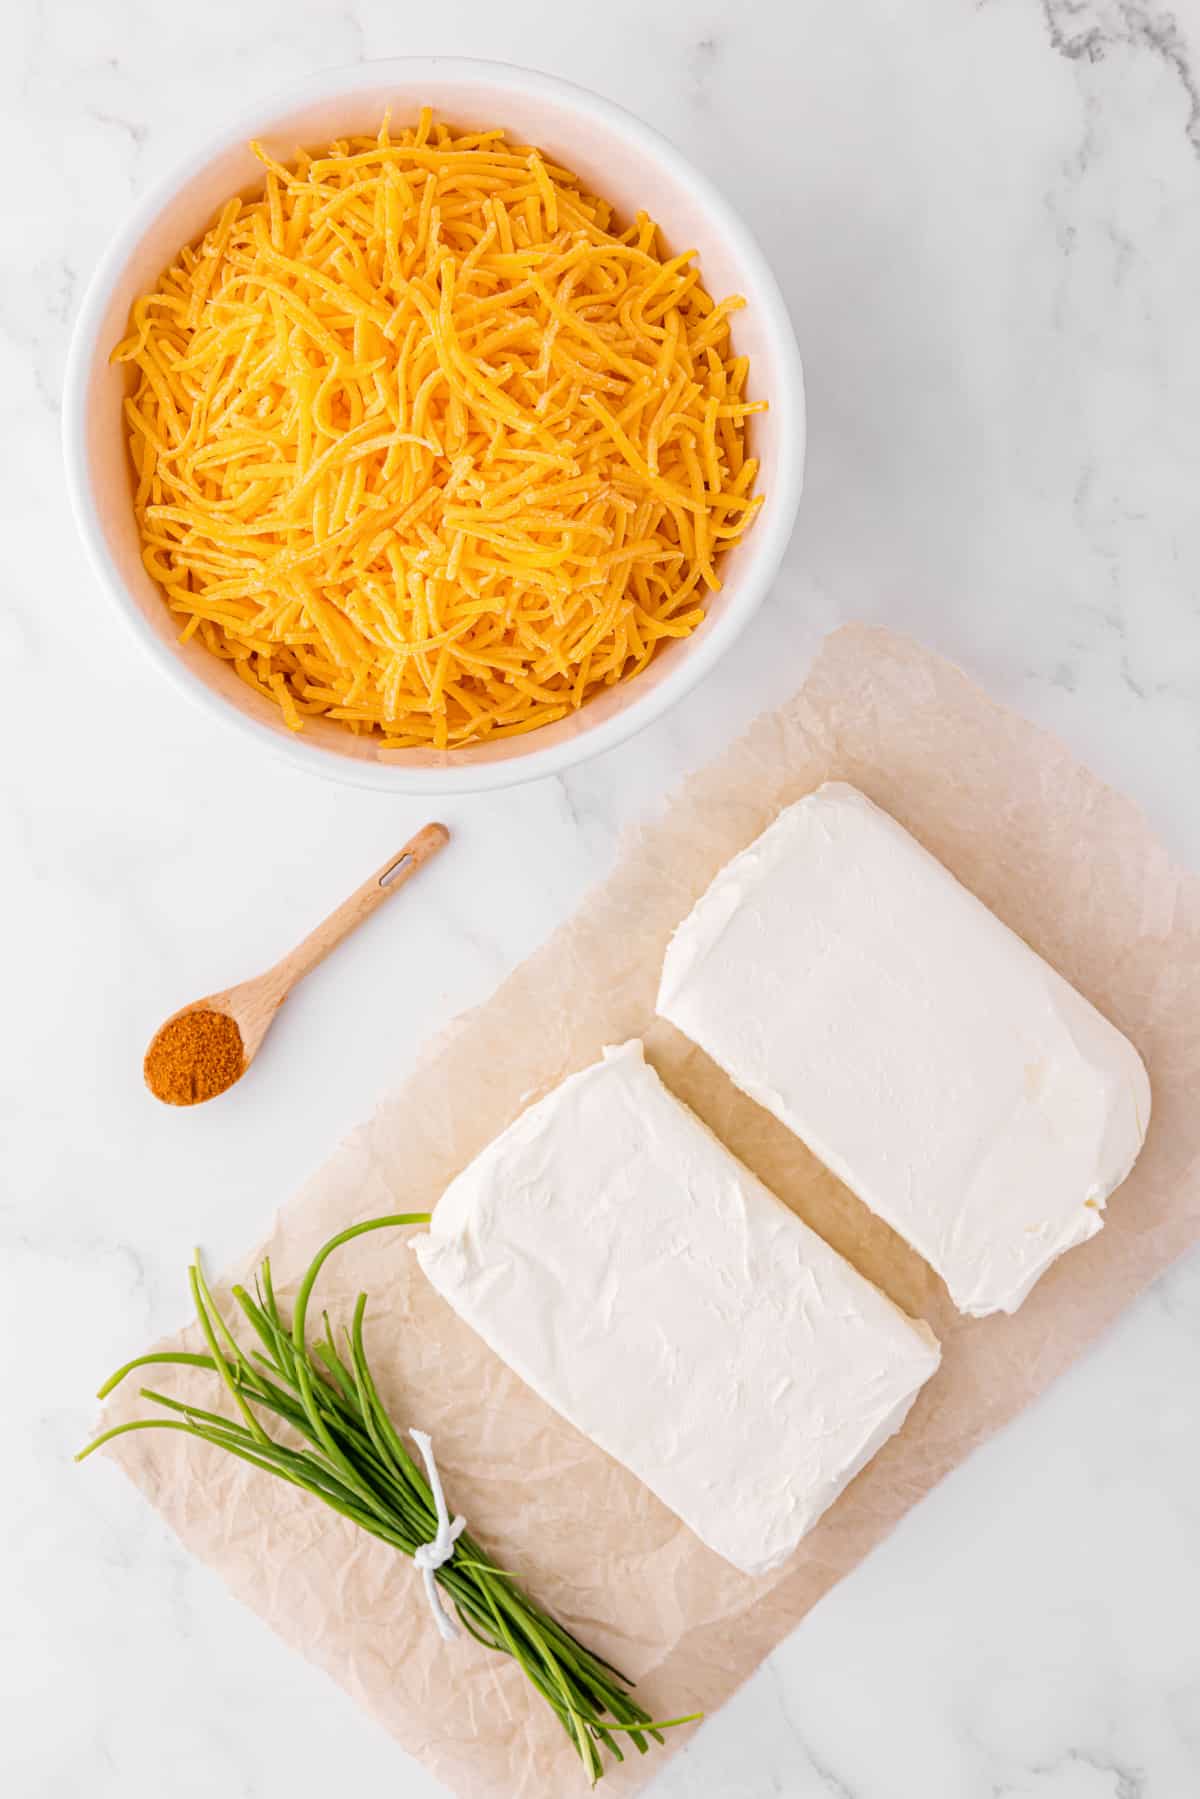
- Cream Cheese, softened
- Shredded Cheddar Cheese
- Chives, chopped
- Cayenne Pepper
Ways to decorate a Snowman Cheese Ball
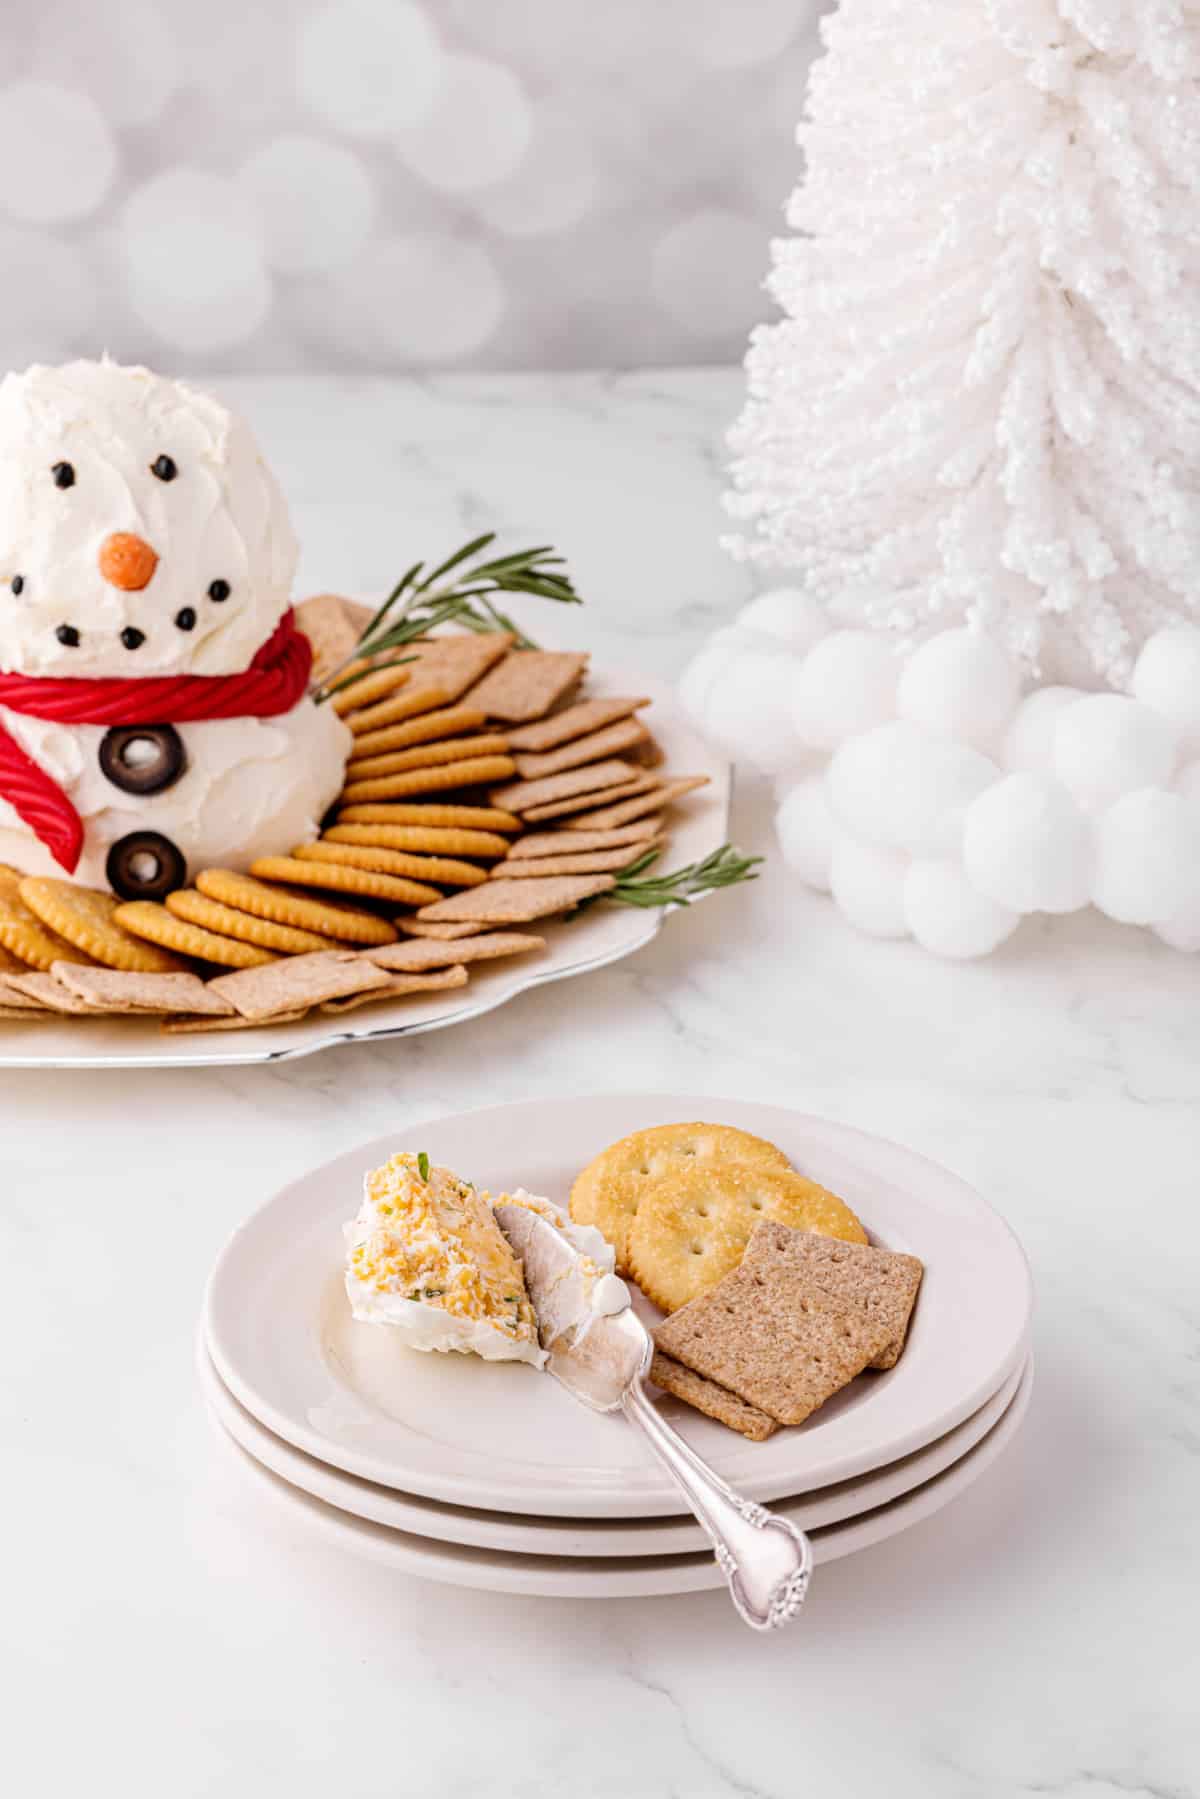
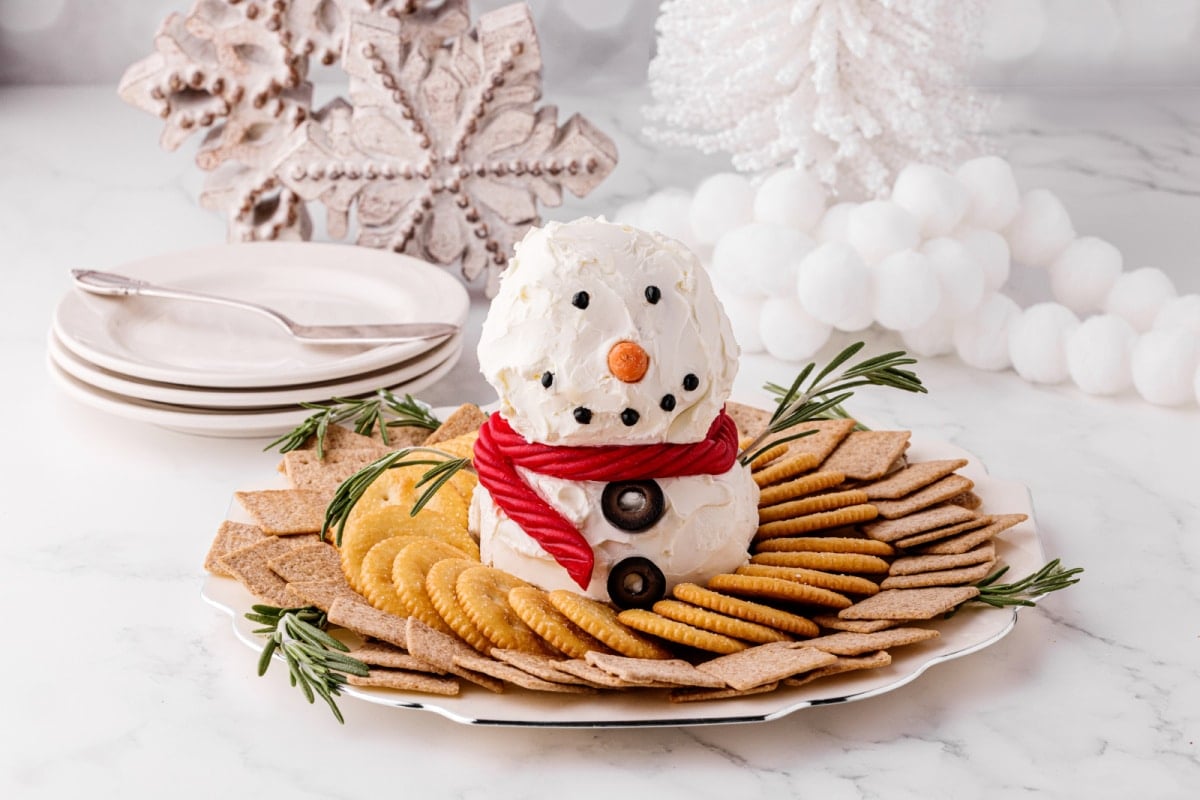
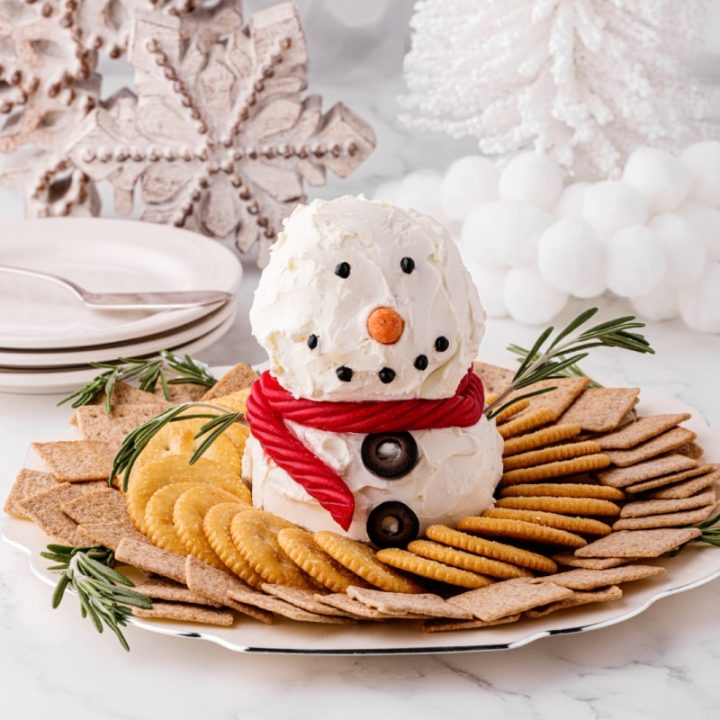
- Raisins or black olives for the eyes and buttons.
- Small carrot for the nose
- Fresh rosemary or celery for the arms and crown
- Red Licorice for the scarf
How to make a Snowman Cheese Ball
- In a large bowl, combine 1 package of cream cheese, shredded cheddar, chives and cayenne pepper.
- Cover and refrigerate for a couple of hours.
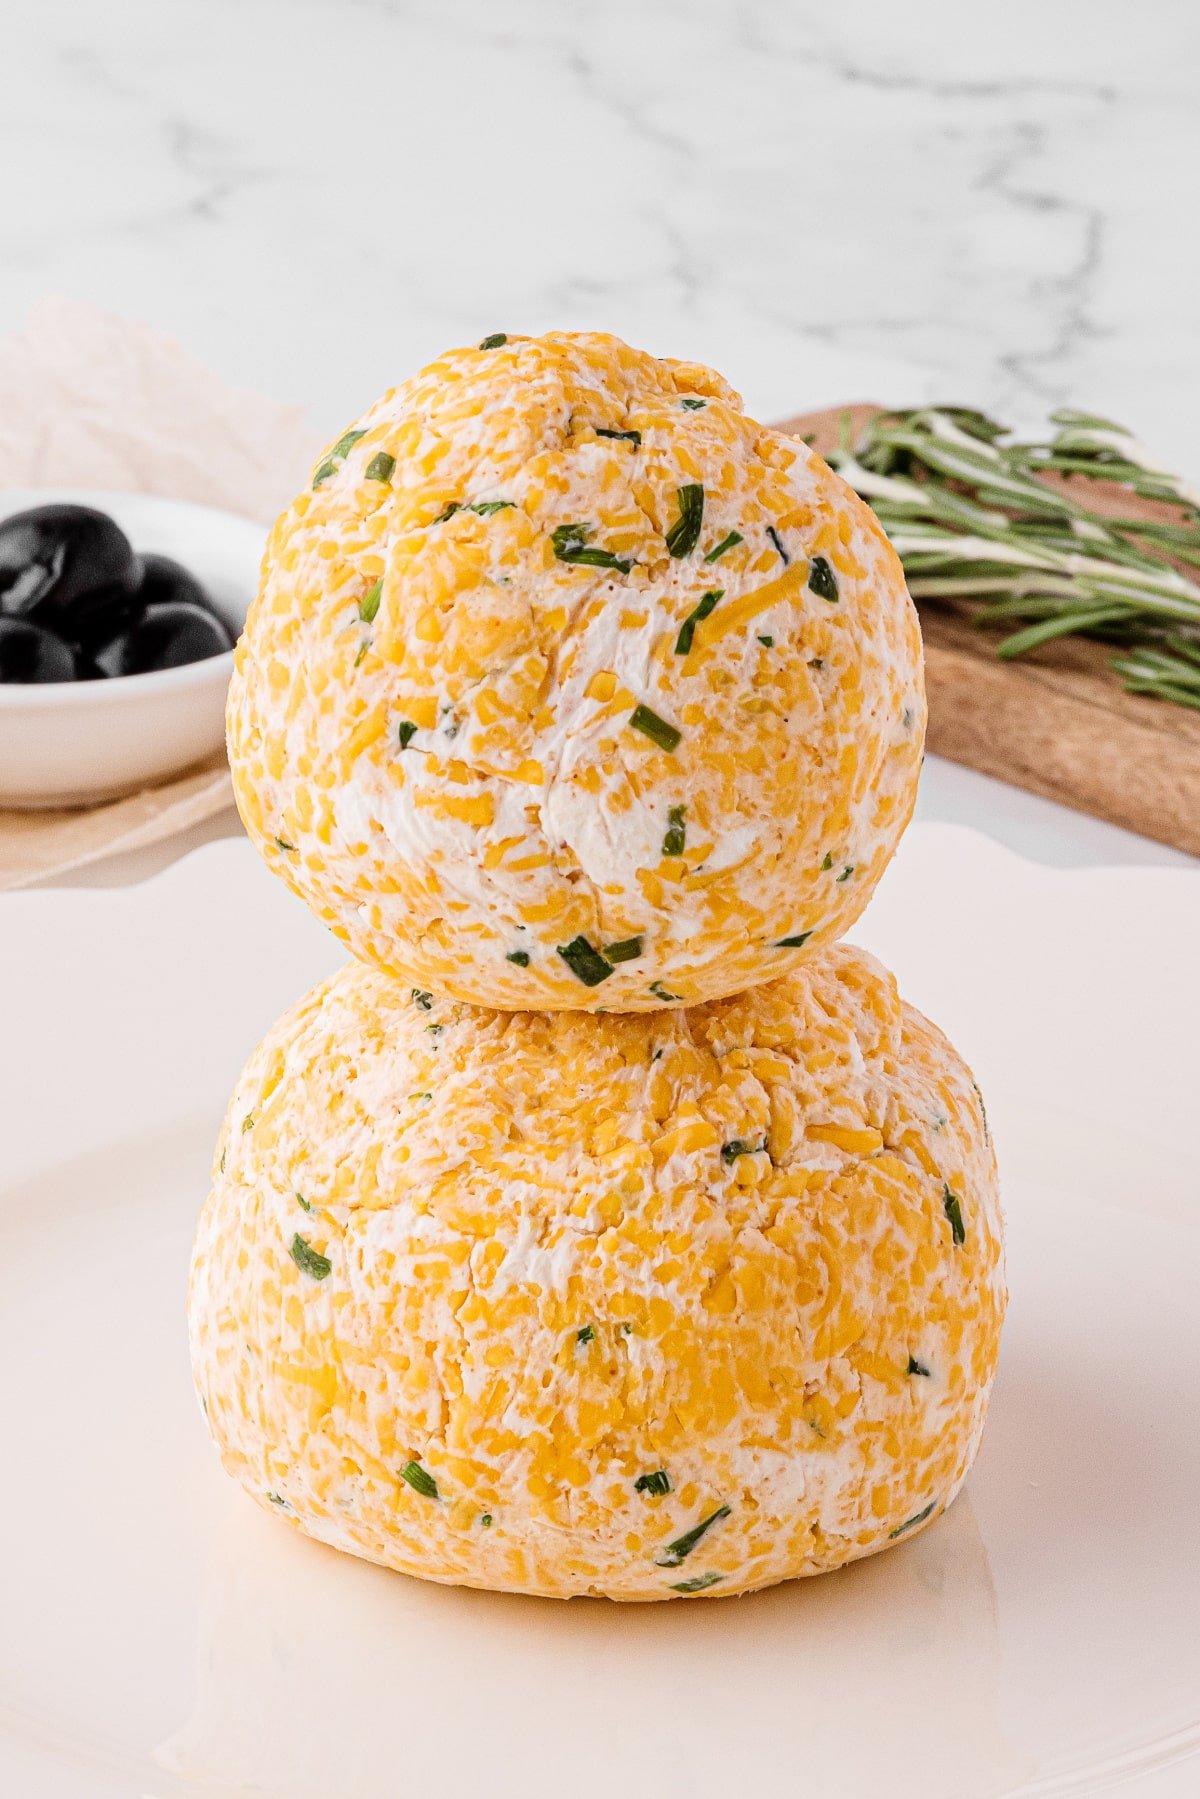
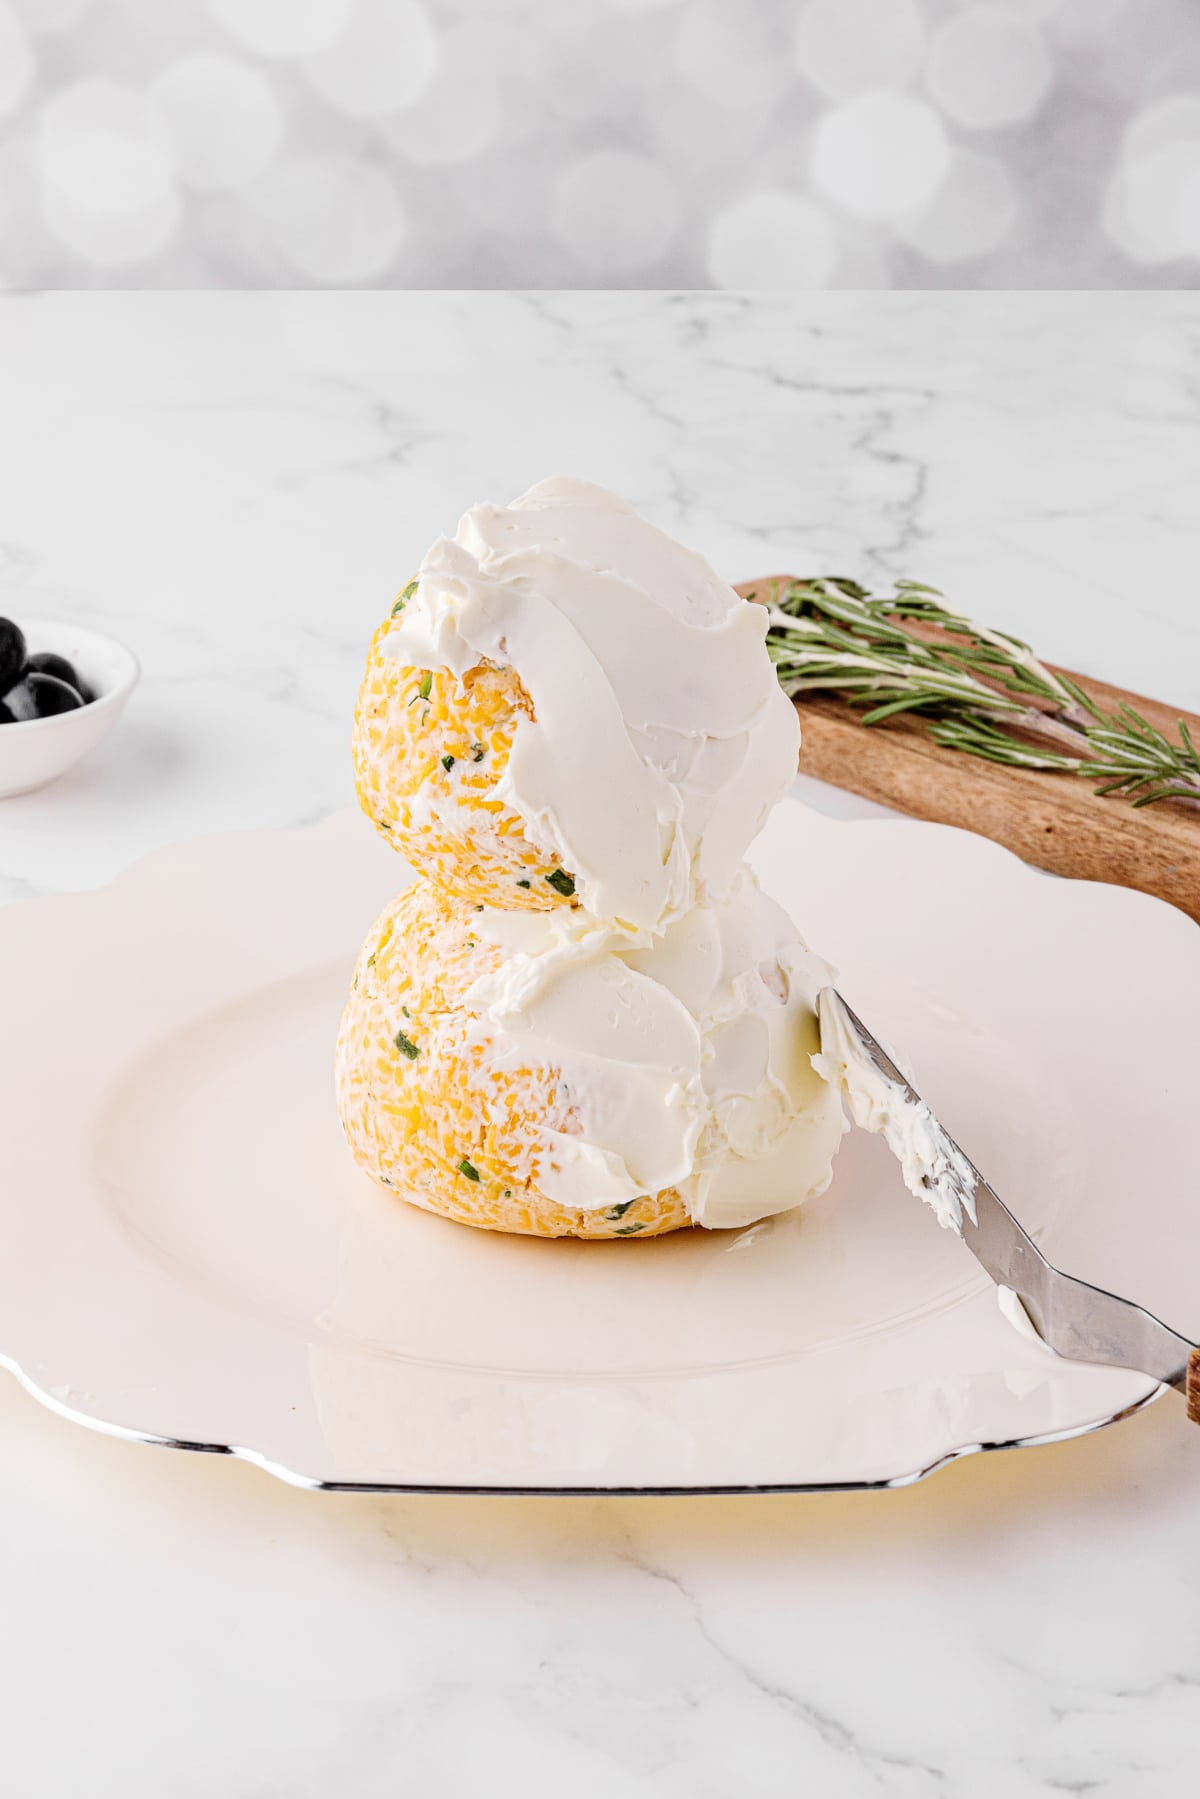
- Divide cheese mixture into two different-size balls: one smaller cheese ball which will be the snowman’s head, and then a slightly bigger cheese ball that will be the snowman’s base. Stack the smaller one, the head of snowman, by placing it on top of the larger ball and creating a snowman shape.
- Refrigerate for an additional 30 minutes.
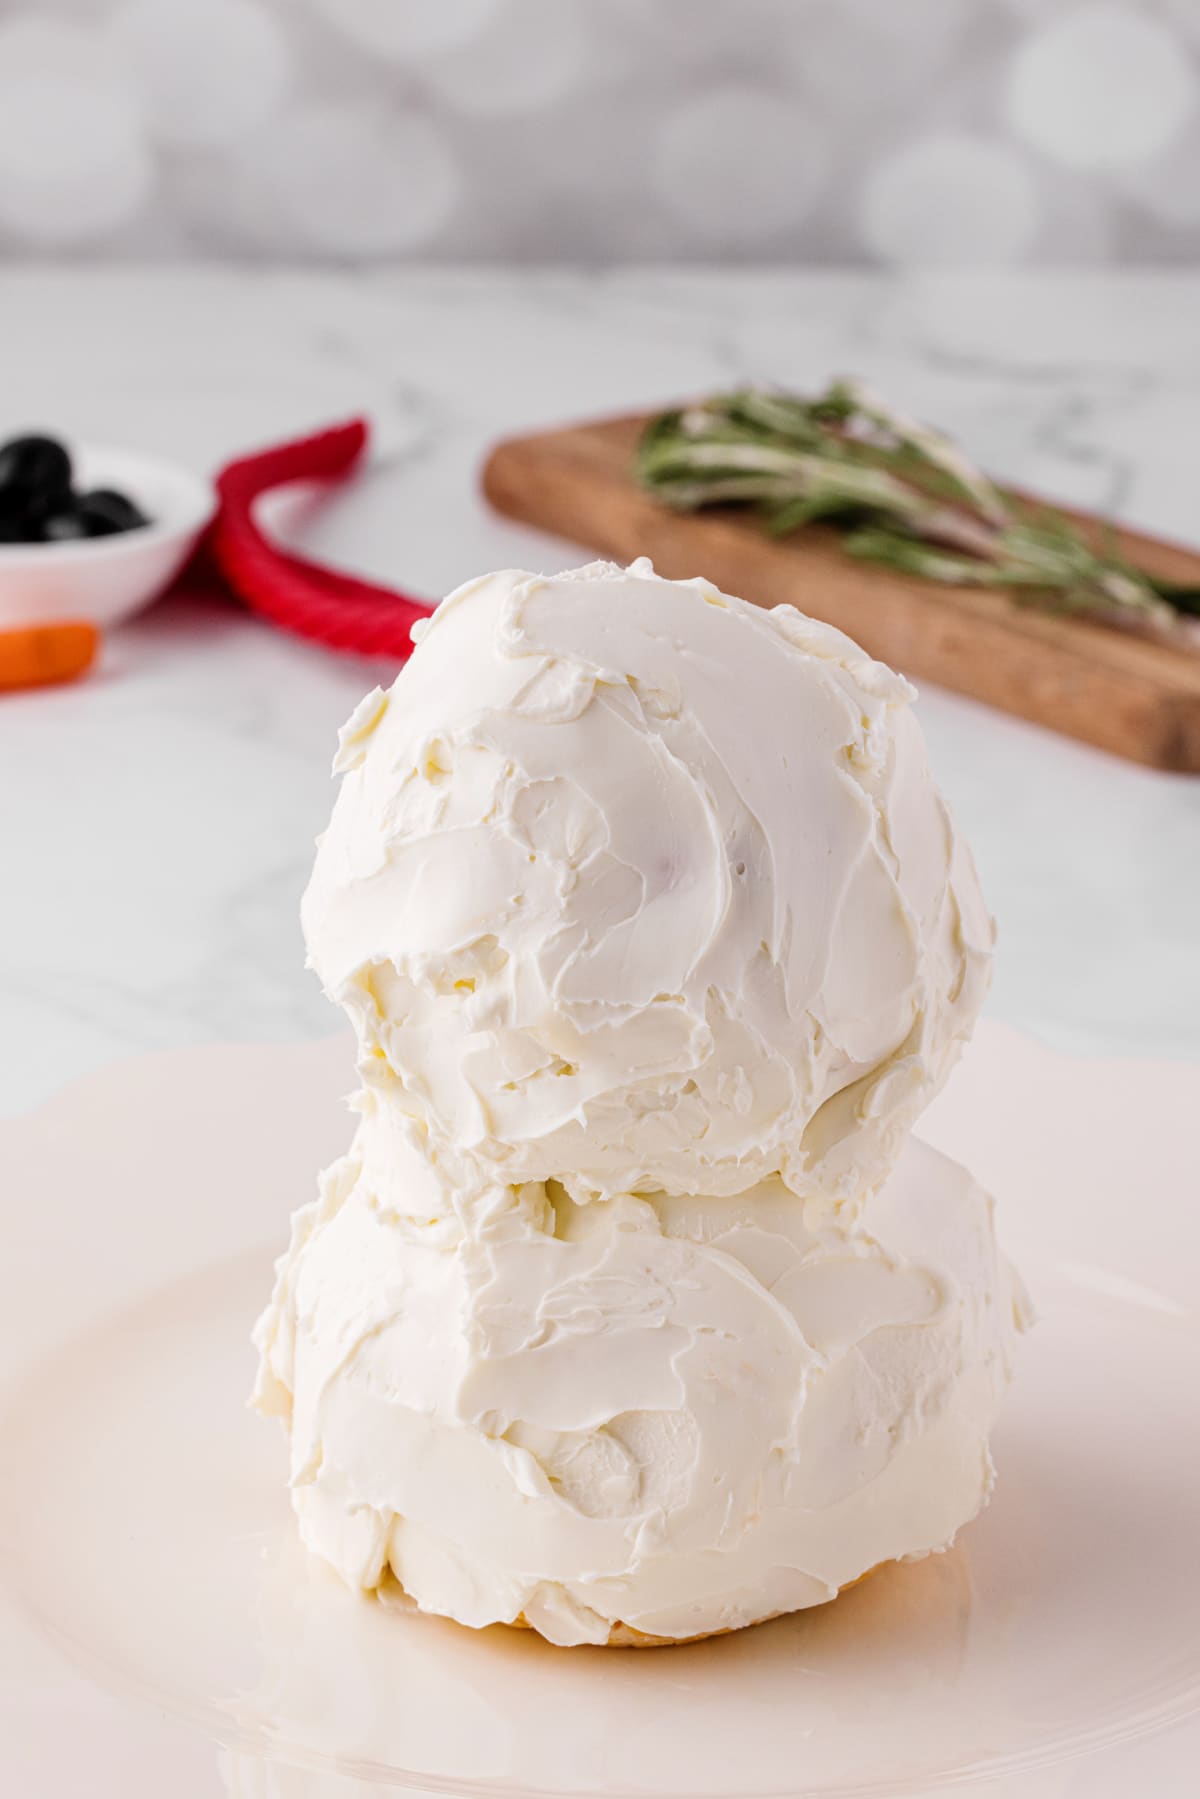
- Take remaining package of cream cheese and frost snowman slowly, spreading the cream cheese outside layer.
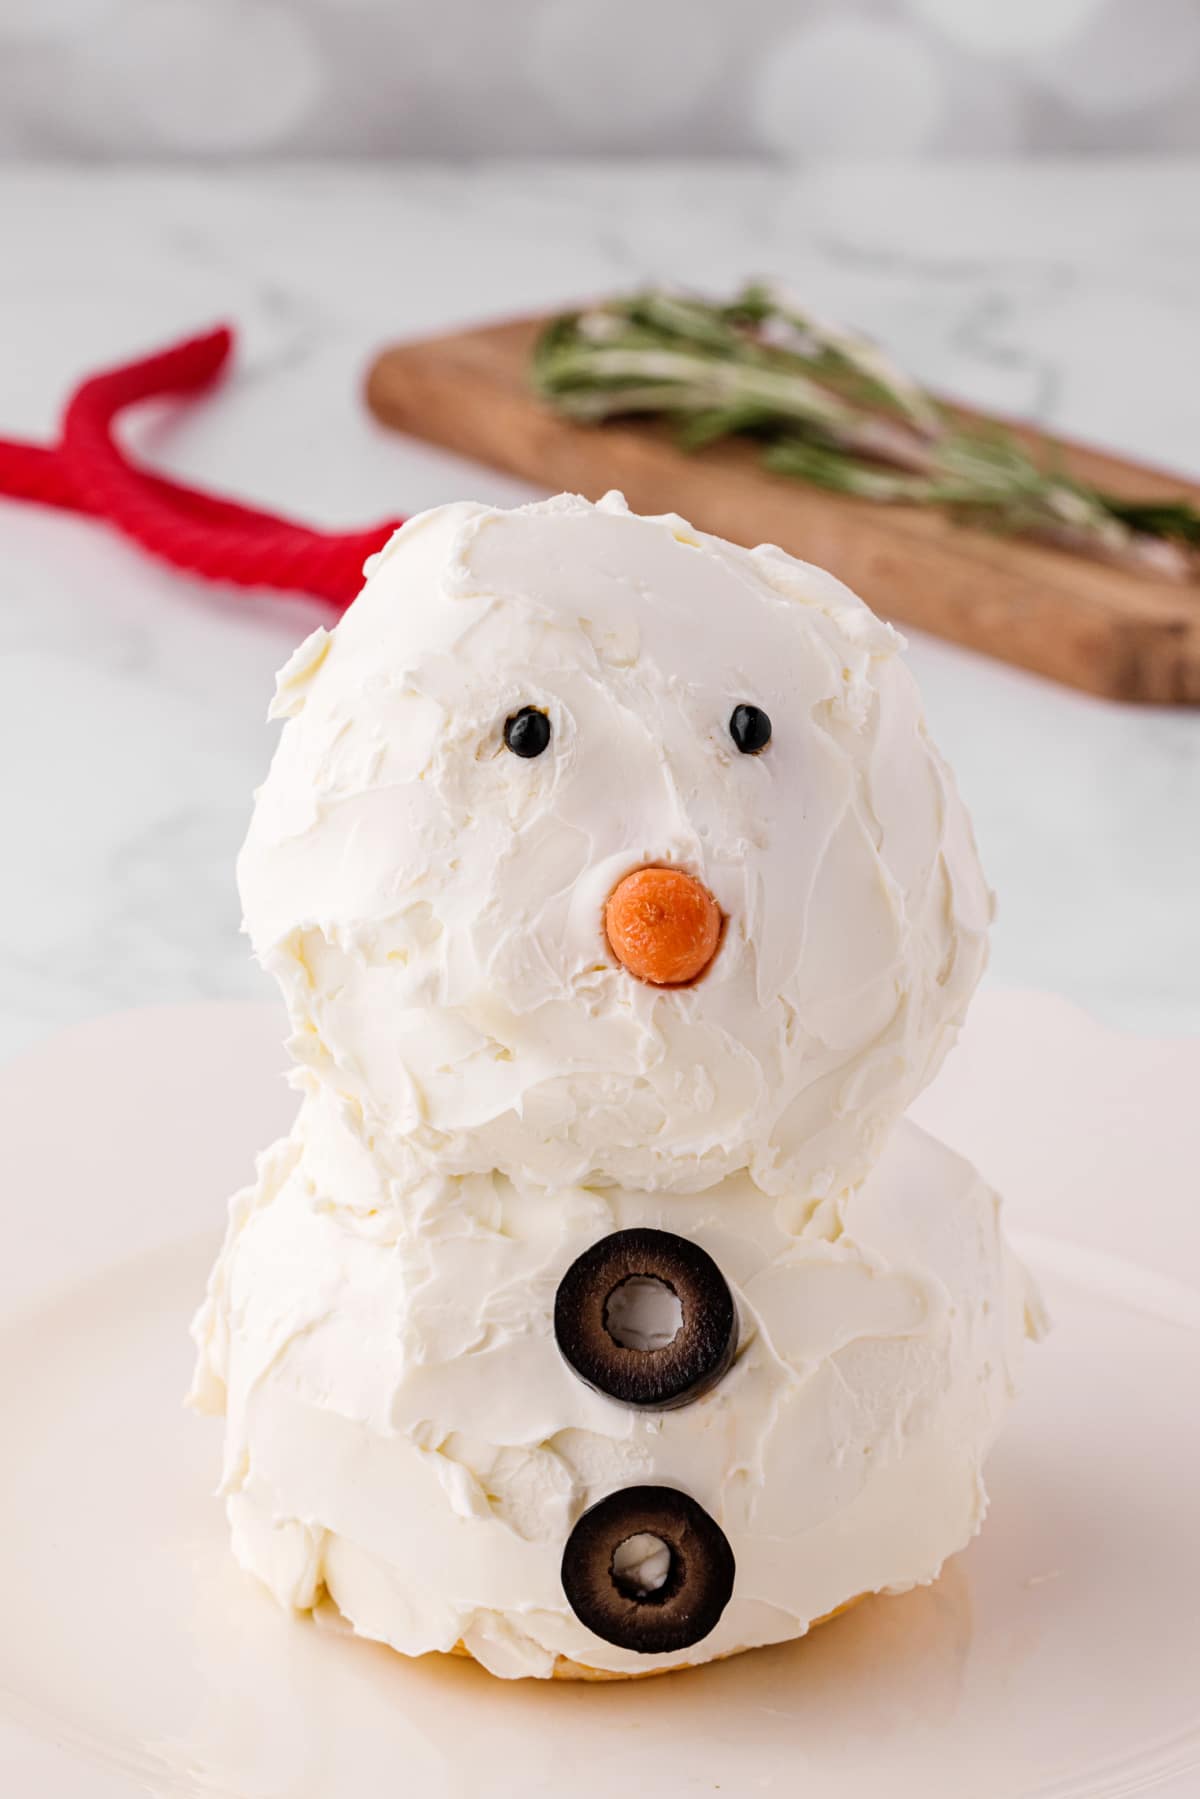
Decorate snowman’s face and body with items listed above. Slice the olive pieces to make buttons. Don’t forget to pop in his carrot nose!
Refrigerate until ready to serve.
Store leftovers in an airtight container in the refrigerator.
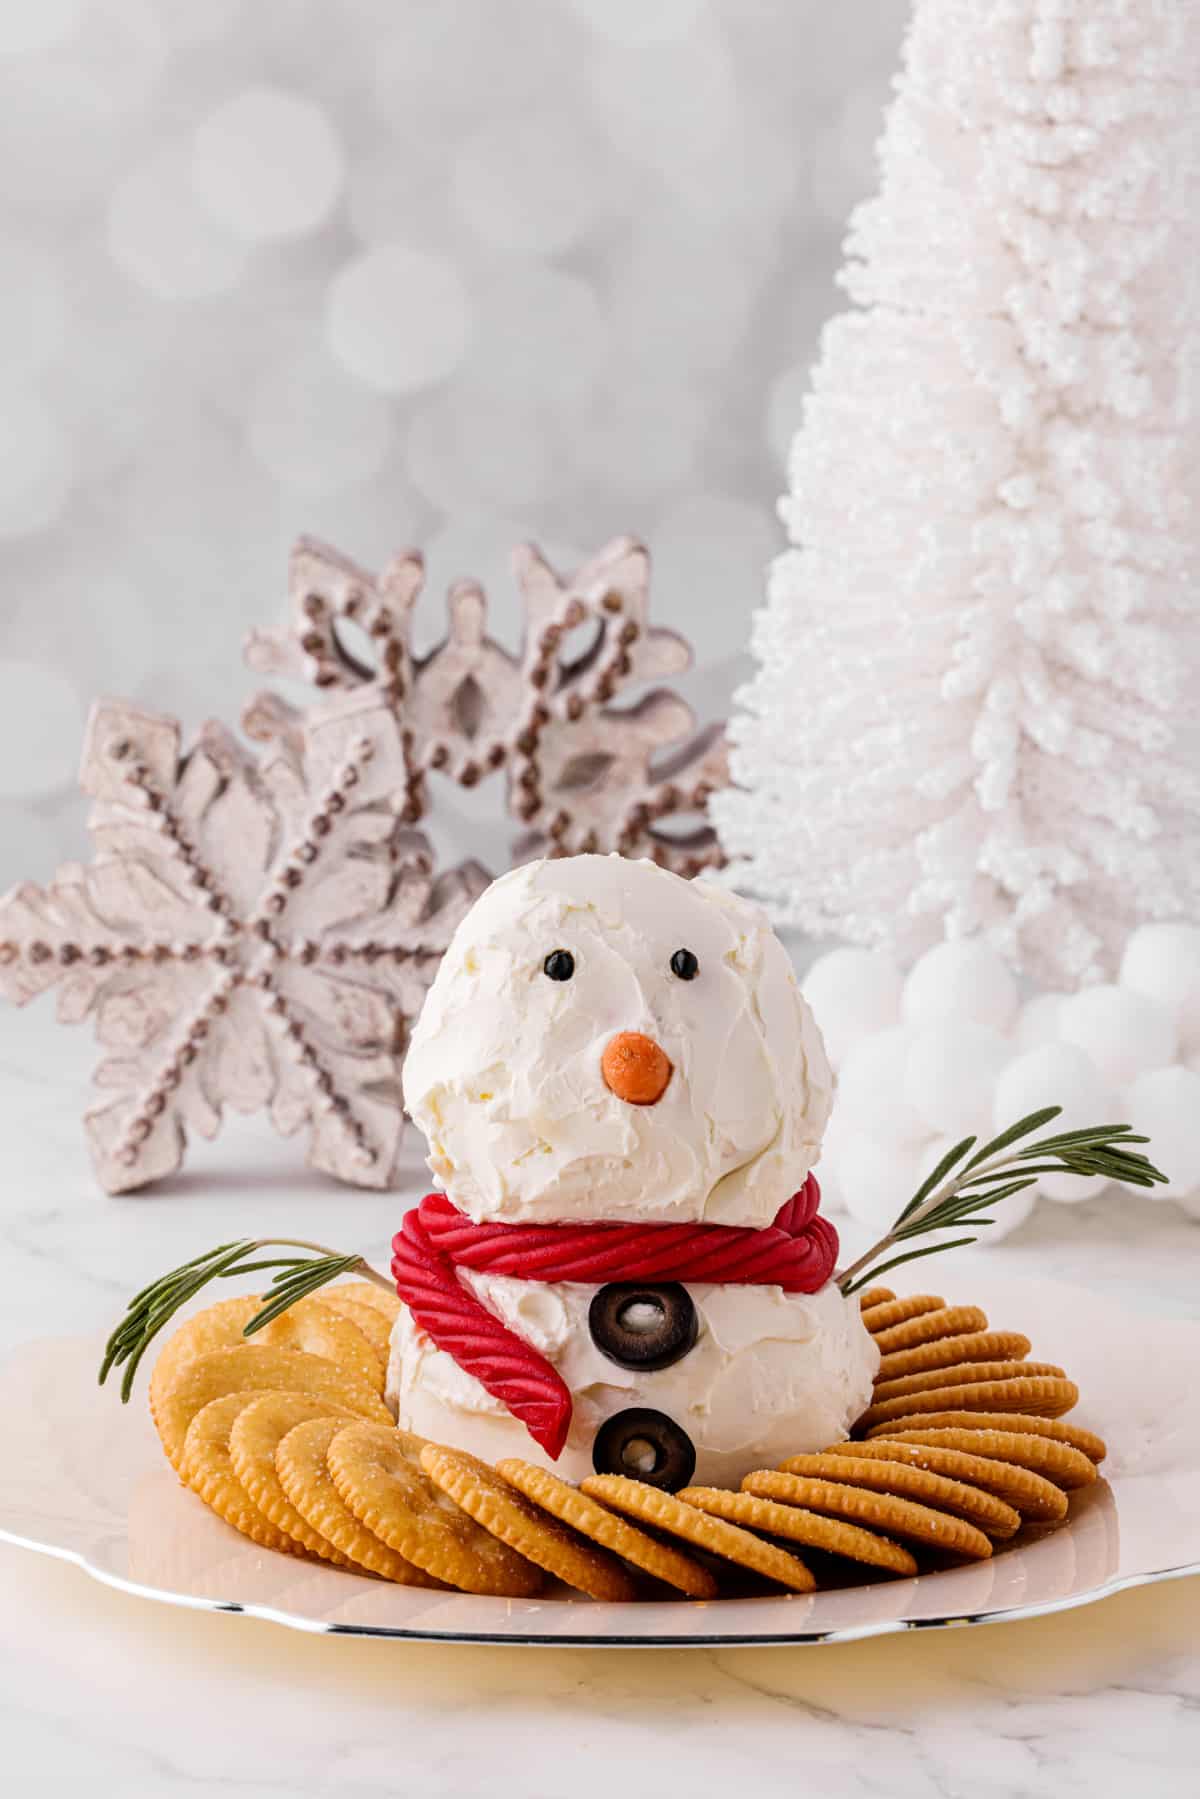
Isn’t this make-ahead snowman cheese ball recipe fun? So perfect for the middle of a serving platter. Surround your snowman’s base with bagel chips, crackers, celery sticks, pretzel sticks and more on the serving plate. You could make your snowman cheeseball the center of your appetizer table display which will be perfect for any party during the holiday season.
Get creative! Place a Christmas wreath around the snowman’s base. Try different kinds of cheese to create different flavors. Christmas cheese balls are always a hit, and there is so much you can do by modifying this original recipe!
What are your other favorite Christmas appetizers? Here are a few of our other favorite delicious holiday appetizer recipes that you might enjoy:
- Favorite Holiday Appetizers
- Cauliflower Nachos
- Chicken Bacon Loaded Potato Skins
- Hot Spinach and Artichoke Dip
Snowman Cheese Ball
How cute is this Snowman Cheese Ball!? Easy to make with just a few ingredients, he's delicious too and will be a hit as the edible centerpiece of your holiday table! Made with cream cheese, cheese and a few other ingredients, this snowman appetizer is not only a great snack to serve your guests but he adds so much joy to the festivities! Make this snowman cream cheese ball part of your holiday table traditions! Kids will love helping you to make him and he adds to must joy to the holiday scene!
Ingredients
- 2 8oz package of Cream Cheese, softened
- 1 8oz package Shredded Cheddar Cheese
- ¼ Cup Chives, chopped
- ¼ tsp Cayenne Pepper
- Raisins or black olives for the eyes and buttons.
- Small carrot for the nose
- Fresh rosemary or celery for the arms
- Red Licorice for the scarf
Instructions
In a large bowl, combine 1 package of cream cheese, shredded cheddar, chives and cayenne pepper.
Cover and refrigerate for a couple of hours.
Divide cheese mixture into two different-size balls: one smaller cheese ball which will be the snowman's head, and then a slightly bigger cheese ball that will be the snowman's base. Stack the smaller one, the head of snowman, by placing it on top of the larger ball and creating a snowman shape.
Refrigerate for an additional 30 minutes.
Take remaining package of cream cheese and frost snowman slowly, spreading the cream cheese outside layer.
Decorate snowman’s face and body with items listed above. Slice the olive pieces to make buttons. Don’t forget to pop in his carrot nose!
Refrigerate until ready to serve.
Notes
Get creative! Place a Christmas wreath around the snowman’s base. Try different kinds of cheese to create different flavors. Christmas cheese balls are always a hit, and there is so much you can do by modifying this original recipe!
Nutrition Information:
Yield: 20 Serving Size: 1Amount Per Serving:Calories: 135Total Fat: 12gSaturated Fat: 7gTrans Fat: 0gUnsaturated Fat: 4gCholesterol: 34mgSodium: 151mgCarbohydrates: 4gFiber: 0gSugar: 3gProtein: 4g
*This is just an estimate. Results may vary.

Meet the author – Keri Lyn
The creative and frugal mind behind She Saved for over 12 years now, Keri Lyn shares her adventures in parenting along with her love for family travel, country living and brand marketing. A self-proclaimed “brand loyalist”, Keri Lyn is known for her strong and enthusiastic voice when it comes to the products and brands that she loves. She Saved has become a community for like-minded consumers who appreciate saving money, time and sanity by getting the best deals on quality products and experiences.