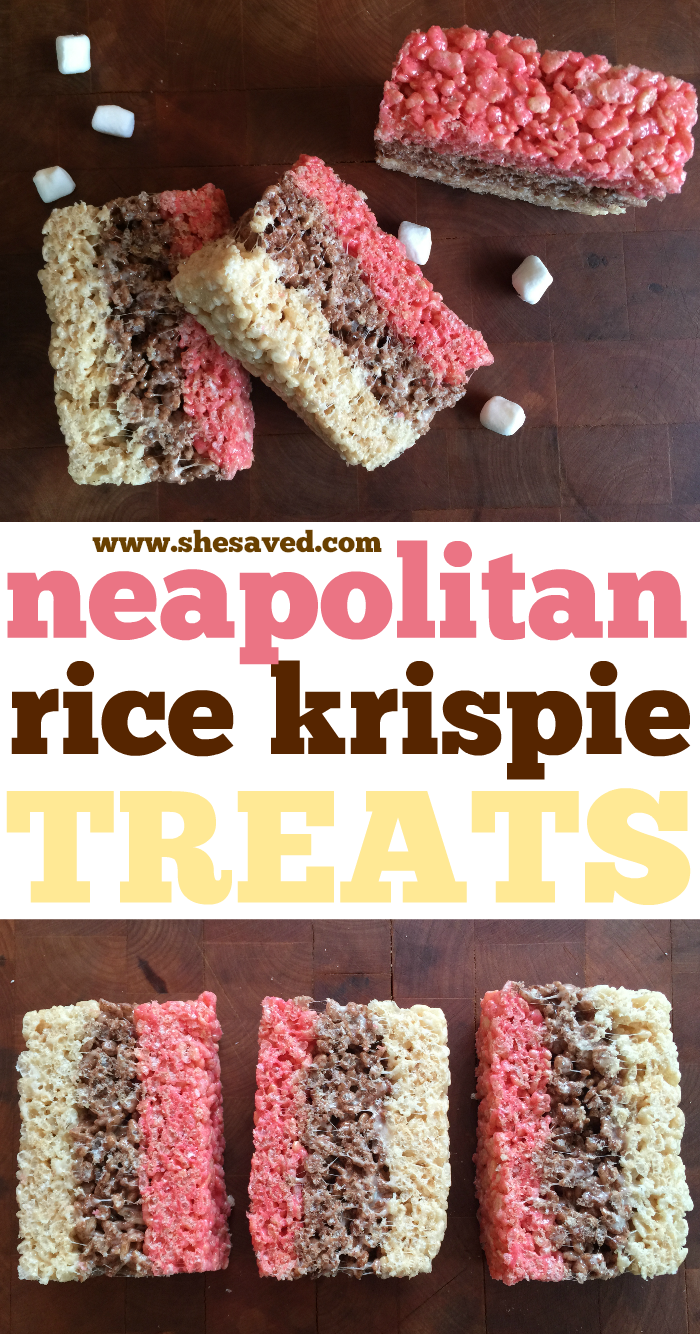
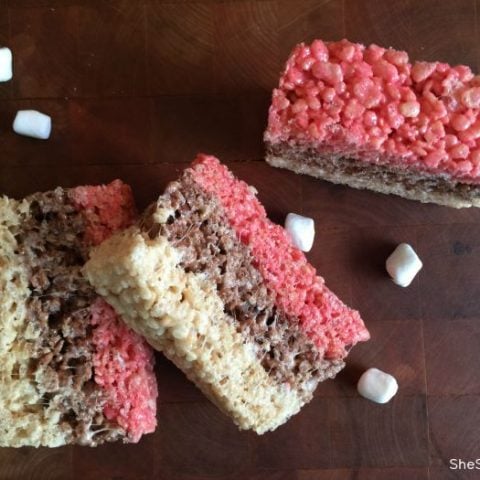
Neapolitan Colored Rice Krispie Treats
Colored Rice Krispie Treats? Yes!! Rice Krispie Treats are always a hit around here, but this new twist on an old favorite is out of this world!
Colored Rice Krispie Treats are amazing – we call them Neapolitan Rice Krispie Treats awesome to look at (and super fun to bring to events!) but I have to admit it, these treats take things to a whole new level of delicious.
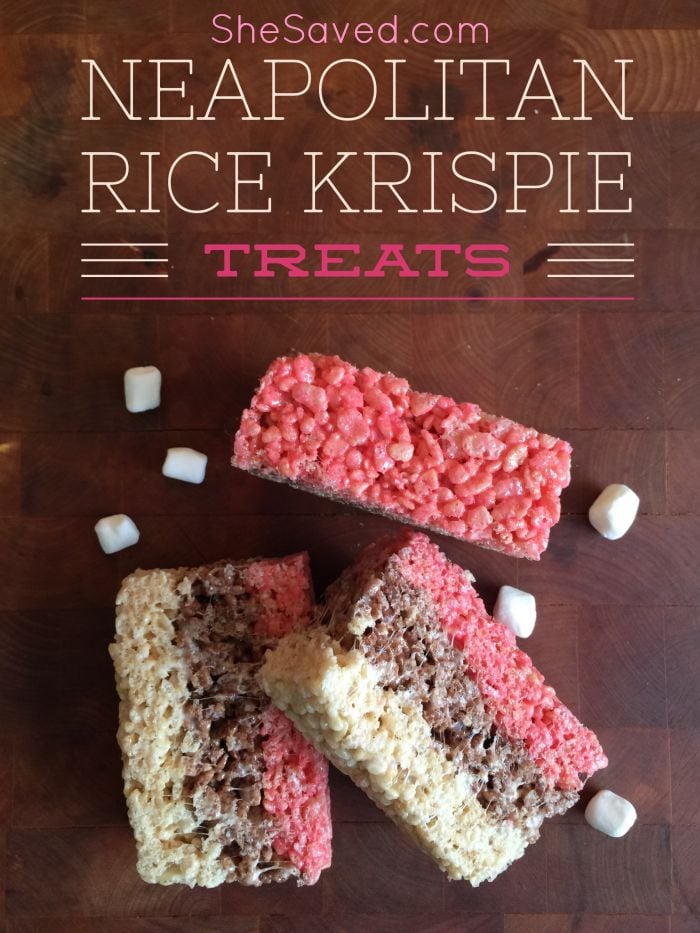
Colored Rice Krispie Treats
I also love that these are still a somewhat simple snack. Easy to tuck into lunches and/or serve at parties.
I always keep Rice Krispies cereal on hand because there are so many different rice krispie recipes that you can make, honestly – one for every occasion which makes them a great go-to when you are in a pinch. Everyone loves a good Rice Krispie great recipe!
Ingredients for making colored Rice Krispie Treats
6 cups Cocoa Krispies
9 tbs salted butter
12 cups miniature marshmallows
3 ounce box of powdered Strawberry Jell-O
There are three layers here (obviously) so you will be doing those each in their own batch.
Layer One – Vanilla Flavored and Colored Rice Krispie Layer:
Melt 3 tbs butter in a large saucepan.
Add 4 cups mini marshmallows and stir constantly until melted.
Remove from heat.
Turn that mixture into your greased baking dish and use a piece of wax paper to press the cereal mixture down firmly.
Wash and dry your large saucepan so you can start on your chocolate layer.
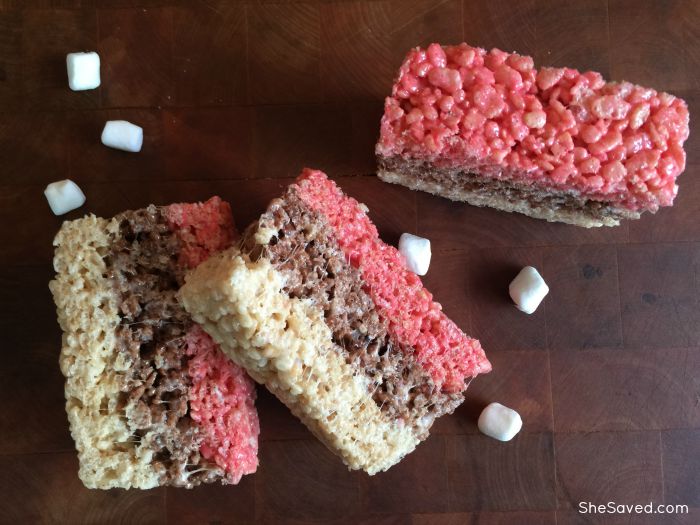
Layer Two – Chocolate Flavored and Colored Rice Krispie Layer:
Add 4 cups mini marshmallows and stir constantly until melted.
Remove from heat.
Turn that mixture on top of your vanilla layer and use a piece of wax paper to press the cereal mixture down firmly.
Wash and dry your large saucepan so you can start on your strawberry layer.
*remember, these colored rice krispie treats have three layers, so you’ll be making each one separately to combine after all three colored rice krispie treat layers are made.
Layer Three – Strawberry Flavored and Colored Rice Krispie Layer:
Add 4 cups mini marshmallows and stir constantly until melted.
Remove from heat.
Add 6 cups Rice Krispies cereal to the marshmallow mixture and stir until all the cereal is coated.
Turn that mixture on top of your chocolate layer and use a piece of wax paper to press the cereal mixture down firmly.
Looking for more fun cookie recipes? Here are a few of our favorites:
Print the recipe for Neapolitan Colored Rice Krispie Treat Bars
Neapolitan Rice Krispie Treats
A fun twist on an old favorite, these Neapolitan Rice Krispie Treats are a yummy treat and a fun dessert option. Since this is still a relatively easy recipe, this is a great one for tweens and teens just learning to cook and bake.
Ingredients
- 12 cups Rice Krispies Cereal
- 6 cups Cocoa Krispies
- 9 tbs salted butter
- 12 cups miniature marshmallows
- 3 ounce box of powdered Strawberry Jell-O
Instructions
You're going to make each layer of these bars in separate batches.
Coat an 8 x 11.5 baking pan with non stick cooking spray.
Layer One - Vanilla Layer
Melt 3 tbs butter in a large saucepan.
Add 4 cups mini marshmallows and stir constantly until melted.
Remove from heat.
Add 6 cups Rice Krispies cereal to the marshmallow mixture and stir until all the cereal is coated.
Turn that mixture into your greased baking dish and use a piece of wax paper to press the cereal mixture down firmly.
Wash and dry your large saucepan so you can start on your chocolate layer.
Layer Two - Chocolate Layer
Melt 3 tbs butter in a large saucepan.
Add 4 cups mini marshmallows and stir constantly until melted.
Remove from heat.
Add 6 cups Cocoa Krispies cereal to the marshmallow mixture and stir until all the cereal is coated.
Turn that mixture on top of your vanilla layer and use a piece of wax paper to press the cereal mixture down firmly.
Wash and dry your large saucepan so you can start on your strawberry layer.
Layer Three - Strawberry Layer
Melt 3 tbs butter in a large saucepan.
Add 4 cups mini marshmallows and stir constantly until melted.
Remove from heat.
Add your 3 oz box of Strawberry Jell-O and stir until it has melted into your marshmallow mixture.
Add 6 cups Rice Krispies cereal to the marshmallow mixture and stir until all the cereal is coated.
Turn that mixture on top of your chocolate layer and use a piece of wax paper to press the cereal mixture down firmly.
Allow your treats to cool completely before slicing and serving.

Meet the author – Keri Lyn
The creative and frugal mind behind She Saved for over 12 years now, Keri Lyn shares her adventures in parenting along with her love for family travel, country living and brand marketing. A self-proclaimed “brand loyalist”, Keri Lyn is known for her strong and enthusiastic voice when it comes to the products and brands that she loves. She Saved has become a community for like-minded consumers who appreciate saving money, time and sanity by getting the best deals on quality products and experiences.