Dr. Seuss Snack: Cat in the Hat Cupcakes
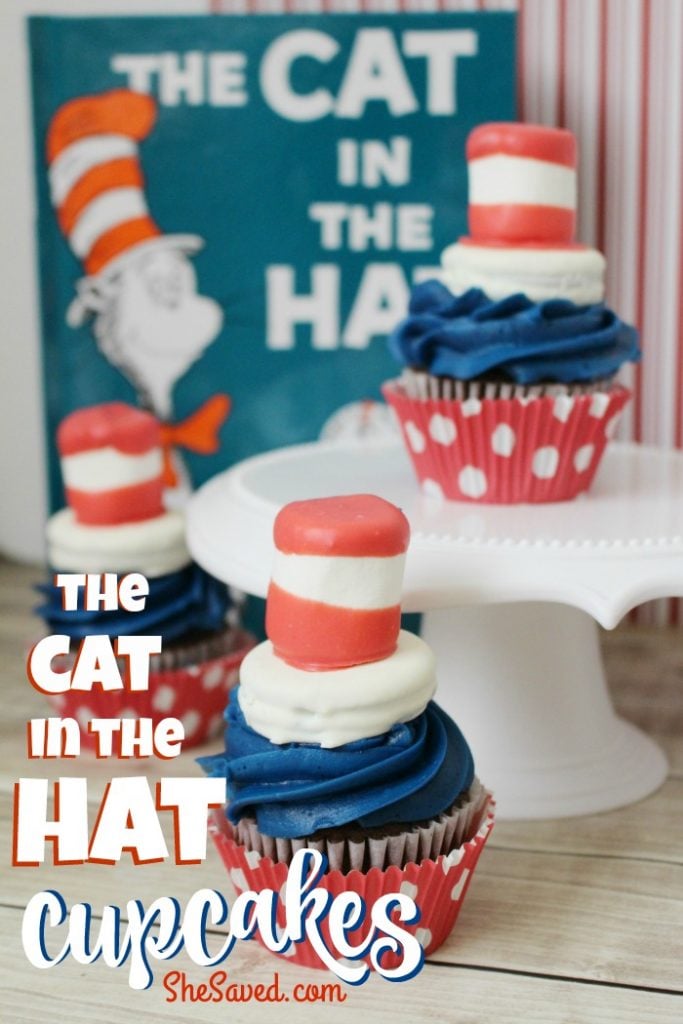
Looking for a fun Dr. Seuss snack idea? National Read Across America Day (Dr. Seuss Day) is March 2nd, 2016 so I wanted to share these fun Cat in the Hat Cupcakes. Recently I shared my Put Me in the Zoo Rice Krispies Treats and my Cat in the Hat Treats, so make sure to check those out as well. Put all of these treats together and you can have some fun snacks that also serve as decor for your Dr. Seuss party!
My kids grew up with Dr. Seuss books and of course, Cat in the Hat is the book that everyone knows and loves. I still remember my parents reading this book to me as a child, it truly is timeless and I love how much we celebrate Dr. Seuss and reading in our schools. These fun Cat in the Hat cupcakes will be perfect for any celebrations that you might be attending, and of course everyone will recognize that iconic Dr. Seuss hat!
Ingredients for Homemade Chocolate Cupcakes
1 1/2 cup granulated sugar
3/4 cup (1 1/2 sticks) unsalted butter, softened at room temperature
3 eggs
2 cups all-purpose flour
3/4 cup Hershey’s dark unsweetened cocoa powder
1 t baking powder
1 t baking soda
1/4 salt
2 t vanilla
1 cup buttermilk
Directions for Homemade Chocolate Cupcakes
1. Preheat oven to 350°.
2. Grease cupcake pan or place cupcake liners in pan.
3. In a medium mixing bowl, add the butter and sugar. With an electric mixer, cream the mixture until light and fluffy.
4. Add the eggs, one at a time and mix until well incorporated.
5. Stir in the vanilla. Set aside.
6. In a separate bowl, sift together the flour, cocoa powder, baking soda, baking powder and salt.
7. Add 1/2 of the dry ingredients to the creamed butter and mix until just wet and combined.
8. Add 1/2 of the buttermilk and mix until combined.
9. Repeat steps 7 and 8.
10. Fill each cupcake liner 3/4 full.
11. Bake for 15-17 minutes or until an inserted toothpick comes out clean.
18. Let cool in pan for 5 minutes.
19. Transfer cupcakes to a wire rack to complete the cooling process.
20. Frost with icing when completely cooled.
Ingredients for Blue Buttercream Icing
1 cup (2 sticks) unsalted butter
3 cups powdered sugar, sifted
1/4 t salt
1 T vanilla extract
2 T cold milk
Blue food gel
Directions for Blue Buttercream Icing
1. In a large mixing bowl, cream the butter with an electric mixer.
2. With the mixer on low speed, add half of the sugar until well blended.
3. Add the rest of the sugar and beat on medium speed until smooth.
4. Add blue gel/coloring until you reach your desired color of dark blue.
5. NOTE: to thin icing, add 1 Tablespoon of milk. If you desire a more thick icing, add 1 Tablespoon of powdered sugar.
6. Add the icing to a decorator bag with a professional tip or you could just use a Ziploc bag snipped off at the side.
7. Pipe the icing onto each cooled cupcake.
How to Assemble the Marshmallow Hat
1. Line a baking sheet with wax or parchment paper.
2. In a microwave safe bowl, microwave the shortening for 40 seconds or until melted.
3. Add the red chocolate melts and stir until completely melted.
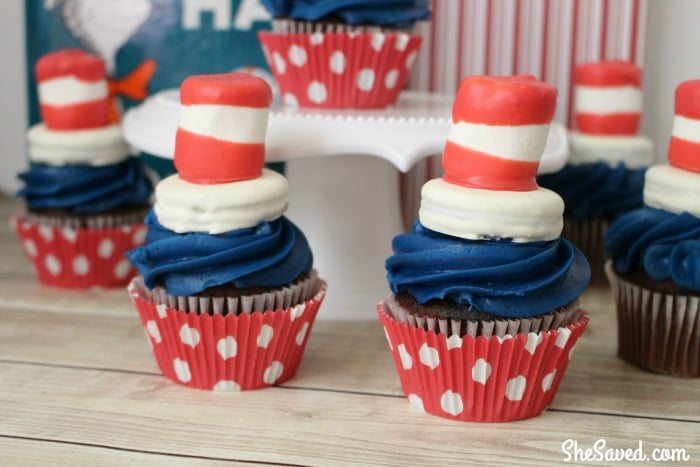
4. Dip one end of each marshmallow into the melted red chocolate and gently press that end onto a white chocolate Oreo cookie.
5. Pick each cookie up with the attached marshmallow and dip the top of the marshmallow into the melted red chocolate. Lay on the baking sheet to “set” for at least 20 minutes.
6. Place the completed Dr. Suess hats onto the prepared cupcakes.
7. Enjoy!

Meet the author – Keri Lyn
The creative and frugal mind behind She Saved for over 12 years now, Keri Lyn shares her adventures in parenting along with her love for family travel, country living and brand marketing. A self-proclaimed “brand loyalist”, Keri Lyn is known for her strong and enthusiastic voice when it comes to the products and brands that she loves. She Saved has become a community for like-minded consumers who appreciate saving money, time and sanity by getting the best deals on quality products and experiences.

