Easy DIY Farmhouse Serving Tray Project
Learn how to make this darling DIY Farmhouse serving tray with just a few supplies and our easy tutorial. This cute homemade country tray would make a wonderful handmade gift idea!
Easy DIY Farmhouse Serving Tray Project
Homemade gifts are the very best, and this DIY Wooden Serving Tray with Handles project that’s not only easy, it’s affordable and fun to make!
I also love that it’s also a very practical gift and would be appreciated by just about anyone.
This project might also be a fun one to do with tweens or teens as it’s simple and introduces some basic crafting skills and techniques.
If you don’t want to build your tray, you could also make this same tray by repurposing an old cupboard door which would be totally perfect for this farmhouse decor style look.
I love recycled and repurposed items, so if you have access to any wood or vintage handles, that would also be a great way to bring this look together.
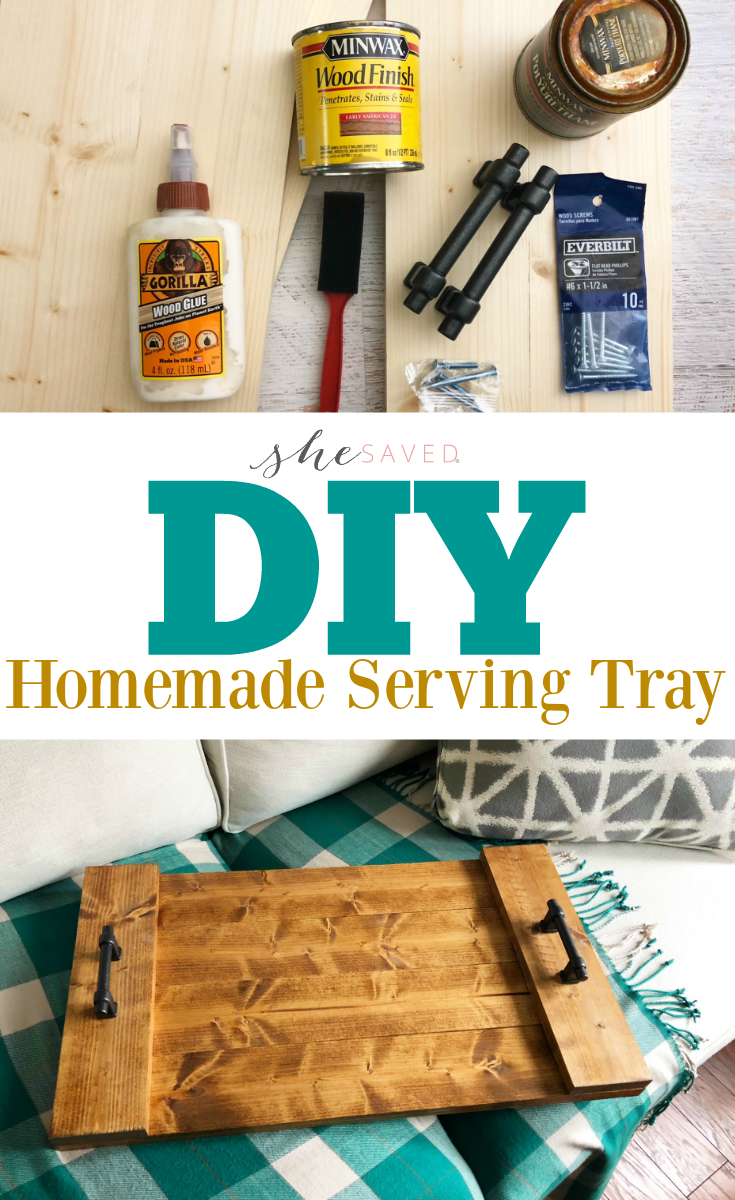
Supplies for making a Farmhouse Serving Tray
4- 24” inch 1×4 boards
2- 14” inch 1×4 boards
2 handles
4 – 1 1/2” wood screws
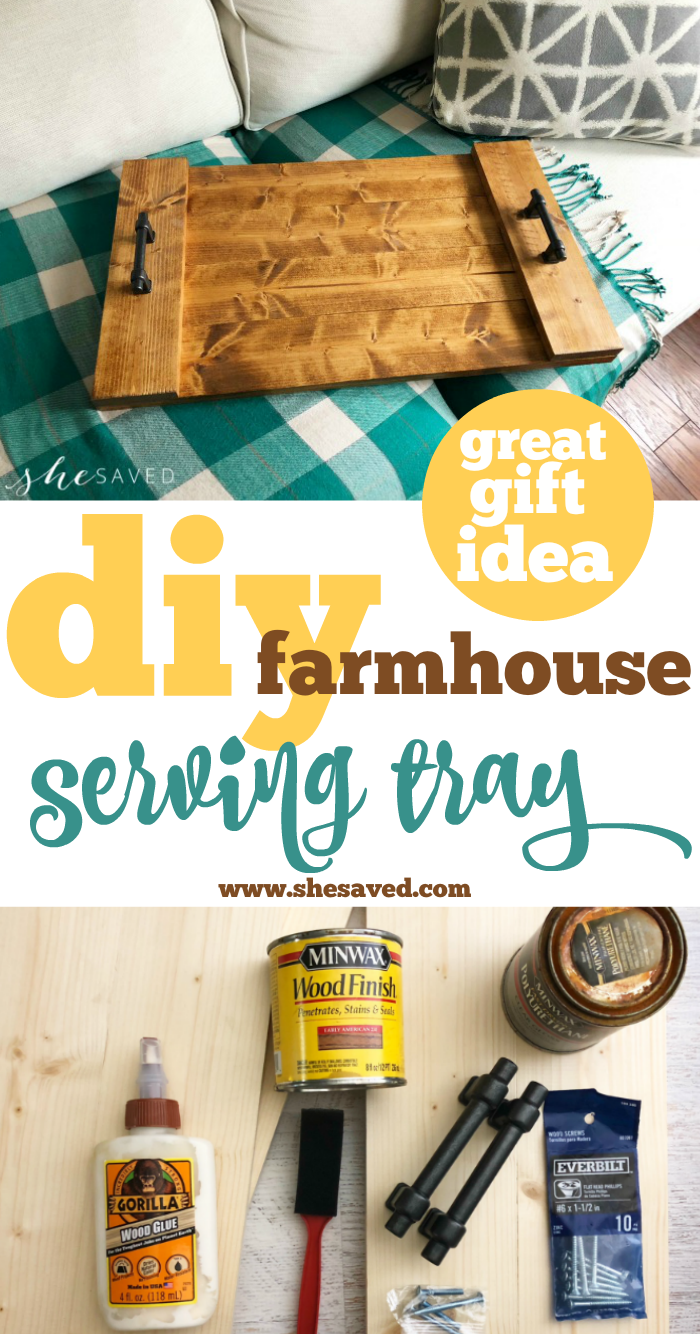
Wood stain
Polyurethane
Wood glue
Paint brush
Rag
Sand paper if needed
How to Make a Farmhouse Serving Tray
1. Go into your local hardware store and pick out a 10ft 1×4 board and have them cut it into eye sizes you need. OR, if getting to a store isn’t an option, you could always use supplies/scraps OR consider using an old cupboard door! We’ve seen this done but never tried it ourselves.
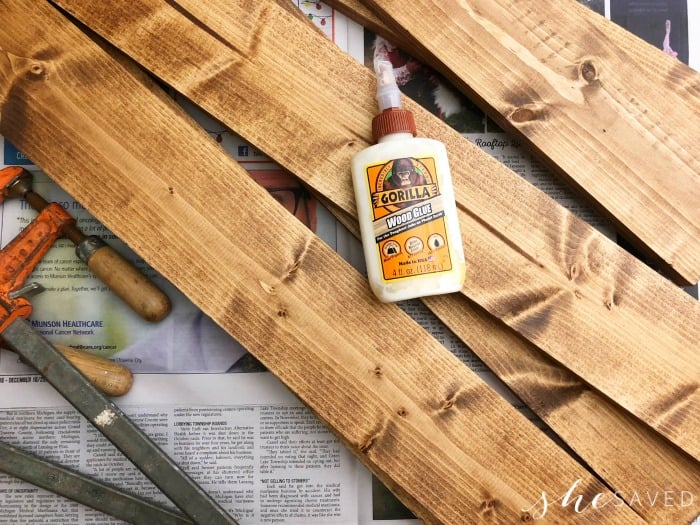
2. In a well ventilated area, stain the tops, bottoms and sides of your boards using a paint brush and wipe off any excess stain using a rag. You will probably want to stain both sides of your boards, as that will give you a more finished look.
I only stained one side for these photos so that I could show you the markings for the handles that I made on the backside.
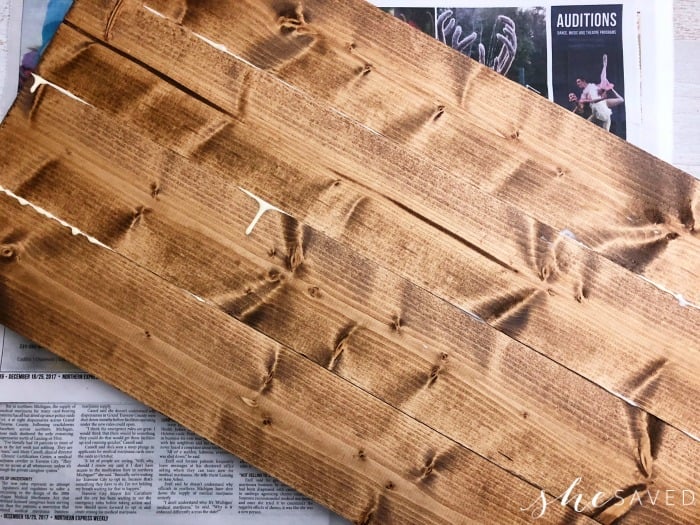
3. Let your boards dry overnight, glue the sides of 4-24” boards together and wipe off any excess glue with a wet rag.
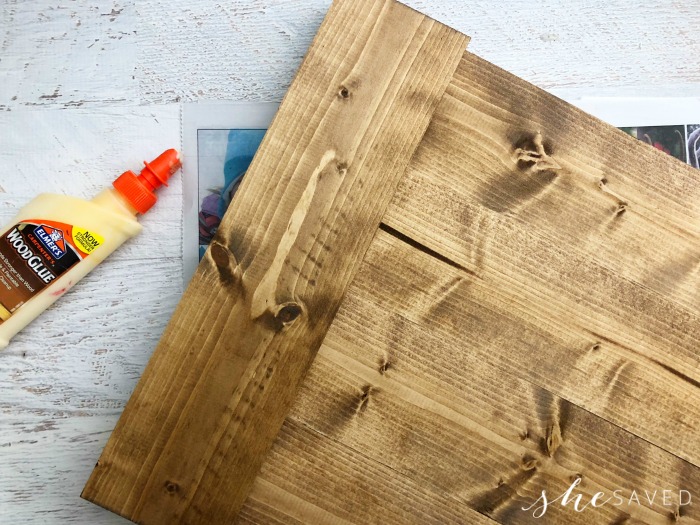
4. Then glue your 2 14” boards on the vertically on the top of each end.
5. Apply a coat of polyurethane to your tray, being carefully not to knock the boards out of place. Let your boards and polyurethane dry overnight.
Assembling Your Farmhouse Serving Tray
6. Measure where you’d like your handles to go and on the backside draw 2 holes on each side.
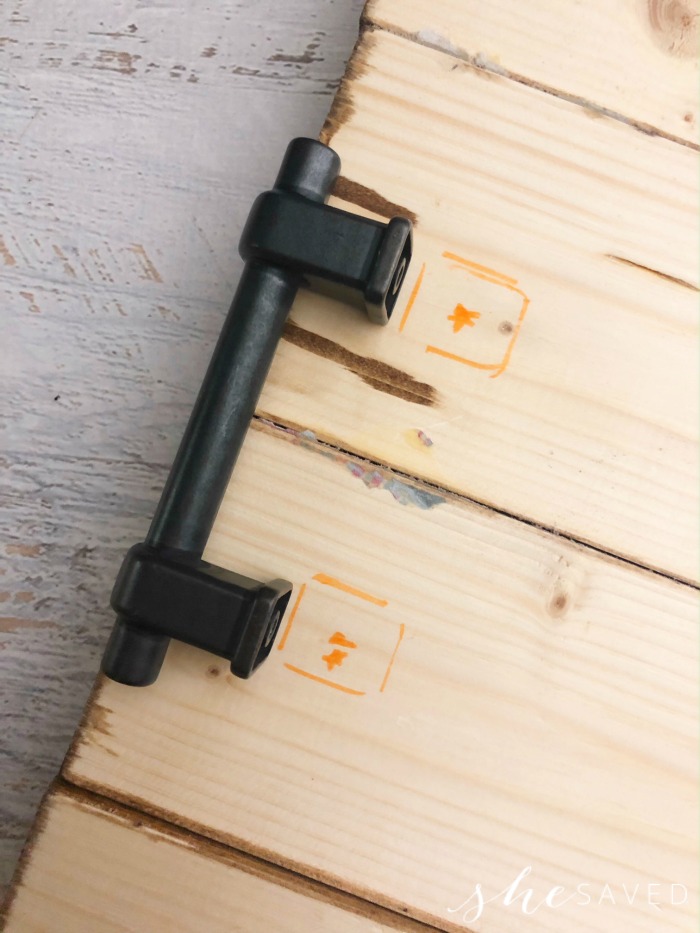

7. Carefully drill 2 holes from the bottom side up with the right size bit for your handles.
8. Screw on your handles from the bottom to the top depending on how your handles attach.
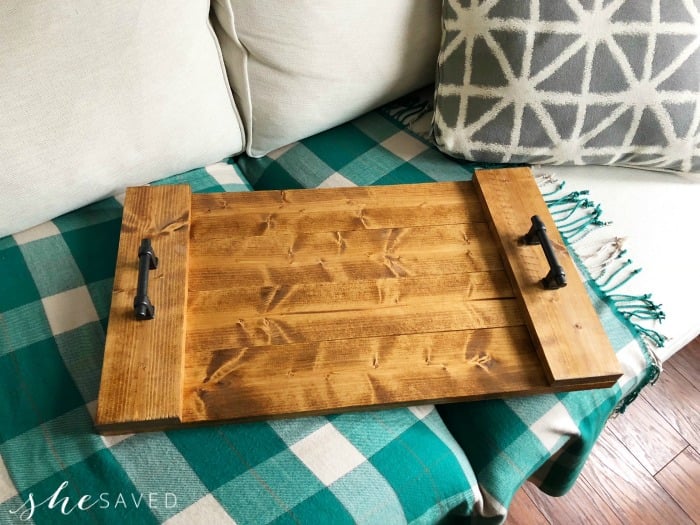
Isn’t this tray so pretty?
I love the Pottery Barn-ish look and of course, you can’t beat the price!
Wouldn’t it be fantastic to make this for mom or dad, as they would love it! Then use it to serve them breakfast in bed on their special day?
I love finding creative and practical homemade gift ideas.
Print the Instructions for making this DIY Serving Tray

Farmhouse Serving Tray Project
If you are looking for a fun and practical DIY project, this Farmhouse Serving Tray project is not only affordable - but makes such a nice finished product. Great for gift giving, this pretty serving tray is a Pottery Barn look a like that cost a fraction of the price!
Materials
- 4- 24” inch 1x4 boards
- 2- 14” inch 1x4 boards
- 2 handles
- 4 - 1 1/2” wood screws
- Wood stain
- Polyurethane
- Wood glue
- Rag
- Sand paper if needed
Tools
- Paint Brush
- Screw Driver / Drill
Instructions
1. Go into your local hardware store and pick out a 10ft 1x4 board and have them cut it into eye sizes you need. OR, if getting to a store isn't an option, you could always use supplies/scraps OR consider using an old cupboard door! We've seen this done but never tried it ourselves.
2. In a well ventilated area, stain the tops, bottoms and sides of your boards using a paint brush and wipe off any excess stain using a rag. You will probably want to stain both sides of your boards. I only stained one side for these photos so that I could show you the markings for the handles that I made on the backside.
3. Let your boards dry overnight, glue the sides of 4-24” boards together and wipe off any excess glue with a wet rag.
4. Then glue your 2 14” boards on the vertically on the top of each end.
5. Apply a coat of polyurethane to your tray, being carefully not to knock the boards out of place and let your boards and polyurethane dry overnight.
6. Measure where you’d like your handles to go and on the backside draw 2 holes on each side.
7. Carefully drill 2 holes from the bottom side up with the right size bit for your handles.
8. Screw on your handles from the bottom to the top depending on how your handles attach.

Meet the author – Keri Lyn
The creative and frugal mind behind She Saved for over 12 years now, Keri Lyn shares her adventures in parenting along with her love for family travel, country living and brand marketing. A self-proclaimed “brand loyalist”, Keri Lyn is known for her strong and enthusiastic voice when it comes to the products and brands that she loves. She Saved has become a community for like-minded consumers who appreciate saving money, time and sanity by getting the best deals on quality products and experiences.


Yes homemade is always better! It sure would be nice to be served breakfast in bed and your tray is perfect for it! My hubby loves using Gorilla glue! He’ll like this project. Thanks for sharing with us at Merry Monday. Hope to see you next week.
My brother and his wife just bought a lot home this will make a nice house warming gift . Thanks so much!
Katie, I’m so sorry! I had a typo in the translation of my notes and didn’t catch it… I feel awful!. The error was in the 4 boards, they should be 24″ boards. And the screws should have read 4 – 1 1/2 wood screws. It’s all updated now and I thank you so much for bringing it to my attention. And again, I’m so so sorry, I would have never caught this and it’s one of my favorite crafts on the blog, so I’m so thankful you took the time to let me know. So sorry it was a hassle for you ladies! ~ Keri Lyn
Unless my coffee hasn’t kicked in yet, I don’t think the corrections will work for a 10′ board. You’ll need a 12′ board or cut the longer pieces to 22″ instead of 24″ to get the entire tray out of one board. 4 x24=96, 2×14=28, 96+28=124. A 10′ board is only 120″. I love this idea though. I have all sorts of scrap lumber I can use to make these for gifts – thank you for the inspiration!
Great idea! I am making this over the weekend. I also discovered the math calculations issue. I used a 10 foot board that is 1 inch thick and 4 inches wide. To use the whole board, my pieces are cut as follows:
4 pieces at 22 inches long
2 pieces at 16 inches long
This used the whole board. I got the board for $7.15 and the glue for about 4. I have stain, clear sealant, screws and handles at home.
If you did a 12 foot board, you could do 4 24 inch pieces and 2 – 16 inch pieces with some left over. I just like using an entire piece with out waste. Thanks again!!
Is the top coat food safe? Like if I want to use it as a cheese board? I thinking about cutting everything first then transfer to the tray.
Thank you!! Can’t wait to make this!!
It’s very good DIY on Farmhouse serving tray. I like this idea and very thankful to you for share this project with us.
This was amazing! I’m so impressed by how you took the time and paid attention to every detail to make sure your piece looked high-end. Beautiful job! Thank you so much for this simple easy tutorial. I’m 22 years old and I’ve never made anything out of wood in my life but lately, I’ve been really interested in the idea, and this looks like a good place to start. Every other “beginner project” I saw was too intimidating for me