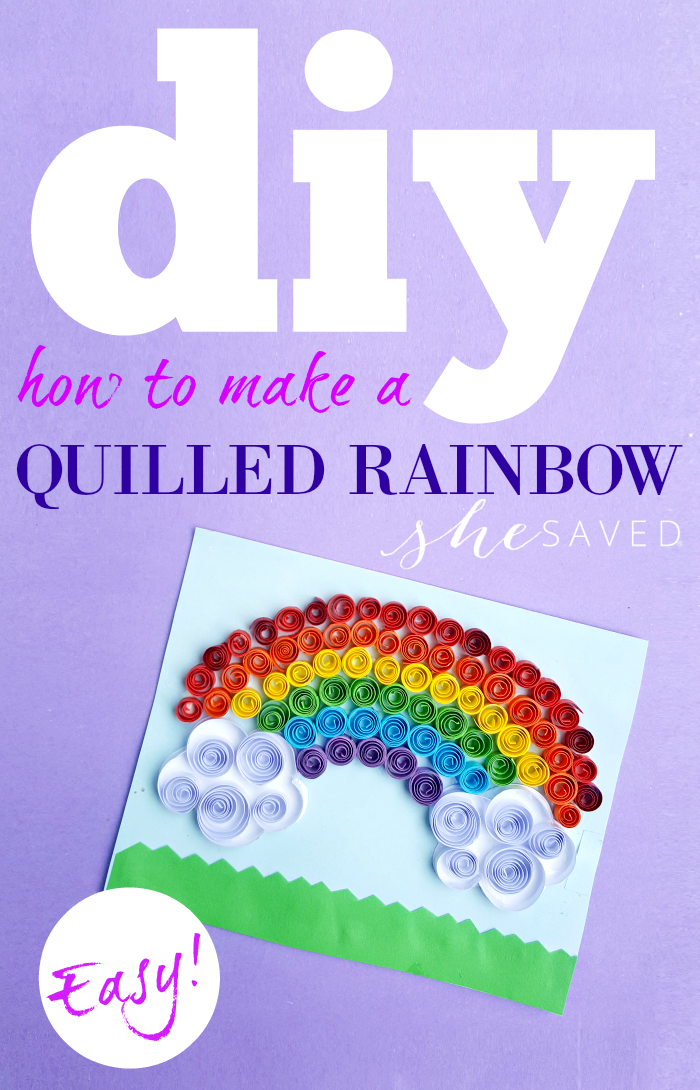
Paper Quilling Project: Quilled Rainbow Craft
Easy to make with just a few supplies, learn how to make this darling Quilled Rainbow Craft! Such a fun craft project for all ages!
Paper Quilling Project: Quilled Rainbow Craft
I’ve had so many requests for more paper quilling crafts so today we are sharing this darling Quilled Rainbow Craft. My daughter is loving paper projects lately and I’m loving them because they are easy on the budget and they are fun projects that she can do just about anywhere. Plus, the finished products are really cool!
In case you missed, make sure to check out my post on How to Make a Quilled Unicorn and the Paper Quilling Flower Basket how-to project that I shared earlier. One thing that I love about paper quilling is that just about anyone can do it, which makes it a fun project for those “mom, I’m bored!” days.
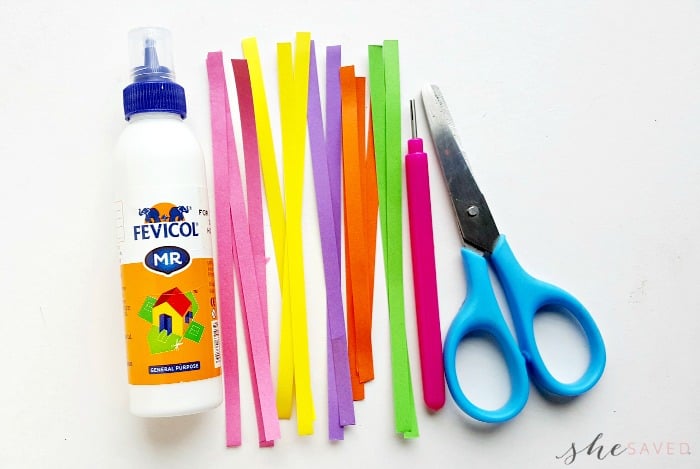
List of Supplies:
- Quilling paper strips
- White stationary paper
- Craft glue
- Slotted quilling tool
- Scissors
Instructions:
Step ONE
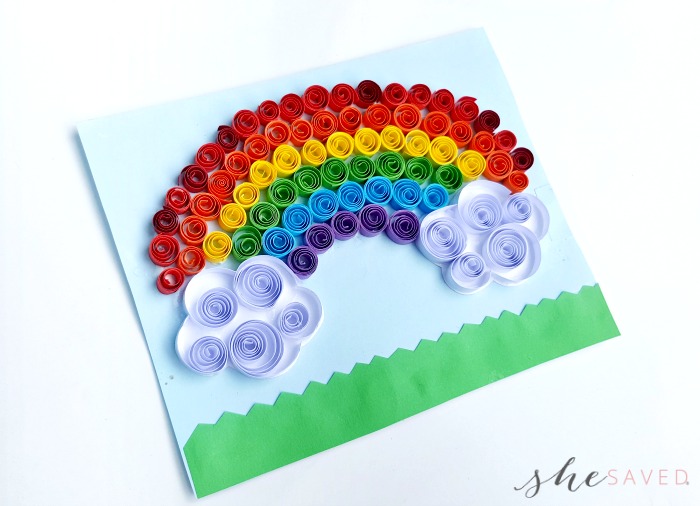
This project required only loose coil shape. Select the colors for the rainbow and the cloud. Take a 6 inch quilling strip and use the slotted quilling tool to coil the entire strip.
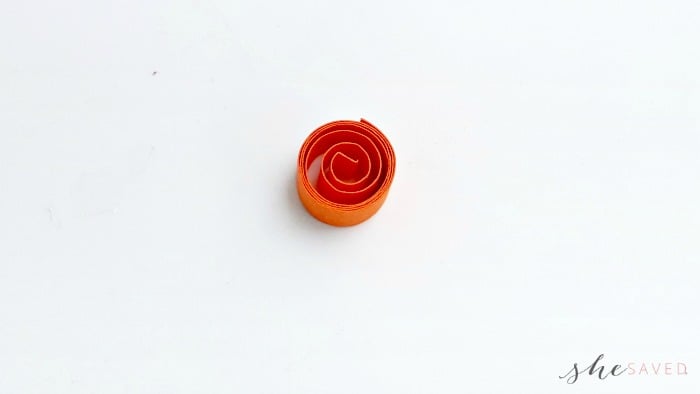
Step TWO
Take the coiled strip out of the tool and allow the coil to loosen up. You can keep the open end as it is or you can also apply glue to close the open end.
Step THREE
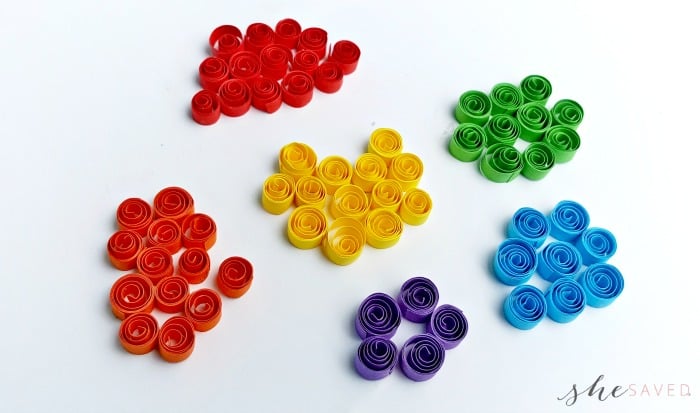
Similarly create a bunch of loose coils; for the rainbow.
Step FOUR
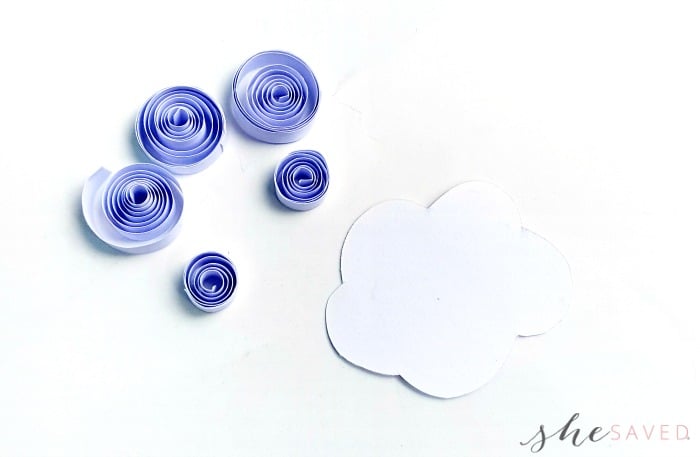
Cut out 2 cloud patterns from white craft paper or stationary paper. Use white quilling strips to create loose coils. Use 6 inches and 12 inches white quilling strips for the cloud patterns. Keep the ends of the coils open.
Step FIVE
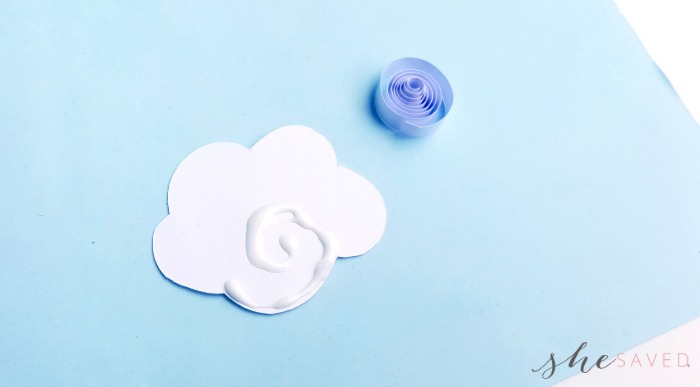
Take a cloud cut out and apply glue along any one of its curved edges; also create a twirl with the glue, inwards.
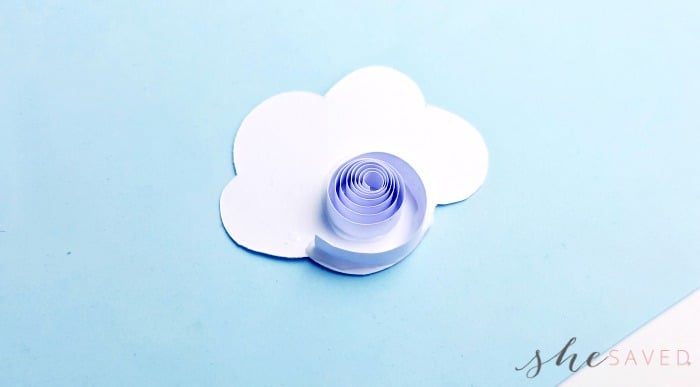
Step SIX
Take a white loose coil and place the coil along the glued part of the cloud; keeping the open end of the coil along the edge of the cloud and the center part of the cloud inwards.
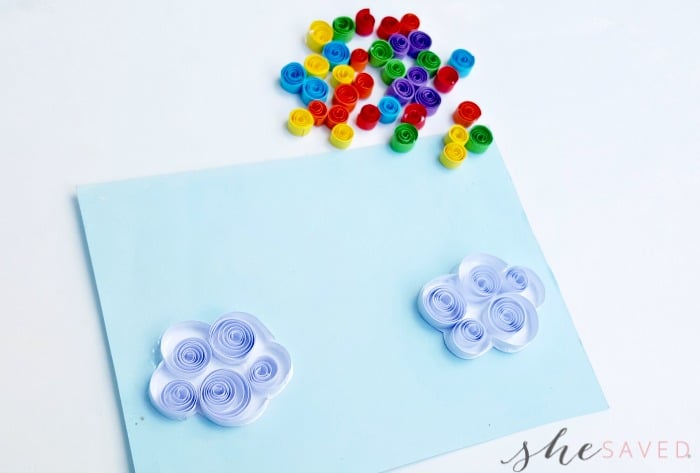
Step SEVEN
Glue the rest of the white loose coils to fill the cloud cut out. Similarly prepare another cloud pattern. Prepare a piece of blue craft paper and glue the 2 cloud patterns on it; keeping enough space between the clouds for the rainbow pattern.
Step EIGHT
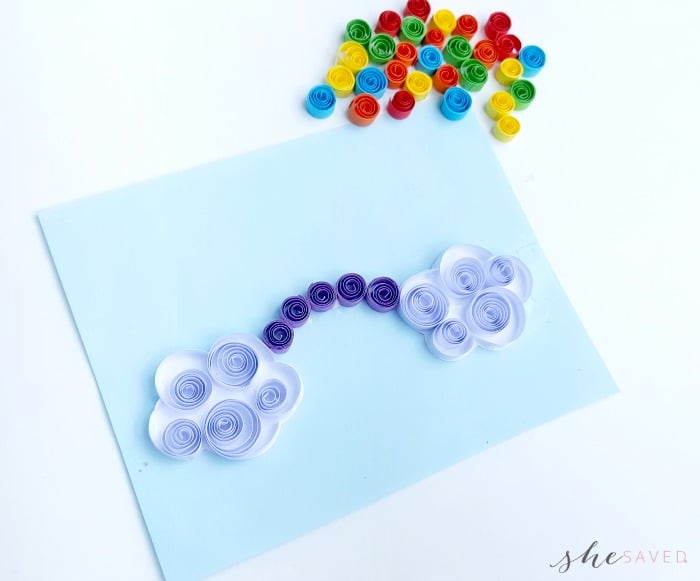
Start with the purple colored loose coils (or red) and simply glue the coils in a curved line from one cloud to the other.
Step NINE
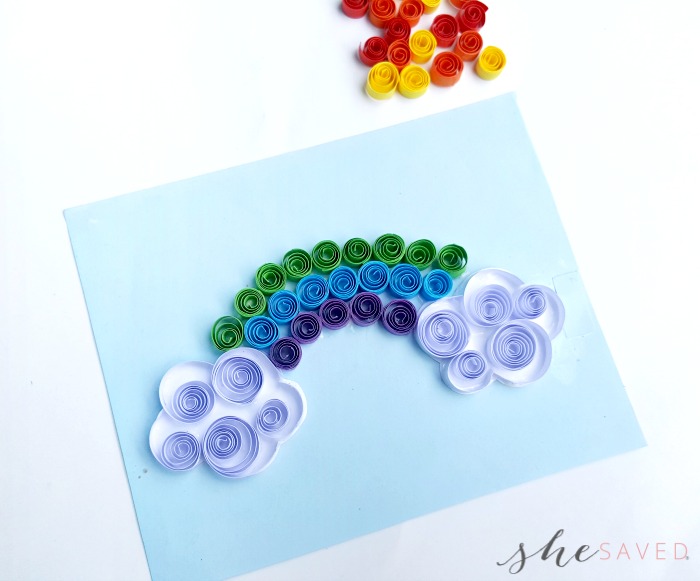
One by one glue the rest of the colors.
Step TEN
Once you are done creating the rainbow pattern allow the glue to dry. You may add more details if you want to.
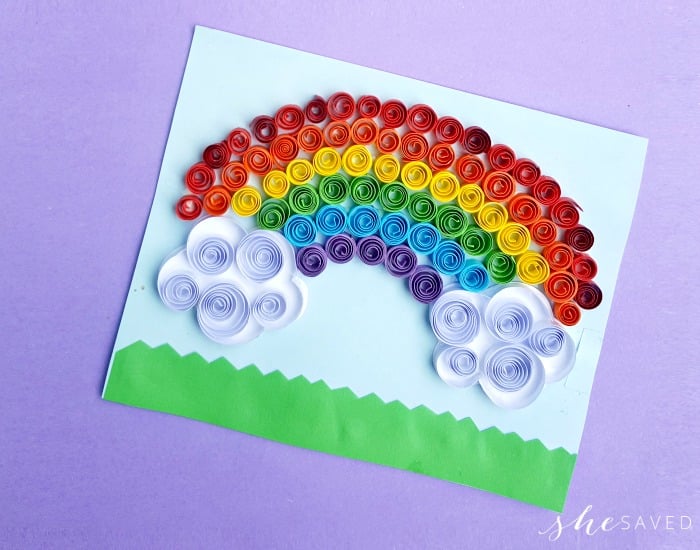
And there you go! A beautiful quilled rainbow! We like to make these as gift cards and I’ve even framed a few of my daughter’s best quilled paper creations. A few weeks ago I also shared a fun Quilled Flower Frame project and you could actually do the same thing with the quilled rainbows. So many fun options and again, one of my favorite things about paper quilling is it’s SO easy for anyone to do just about anywhere!! (great for keeping kids busy on car trips too!)
Paper Quilling is actually a fascinating form of art and there are so many fun things you can do with it once you start getting good at it! I actually think Paper Quilling sets would make wonderful gifts!

Meet the author – Keri Lyn
The creative and frugal mind behind She Saved for over 12 years now, Keri Lyn shares her adventures in parenting along with her love for family travel, country living and brand marketing. A self-proclaimed “brand loyalist”, Keri Lyn is known for her strong and enthusiastic voice when it comes to the products and brands that she loves. She Saved has become a community for like-minded consumers who appreciate saving money, time and sanity by getting the best deals on quality products and experiences.