Easy Fall Snack for Kids: Scarecrow Pudding Cups
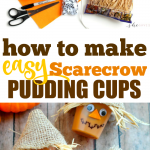
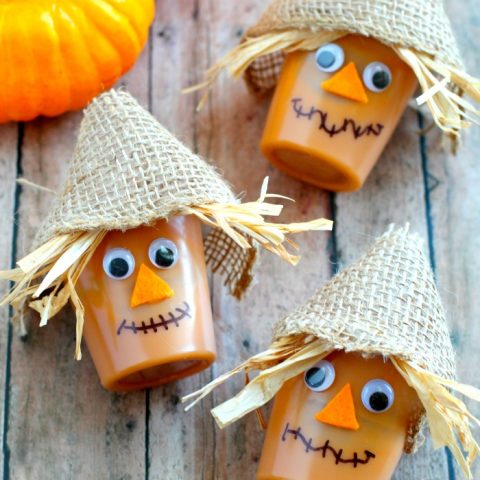
How darling are these scarecrow pudding cups? Such an easy fall snack for kids, perfect for Halloween parties, harvest festivals, bake sales and more!

Easy Fall Snack for Kids: Scarecrow Pudding Cups
With fall right around the corner, I’ll be sharing some of our favorite fall recipes and crafts and this one is so perfect because it’s not only an easy fall snack for kids, but these scarecrow pudding cups are a darling treat that even adults will get a kick out of! Plus, minimal supplies and time mean that this one that you can easy put together with little expense and little clean up time!
Another thing that I love about this craft / treat idea is that it can be used anytime between September and the end of October, and it’s also one that the kids can help you make and you could easily incorporate this into a classroom party activity.
Materials for making easy Scarecrow Pudding Cup Treats
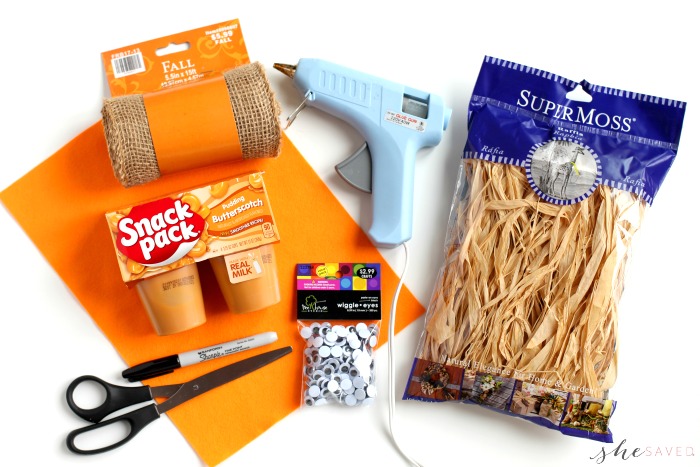
- Butterscotch Pudding Cups
- Orange Felt Sheet
- Natural Raffia
- Burlap
- Wiggle Eyes
- Black Sharpie Marker
- Scissors
- Hot Glue Gun
Directions for making easy Scarecrow Pudding Cup Treats
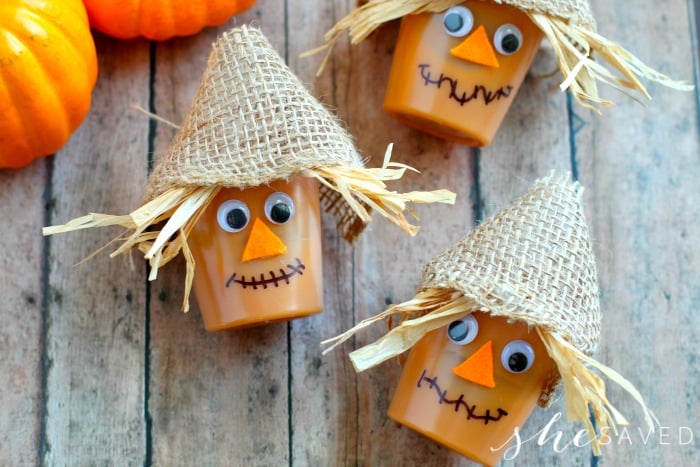
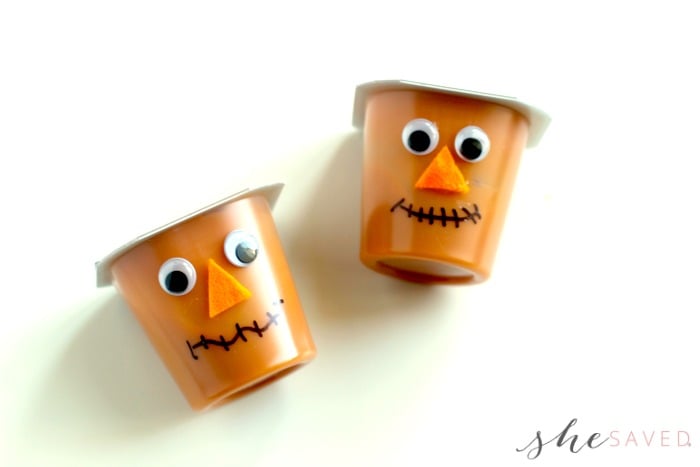
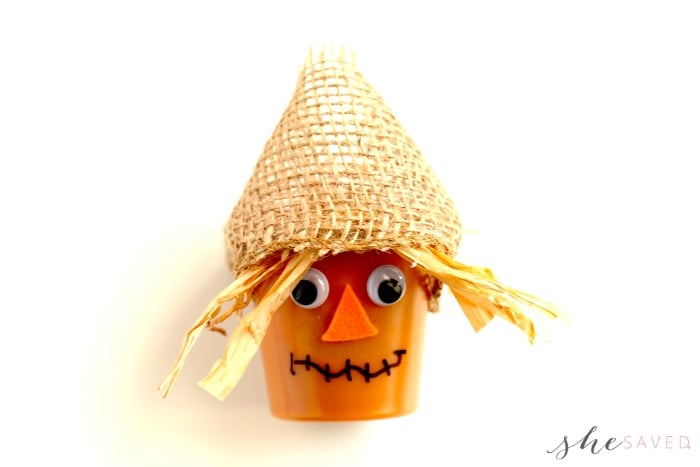
- To make the face of your scarecrow, glue two google eyes on one side of butterscotch pudding. Cut a small triangle out of the felt sheet for the nose. Next, place the felt triangle, with the pointed side up, in the center and underneath/between the eyes. Use the black sharpie to draw on a scarecrow mouth and add lines for “stitches” to give it that scarecrow look.
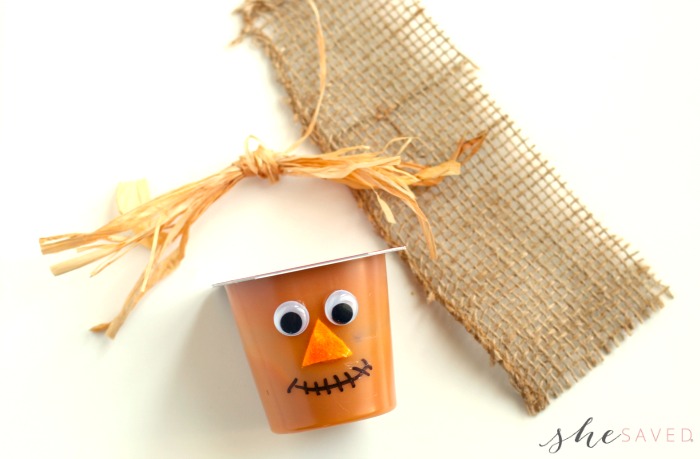
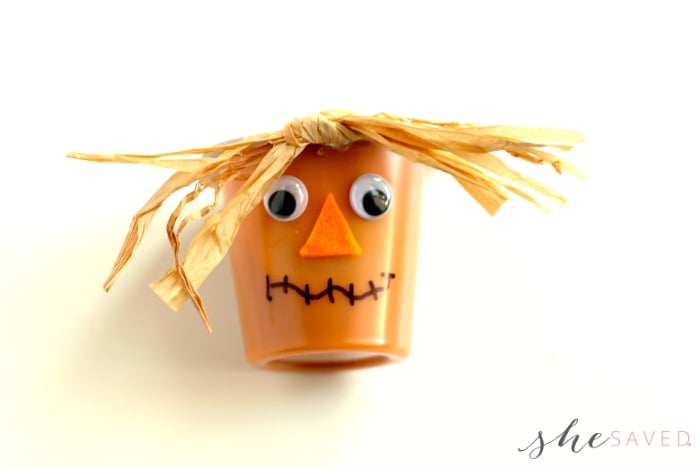
- Next, take a few pieces of raffia and knot them together in the middle. After knotting, this should be approximately 5 inches in length. You can then trim pieces to get the look you want.
- Use the hot glue on the back off the raffia knot to stick it in place on the edge of the pudding cup lid (above the face), pressing firmly to make sure it dries firmly.
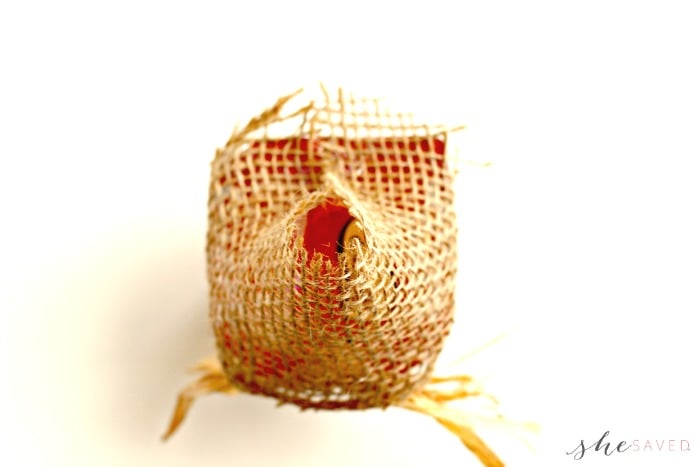
- Take a piece of burlap (approximately 8” x 3”) and wrap it around the pudding cup lid, with the bottom edge giving a slight overhang to the lid. (see photos) Use a large dab of hot glue to secure the back end pieces in place on the top of the lid near the back. Next place a dab of glue over the raffia ribbon knot and press the burlap down so it stays in place in the front as well.

Aren’t these the cutest? I’ve got quite a few other Halloween Crafts that we’ve shared over the years. Make sure to check them out!
How to Draw Scarecrow Eyes if You Don’t have Google Eyes?
I would just draw little dots or button eyes, keep them simple – OR you could draw circles with dots in them – to make them look just like google eyes!
Print this Instructions for making easy Scarecrow Pudding Cups
Easy Fall Snack for Kids: Scarecrow Pudding Cups
These fun scarecrow pudding cups are an easy fall snack idea for kids and perfect for autumn festivities and halloween party treat ideas!
Ingredients
- Butterscotch Pudding Cups
- Orange Felt Sheet
- Natural Raffia
- Burlap
- Wiggle Eyes
- Black Sharpie Marker
- Scissors
- Hot Glue Gun
Instructions
- To make the face of your scarecrow, glue two google eyes on one side of butterscotch pudding. Cut a small triangle out of the felt sheet for the nose. Next, place the felt triangle, with the pointed side up, in the center and underneath/between the eyes. Use the black sharpie to draw on a scarecrow mouth and add lines for "stitches" to give it that scarecrow look.
- Next, take a few pieces of raffia and knot them together in the middle. After knotting, this should be approximately 5 inches in length. You can then trim pieces to get the look you want.
- Use the hot glue on the back off the raffia knot to stick it in place on the edge of the pudding cup lid (above the face), pressing firmly to make sure it dries firmly.
- Take a piece of burlap (approximately 8” x 3”) and wrap it around the pudding cup lid, with the bottom edge giving a slight overhang to the lid. (see photos) Use a large dab of hot glue to secure the back end pieces in place on the top of the lid near the back. Next place a dab of glue over the raffia ribbon knot and press the burlap down so it stays in place in the front as well.

Meet the author – Keri Lyn
The creative and frugal mind behind She Saved for over 12 years now, Keri Lyn shares her adventures in parenting along with her love for family travel, country living and brand marketing. A self-proclaimed “brand loyalist”, Keri Lyn is known for her strong and enthusiastic voice when it comes to the products and brands that she loves. She Saved has become a community for like-minded consumers who appreciate saving money, time and sanity by getting the best deals on quality products and experiences.