DIY Candy Cane Place Card Holders
DIY Candy Cane Place Card Holders
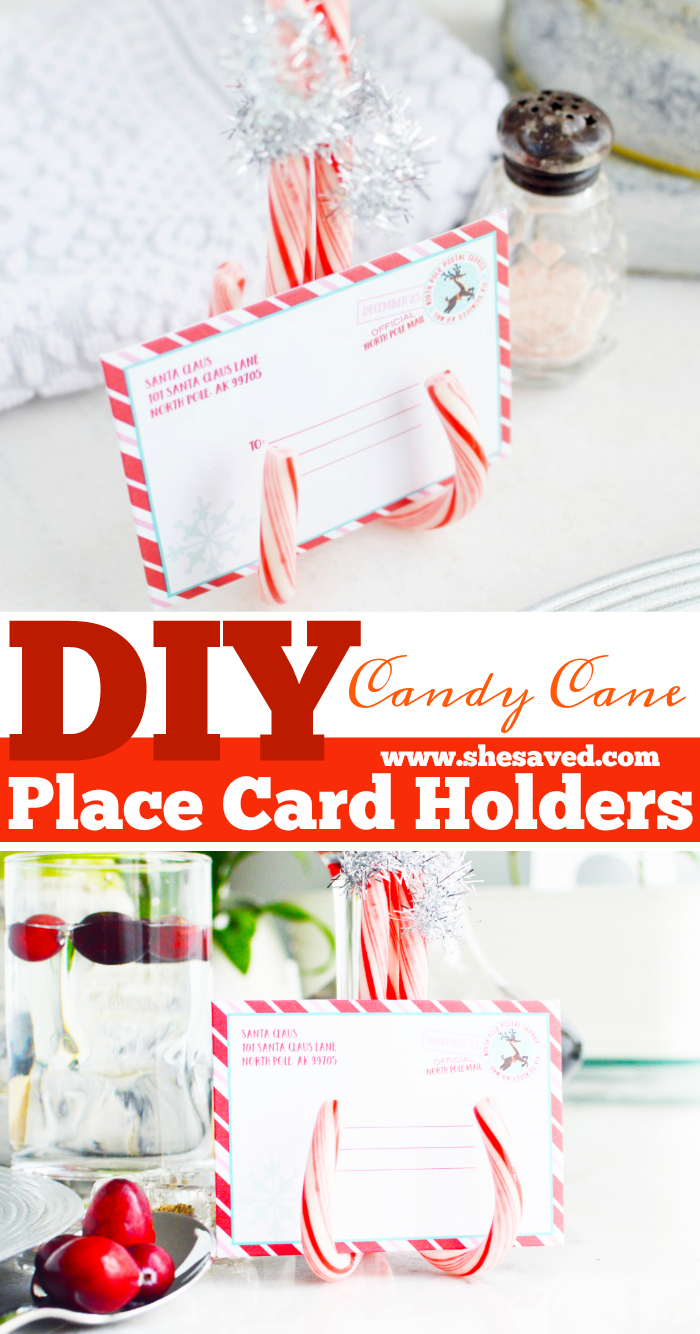
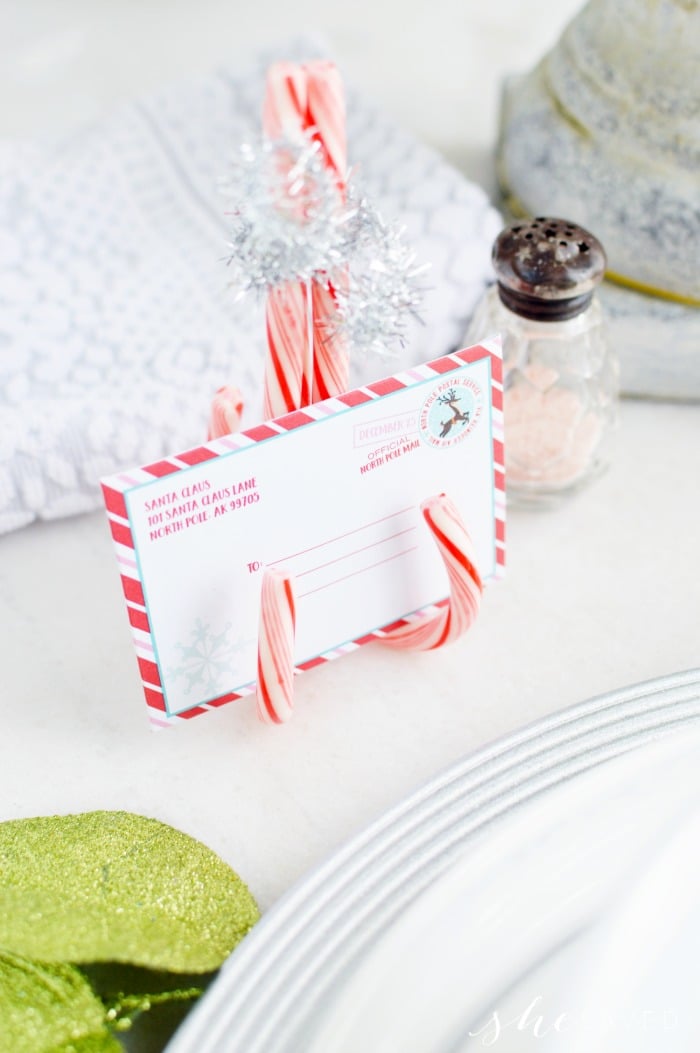
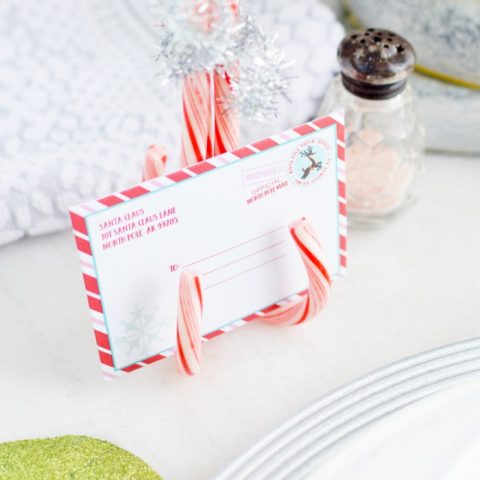
How darling are these candy cane place card holders? I love setting a holiday table, and I especially love finding affordable and unique ways to make it festive and colorful.
These DIY Candy Cane Place Card Holders are easy to make and look so lovely as part of your dinner table setting. Best of all, they require just a few supplies and only a few minutes to make!
Supplies for Candy Cane Place Card Holders
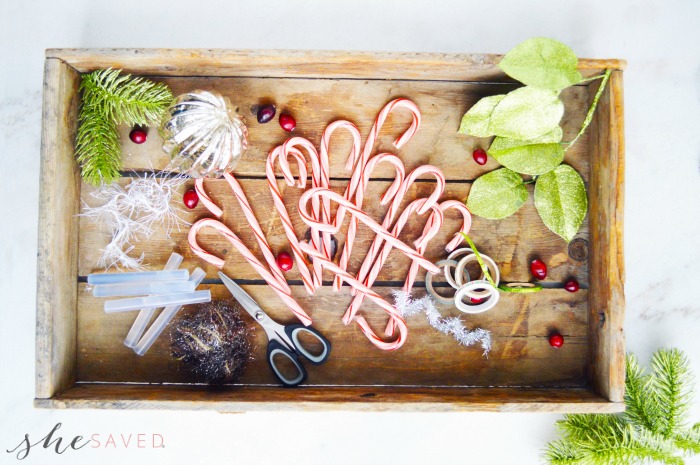
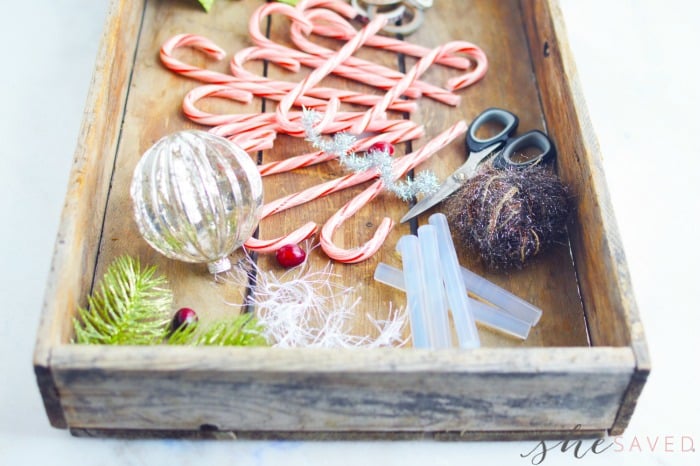
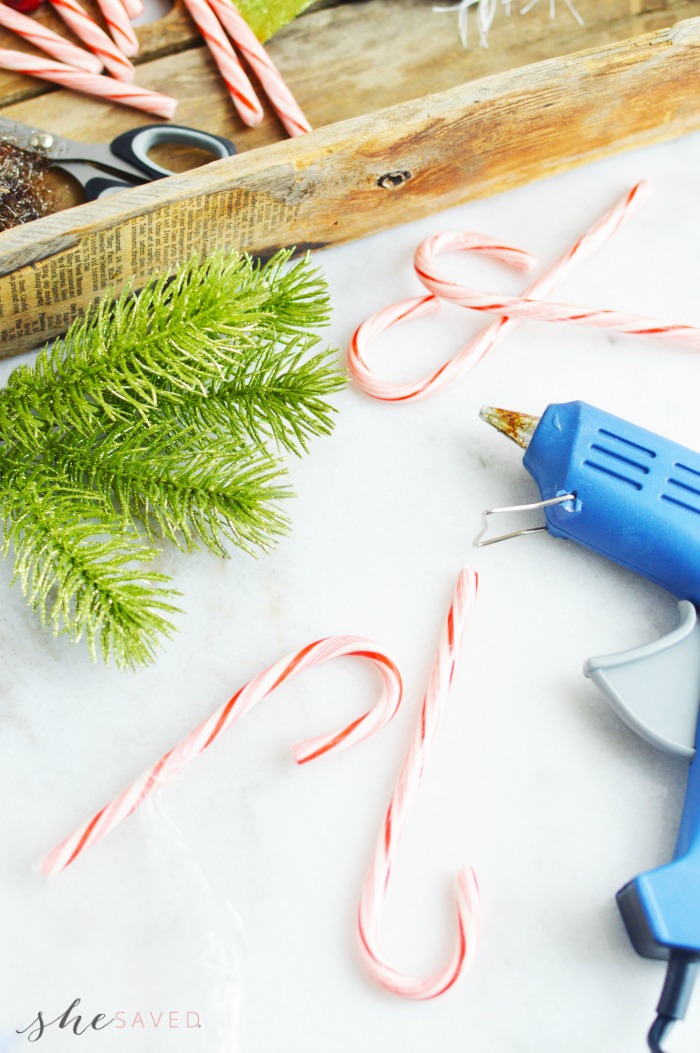
3 candy canes, the ones here are standard size
Hot glue, tape or sticky dots (like are used for scrapbooking).
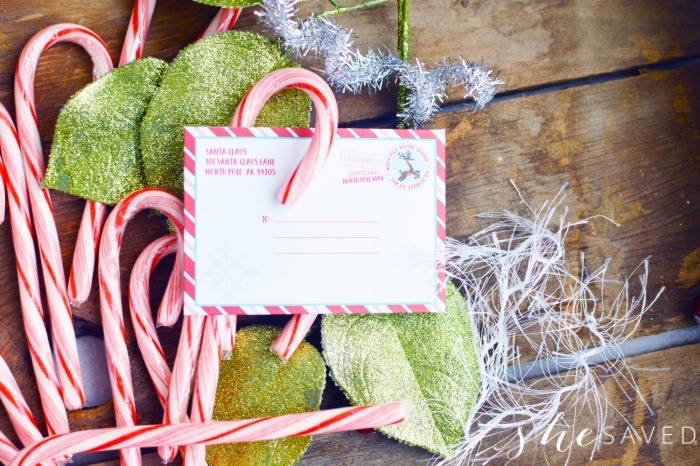
About 6 inches of ribbon, tinsel or trim. I love the look of tinsel, so I went with that. You could also use a narrow washi tape.
Place cards, pictures or envelopes, I got these exact ones at Michael’s Craft Store this season but there are so many different options you could use.
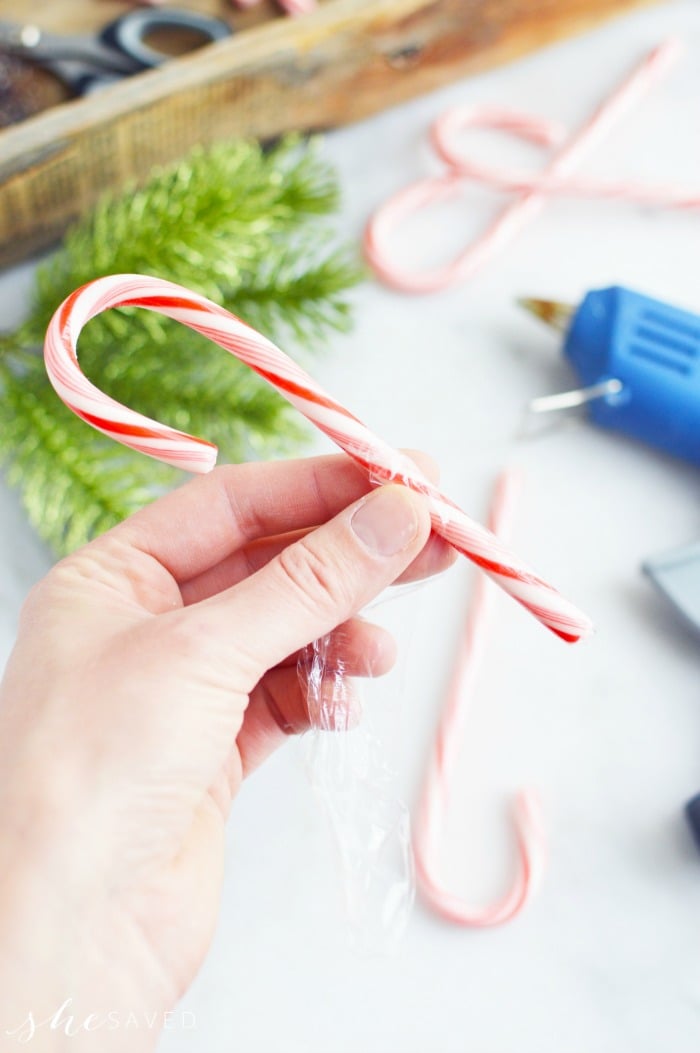
*I removed the plastic that the candy canes were individually wrapped in, if you think your guests might want to eat them or take them home as favors, you may want to leave this protective plastic on and opt for tape so they candy canes will still be edible.
The plastic will melt when you apply the glue from the glue gun, so just be prepared for that and remember that less might be more, especially if you want these to still be edible afterwards.
Steps:
Heat your glue gun or other adhesive and make sure you have it handy so you can quickly pick it up while holding the candy canes in place.
Once you have the arrangement you prefer for the candy canes, hold them tight and have them stand up on a flat surface to make sure the bottom is level.
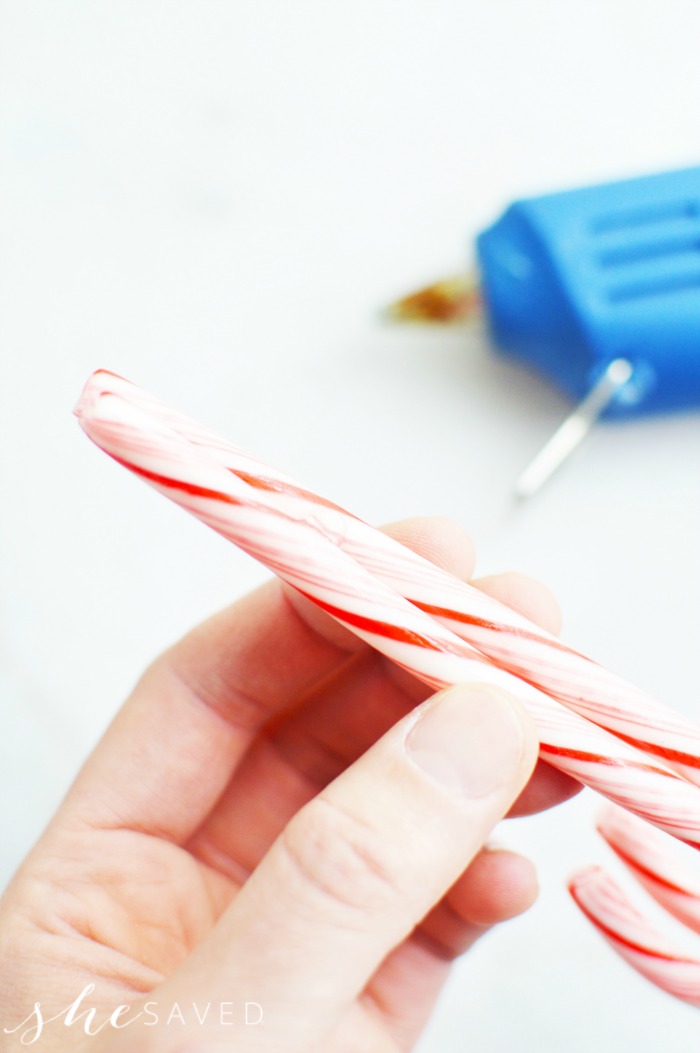
Then glue or tape them together, start with two of the candy canes and then glue the third in place when that first set is sturdy.
*Tip, if using a washi tape, consider wrapping the tape around two full times to help hold the tape in place. You could also add a tiny tab of glue to help.

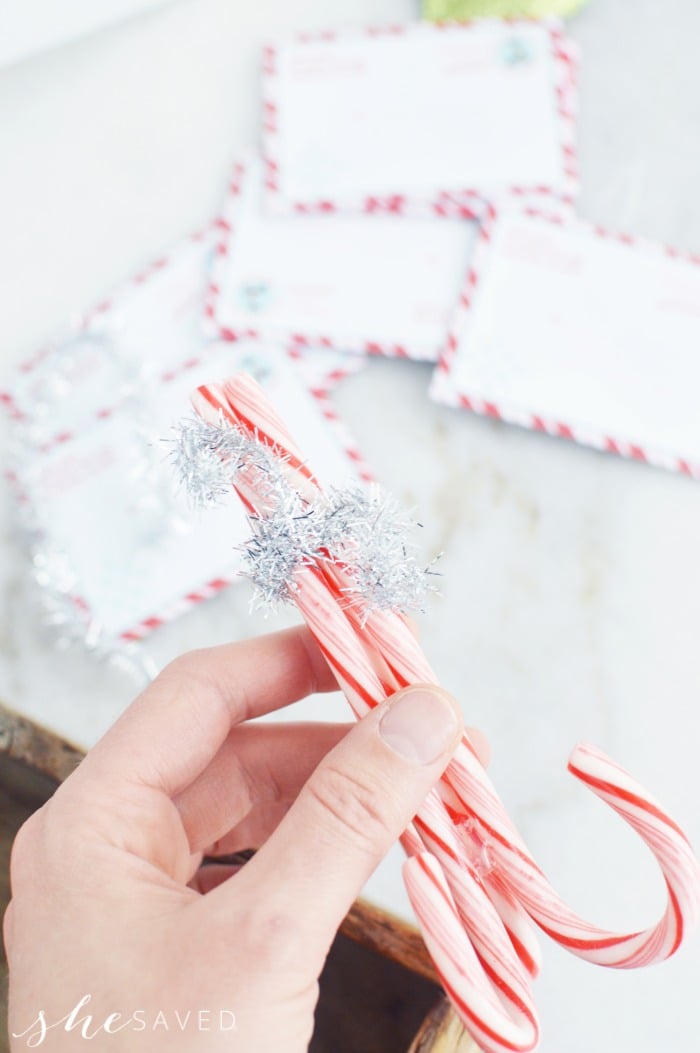
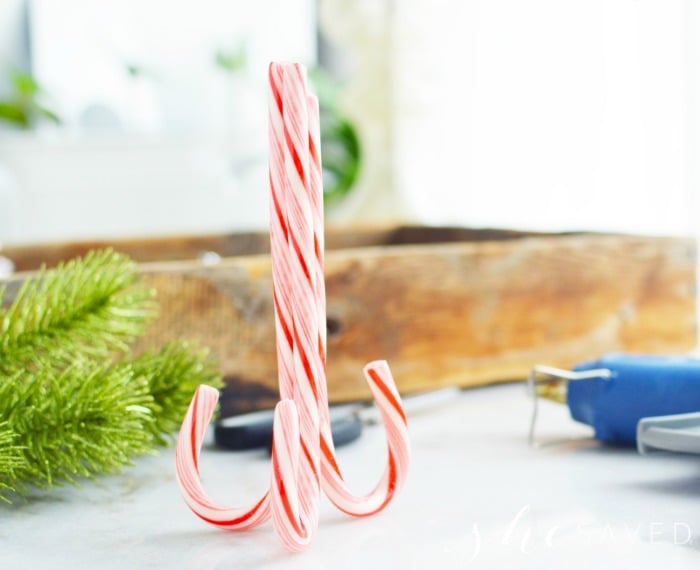
You can then wrap your trim around the candy cane cluster. I love the look of this tinsel, it’s so festive and yet simple. If you can find a tinsel that has a wire in it, you can use a pencil to wrap the ends of the tinsel garland into little loops.
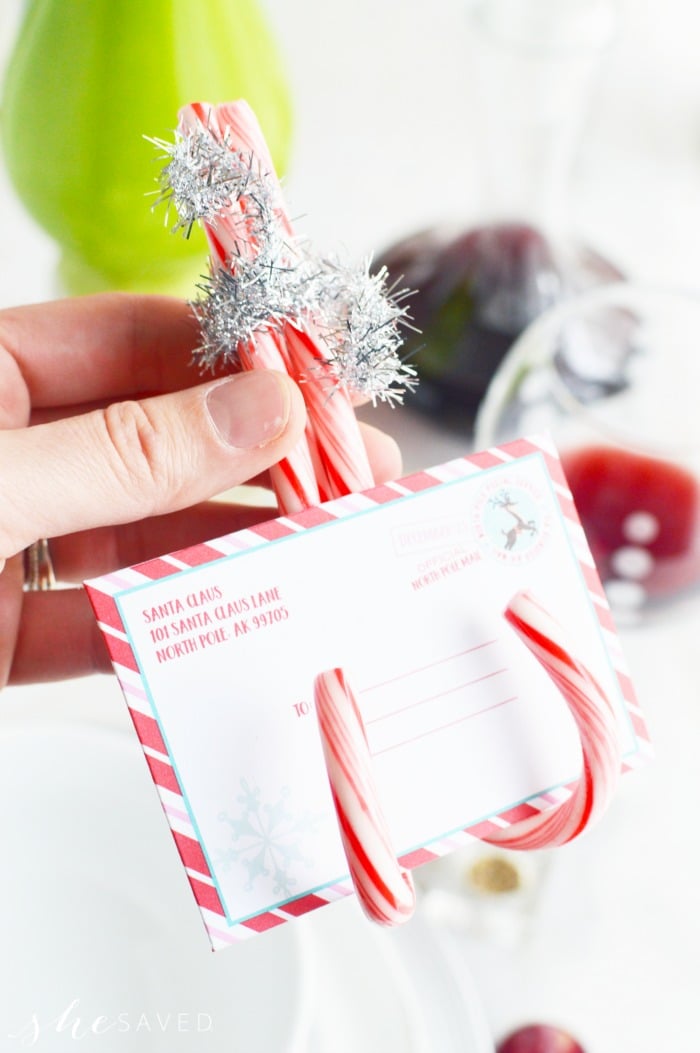
Use cute cards like these or print your own place settings.
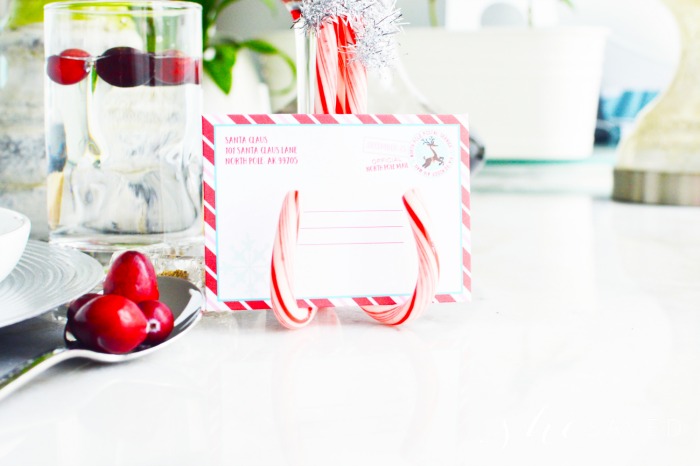
These store nicely at room temperature until you’re ready to use them.
Ideas for Setting Your Holiday Table
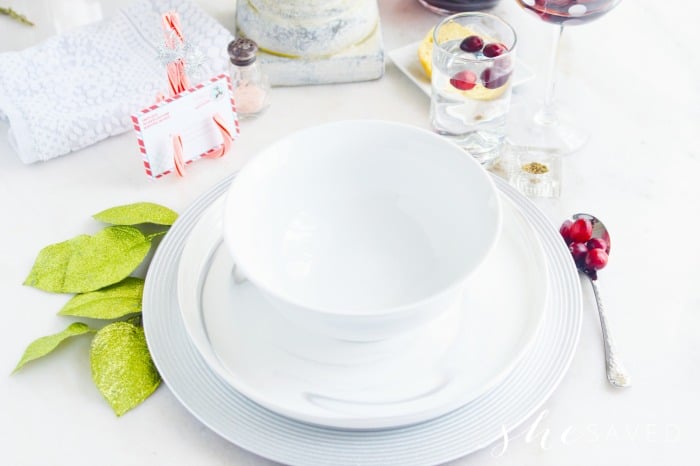
It really doesn’t take much to pull a holiday table together. Keep it simple with small accents and subtle pops of color. Use sprigs of green for color and cranberries to bring in some red.
I love how simple these are. If you are looking for more Christmas party ideas, make sure to check out some of the other DIY projects that I’ve shared over the years. From gift ideas to recipes and everything in between, we’ve shared some really fun projects over the years!
And how lovely is this!? I love it!
I also love that you can find almost everything you need at Dollar Tree! Or, if you are like me, maybe you bought candy canes last year at the Christmas clearance sales.
My hubby always thinks I’m crazy, but I love pulling out those boxes from the previous years clearance shopping purchases.
As mentioned, we found these little postcards at Michael’s Craft Store (Yay again for Christmas clearance!!) but you could also make your own, or check out some of the many options out here:
DIY Candy Cane Place Card Holders
Set a beautiful holiday table with these darling DIY Candy Cane Place Card Holders that will add an elegant and festive touch to your Christmas dinner!
Materials
- 3 candy canes, the ones here are standard size
- Hot glue, tape or sticky dots (like are used for scrapbooking).
- About 6 inches of ribbon, tinsel or trim, or even a narrow washi tape here.
- Place cards, pictures or envelopes, I got these exact ones at Micheals craft store this season.
Tools
- Glue gun
Instructions
Heat your glue gun or other adhesive and make sure you have it handy so you can quickly pick it up while holding the candy canes in place.
Once you have the arrangement you prefer for the candy canes, hold them tight and have them stand up on a flat surface to make sure the bottom is level.
Then glue or tape them together, start with two of the candy canes and then glue the third in place when that first set is sturdy.
*Tip, if using a washi tape, consider wrapping the tape around two full times to help hold the tape in place. You could also add a tiny tab of glue to help.
You can then wrap your trim around the candy cane cluster.
Use cute cards like these or print your own place settings.
These store nicely at room temperature until you’re ready to use them.
Notes
*I removed the plastic that the candy canes were individually wrapped in, if you think your guests might want to eat them or take them home as favors, you may want to leave this protective plastic on and opt for tape so they candy canes will still be edible.

Meet the author – Keri Lyn
The creative and frugal mind behind She Saved for over 12 years now, Keri Lyn shares her adventures in parenting along with her love for family travel, country living and brand marketing. A self-proclaimed “brand loyalist”, Keri Lyn is known for her strong and enthusiastic voice when it comes to the products and brands that she loves. She Saved has become a community for like-minded consumers who appreciate saving money, time and sanity by getting the best deals on quality products and experiences.


What a fun and festive idea.
Amalia
xo
I’m trying this and the hot glue doesn’t stick to the candy cane…