Chocolate Butterfly Cupcakes
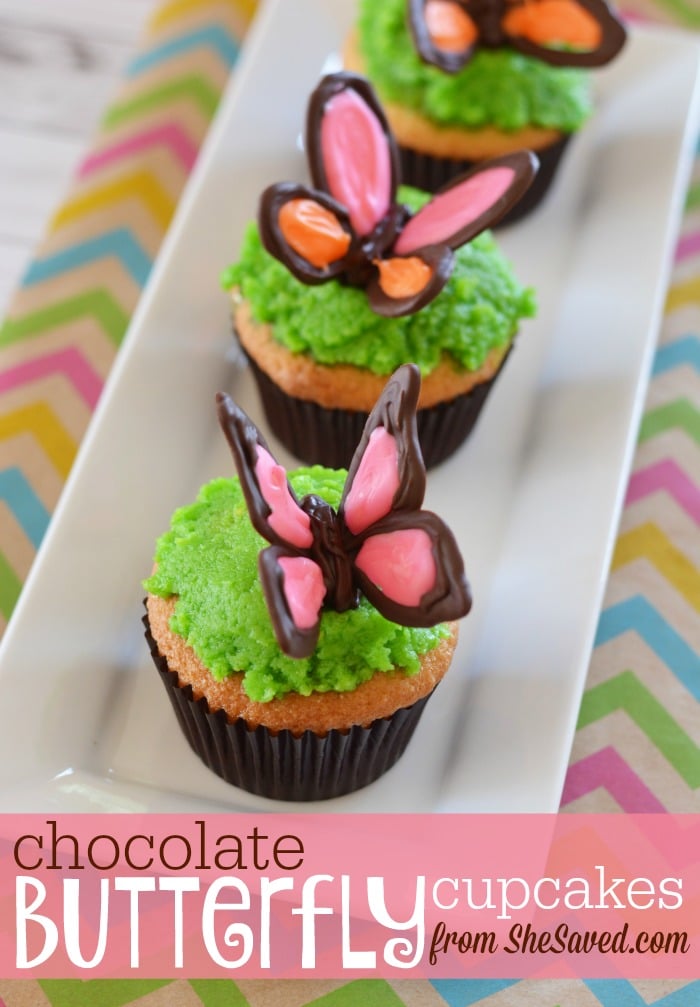
Chocolate Butterfly Cupcakes
My daughter enjoys making the chocolate butterflies with me, so this might even be a fun baking project for your kiddos!
What you will need to make these Butterfly Cupcakes
Note: I usually make these the day before.
Your favorite frosting, colored green1 bag orange Wilton candy melts
1 bag pink Wilton candy melts
1 bag chocolate chips
Wax paper
Wooden spoons
Ziplock sandwich size bags
Printed pattern
Wax paper
How to make the Chocolate Butterflies
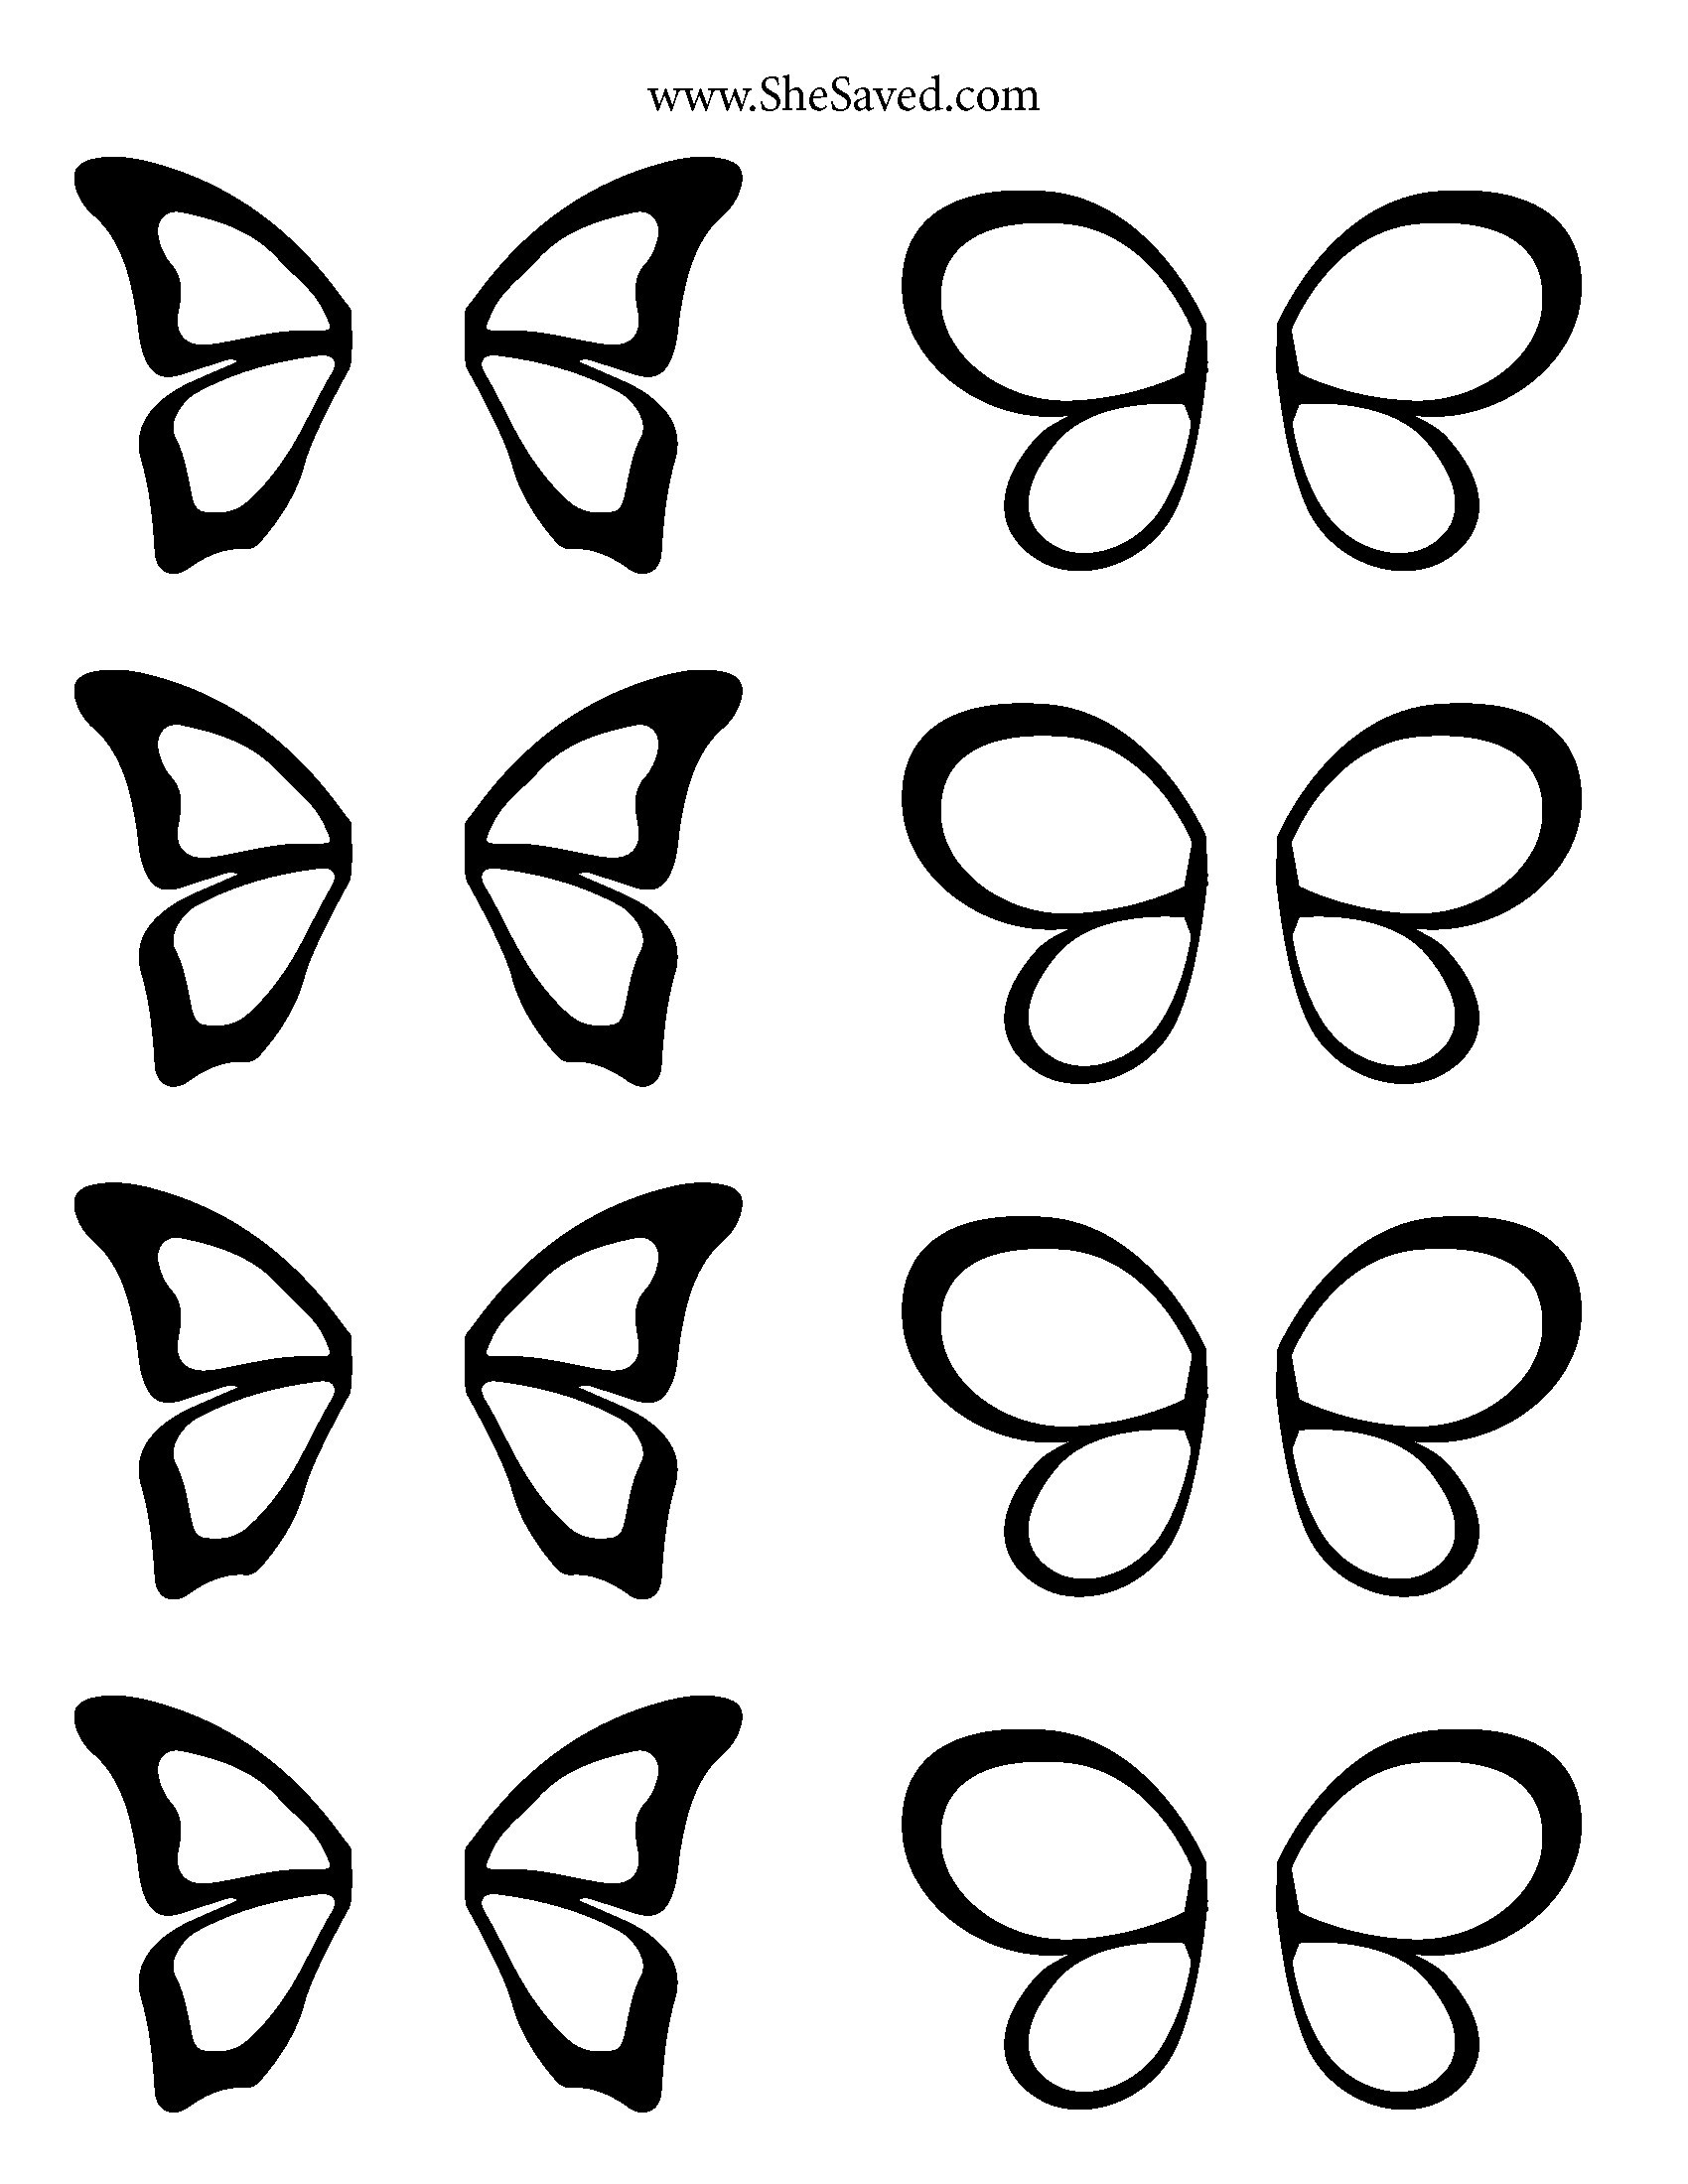
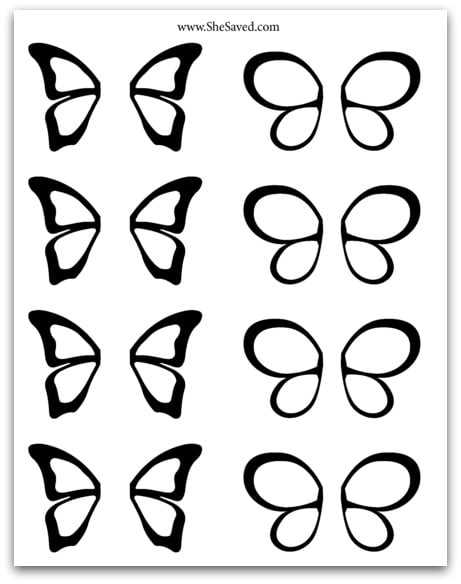 First of all, go here to print out the free butterfly pattern printable. On a flat, dry work space, place your printed pattern and cover with wax paper.
In a ziplock bag, place 1/3 cup of chocolate chips. Microwave for 60 seconds on 50% power. Knead and microwave again for 60 seconds on 50% power and knead until chocolate is smooth.
Cut a small corner of the bag and pipe the chocolate onto the wing pattern. Set aside to set up and dry – usually when the chocolate is no longer shiny, it’s safe to begin the interior of the wings.
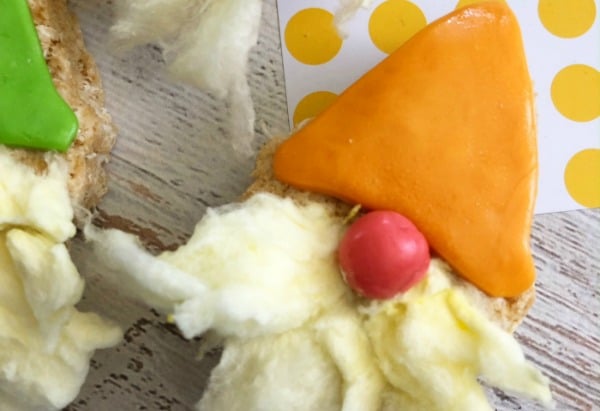
Place 20 orange candy melts in the corner of a ziplock bag. Microwave on 50% power for 30 seconds. Flip bag over and microwave for another 30 seconds on 50% power. Knead. Continue to microwave and knead until completely melted. Pipe the Orange color into the center of the butterfly wings.
Repeat with the pink candy melts.
Let wings set to dry completely.
For the next step, I work with 6-8 butterflies at a time.
On wax paper, lay two wooden spoon handles next to each other with about 1″ in between them.
By now your chocolate in the bag has probably hardened. Place in the microwave and microwave for 30 seconds on 50% power until smooth.
Pipe a 1″ log of chocolate in between the two spoon handles.
Place one wing on the chocolate dollop and one on the other, using the handles to prop up the wings.
Pipe an additional layer of chocolate in between the wings to create the body. Let set until completely dry.
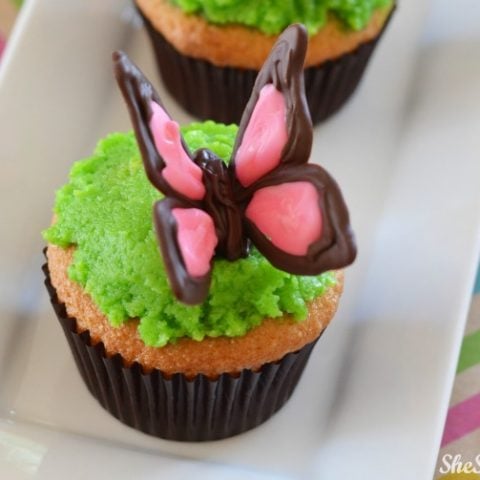
Frost your cupcakes with prepared green frosting and place a butterfly on top.

Tips to help with making butterflies from melted chocolate
Cut a small hole in the plastic bag so you have more control with the melted chocolate. Go slowly and your outline will be fine. Remember to stop squeezing the bag before you move the bag to the other wing outline.
I usually make my cupcakes the day before so they are cool enough to frost and decorate. You can also make the butterflies the day before, just place in an airtight container in a cool place (but not the refrigerator) and frost the cupcakes and decorate with the butterfly the day of serving.
I reheat my hardened chocolates in the ziplock bags by dipping them in warm/hot water in a glass or bowl.
Happy cupcake making and decorating!

Print the recipe and how-to for these Chocolate Butterfly Cupcakes
Chocolate Butterfly Cupcakes
These cupcakes with Chocolate Butterflies are so cute and with our free printable butterfly template you'll be able to easily make these beautiful chocolate butterflies! Perfect for your bug themed or spring garden party!
Ingredients
- 24 of your favorite cupcakes, baked and cooled
- Note: I usually make these the day before.
- Your favorite frosting, colored green1 bag orange Wilton candy melts
- 1 bag pink Wilton candy melts
- 1 bag chocolate chips
- Wax paper
- Wooden spoons
- Ziplock sandwich size bags
- Printed pattern
- Wax paper
Instructions
First of all, go here to print out the free butterfly pattern printable. On a flat, dry work space, place your printed pattern and cover with wax paper.
In a ziplock bag, place 1/3 cup of chocolate chips. Microwave for 60 seconds on 50% power. Knead and microwave again for 60 seconds on 50% power and knead until chocolate is smooth.
Cut a small corner of the bag and pipe the chocolate onto the wing pattern. Set aside to set up and dry - usually when the chocolate is no longer shiny, it's safe to begin the interior of the wings.
Place 20 orange candy melts in the corner of a ziplock bag. Microwave on 50% power for 30 seconds. Flip bag over and microwave for another 30 seconds on 50% power. Knead. Continue to microwave and knead until completely melted. Pipe the Orange color into the center of the butterfly wings.
Repeat with the pink candy melts.
Let wings set to dry completely.
For the next step, I work with 6-8 butterflies at a time.
On wax paper, lay two wooden spoon handles next to each other with about 1" in between them.
By now your chocolate in the bag has probably hardened. Place in the microwave and microwave for 30 seconds on 50% power until smooth.
Pipe a 1" log of chocolate in between the two spoon handles.
Place one wing on the chocolate dollop and one on the other, using the handles to prop up the wings.
Pipe an additional layer of chocolate in between the wings to create the body. Let set until completely dry.
Frost your cupcakes with prepared green frosting and place a butterfly on top.
Notes
Cut a small hole in the plastic bag so you have more control with the melted chocolate. Go slowly and your outline will be fine. Remember to stop squeezing the bag before you move the bag to the other wing outline.
I usually make my cupcakes the day before so they are cool enough to frost and decorate. You can also make the butterflies the day before, just place in an airtight container in a cool place (but not the refrigerator) and frost the cupcakes and decorate with the butterfly the day of serving.
I reheat my hardened chocolates in the ziplock bags by dipping them in warm/hot water in a glass or bowl.

Meet the author – Keri Lyn
The creative and frugal mind behind She Saved for over 12 years now, Keri Lyn shares her adventures in parenting along with her love for family travel, country living and brand marketing. A self-proclaimed “brand loyalist”, Keri Lyn is known for her strong and enthusiastic voice when it comes to the products and brands that she loves. She Saved has become a community for like-minded consumers who appreciate saving money, time and sanity by getting the best deals on quality products and experiences.


Almost too cute to eat.
Amalia
xo
These are so adorable and my daughters would love them!!! Plus, they’re absolutely perfect for spring!
Oh these cupcakes are pretty!
Pinned and sharing all over the place!
Sinea ♥
Your cupcakes are adorable! Thanks for sharing your recipe at Motivation Monday on Mom Home Guide!
These are soo cute! What a delicious and gorgeous spring treat! Thanks for sharing at Merry Monday!
What a cute idea! Thanks for linking up at the Wonderful Wednesday Blog Hop 🙂 This post is featured on my page this week
These cupcakes are adorable! Thanks for sharing at Creativity Unleashed Link Party.
These are too adorable! I would never be able to get that butterfly down! Thanks for linking up with Delicious Dishes Recipe Party!
Those are truly cute and perfect to make for all of those summer potluck dinners. Thank you for sharing this simple to follow tutorial.
Thank you for sharing this with us on the #HomeMattersParty. We hope to see you when we open our doors at 12 AM EST on Friday.
Thanks for sharing your thoughts on mom blog. Regards
However they are really cute!! I wished you would’ve included step by step picture directions.