DIY Paper Quilling Project: How to Make a Quilled Unicorn
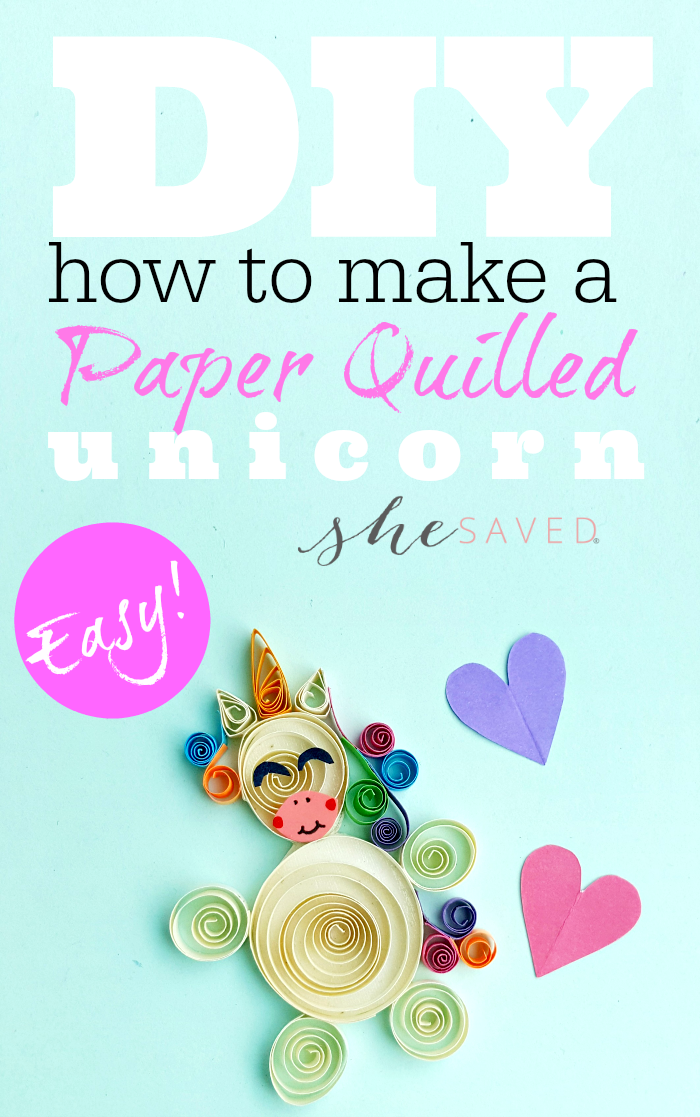
DIY Paper Quilling Project: How to Make a Quilled Unicorn
Another paper quilling project to share with you and this one is a magical quilled unicorn! If you aren’t familiar with paper quilling, it’s a fun and easy paper craft option and wonderful for craft enthusiasts of all ages!
We recently shared this Paper Quilling Flower project with you and it’s been so popular that I’ll be sharing more of our favorites. The best thing about Paper Quilling is that you don’t need very many supplies, it’s very inexpensive and the result are beautiful and detailed paper creations that make great gifts and they also are really cute if you glue them to blank greeting cards. You can even frame your quilled paper creations!
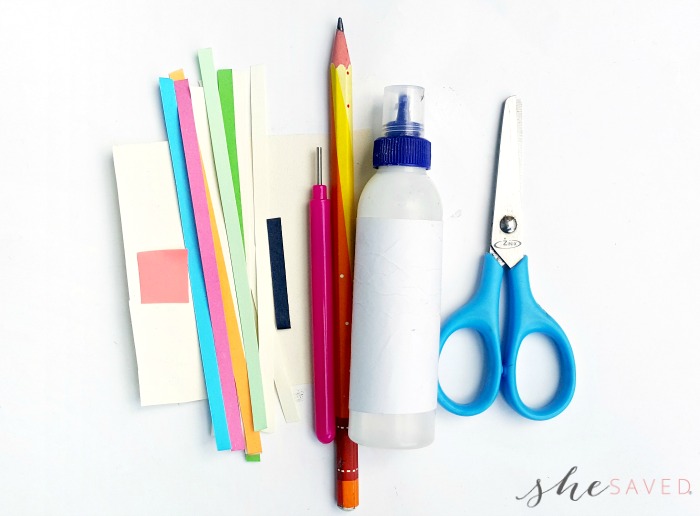
List of Supplies:
- Quilling paper strips
- Craft paper – black , cream and pink
- Craft glue
- Slotted quilling tool
- Scissors
Instructions:
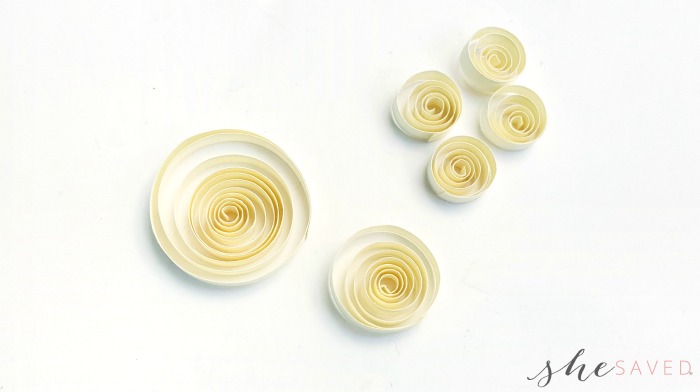
Step ONE
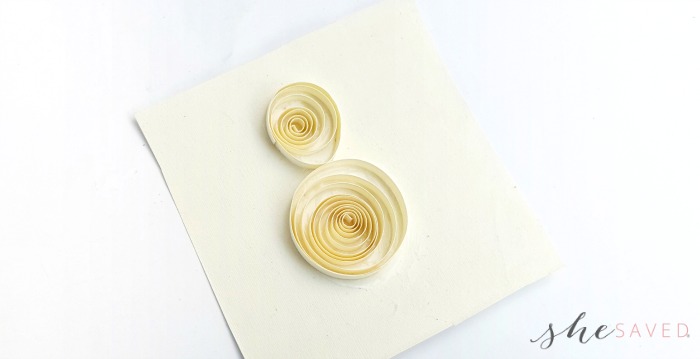
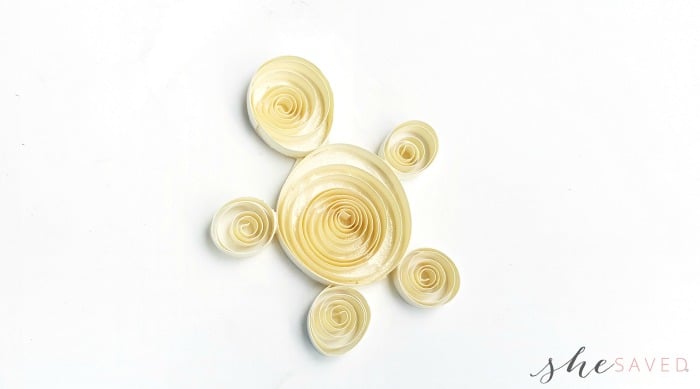
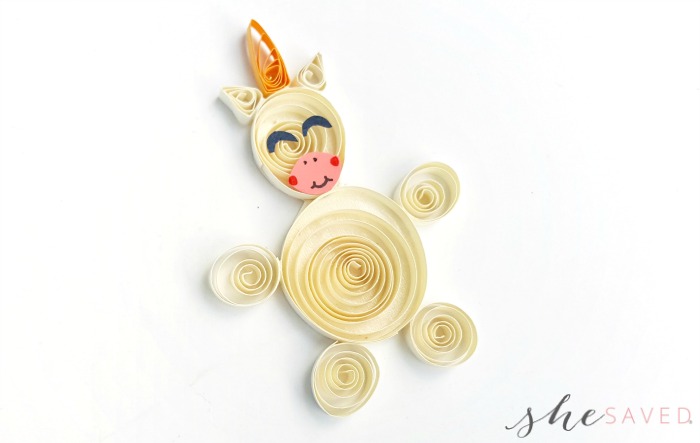
Select a color for the unicorn, I chose cream colored quilling strips. Take 6 quilling strips of the following sizes – one 20 inches, one 12 inches and four 5 inches strips. Prepare loose coil patterns with them. The big coil will be the body, medium coil will be the head and the 4 small coils will be the legs of the unicorn.
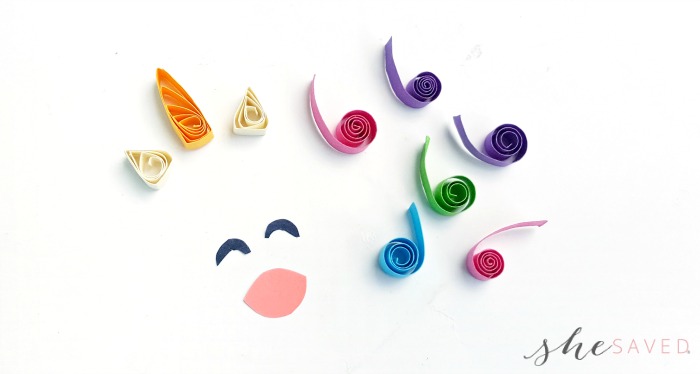
Step TWO
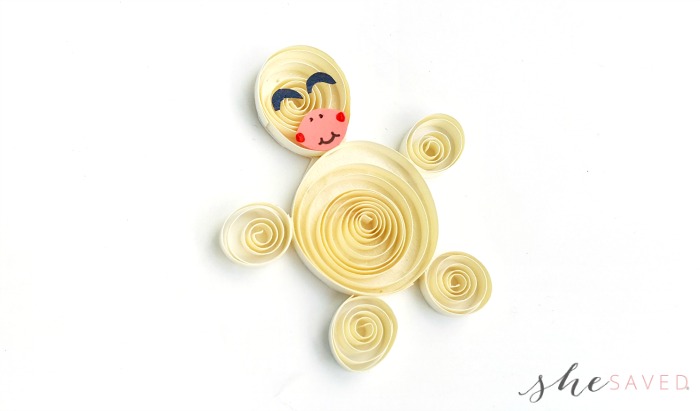
Use different colored strips (1.5 – 2 inches) to create curled pieces for the hair and the tail of the unicorn. Simply coil the strips by keeping one end of the strips open. Use cream quilling strips (2 inches) to create two triangle shapes (the ears) and a different colored (for the horn) strip to create a stretched triangle shape. Cut out a lens shape (mouth) from pink craft paper and 2 closed eye patterns from black craft paper.
Step THREE
Prepare a small piece of cream colored craft paper. Take the big and the medium loose coils and glue them on the paper, placing both coils adjacent to each other. This will create a back for your paper quilled unicorn. If you want to make this piece into a greeting card, you could just create it on a blank card. If you plan on framing your piece, you could also leave it on the backing which might make framing easier as well.
Step FOUR
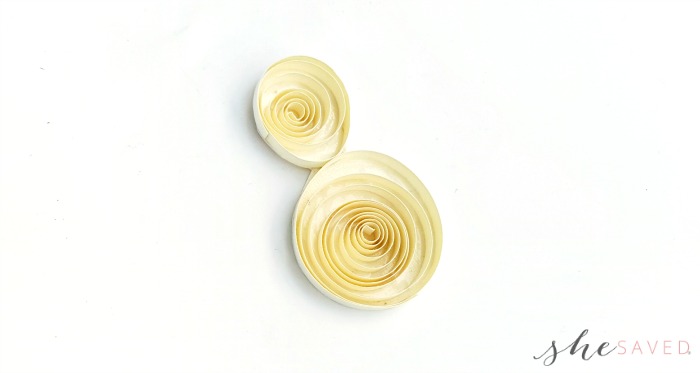
If you choose to cut to cut out your unicorn body then use scissors to cut the paper by tracing around the edges of the glued coils.
Step FIVE
Now take the 4 small loose coils; glue 2 of them at the bottom side of the large coil, and the others on both sides of it.
Step SIX
Carefully and neatly attach the mouth (lens shape) and the eye patterns on the head part. Use a marker to add rosy cheeks, nostrils and a little smile to your unicorn.
Step SEVEN
Attach the ears and the horn on the top end of the head.
Step EIGHT
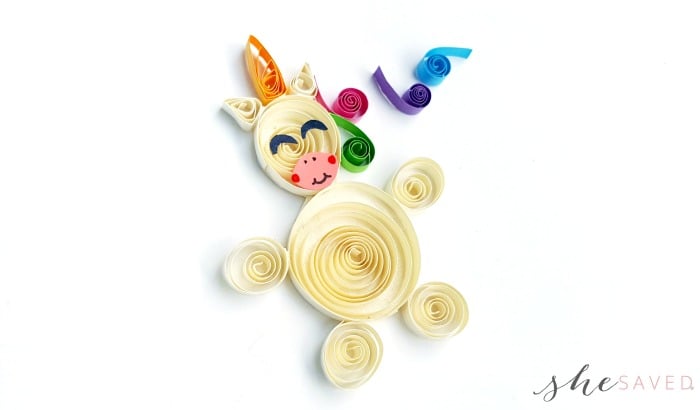
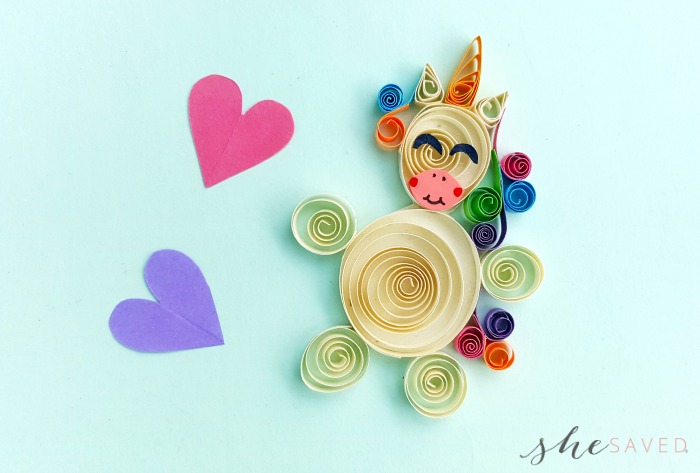
This step is my favorite part as it really brings your unicorn to life and adds so much color and fun! Attach the curled strips with one end open and attach them on any one side of the head, near the ear and attaching the pieces towards the body of the unicorn.

Step NINE
Use the curled pieces to create the tail as well. Once you are done with the unicorn pattern allow the glue to dry.
Isn’t he (or she!) the cutest? Sure to put a smile on any fact, the finished unicorn is magically fantastic!

Meet the author – Keri Lyn
The creative and frugal mind behind She Saved for over 12 years now, Keri Lyn shares her adventures in parenting along with her love for family travel, country living and brand marketing. A self-proclaimed “brand loyalist”, Keri Lyn is known for her strong and enthusiastic voice when it comes to the products and brands that she loves. She Saved has become a community for like-minded consumers who appreciate saving money, time and sanity by getting the best deals on quality products and experiences.
This is the cutest unicorn! Thanks for the great tutorial and sharing it at Merry Monday, see you next week!
I”m sure this would be a great project to work on while watching TV. The unicorn is so cute! Thanks for sharing at #HomeMattersParty