DIY No Sew Scrunchie Craft
Learn how to make your own homemade hair scrunchies at home with this easy DIY no sew scrunchie craft tutorial!
DIY No Sew Scrunchie Craft
Scrunchies are back!
If you didn’t already know they have made their way back into fashion and they make a great frugal project for adults or kids, and especially tweens and teens!
Have you ever wondered how to make a basic scrunchie if you don’t sew or don’t have a sewing machine? I’ve got you! These DIY No Sew Scrunchies are easy and fun to make for yourself or as gifts.
How to Make a Scrunchie
It’s easy! And affordable (you might have fabric scraps on hand OR shop the clearance tables at your favorite craft or fabric store for a piece of fabric that would make for a fun new DIY scrunchie and an easy project – that will also make perfect gifts for anyone that loves hair accessories!)
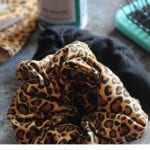
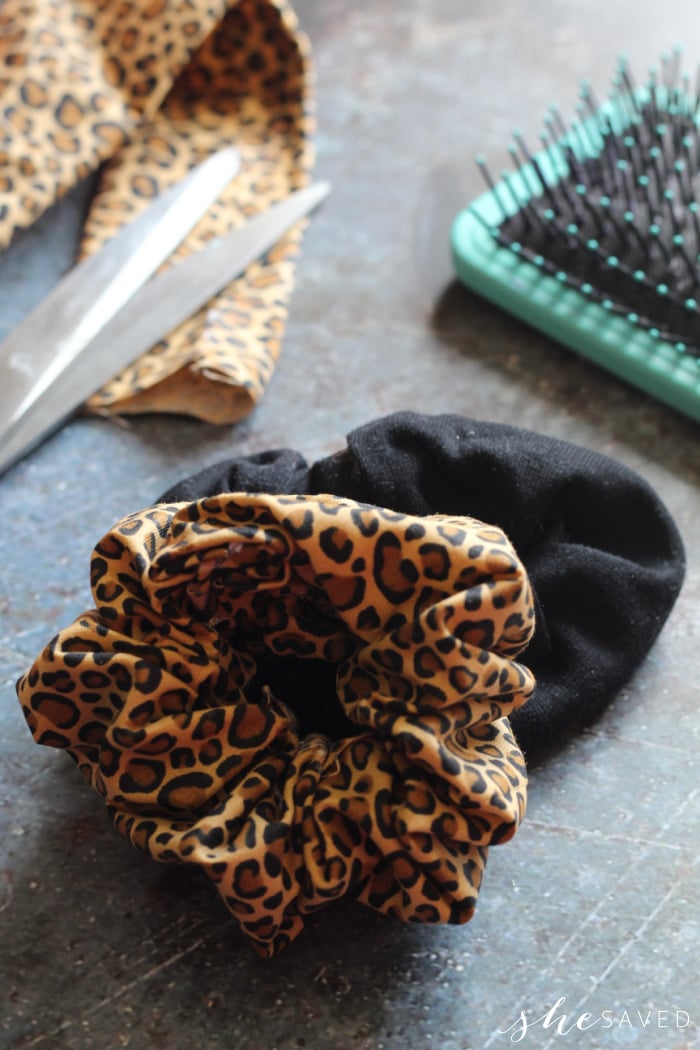
Embrace the trend and use a wide variety of different fabrics. Whip up a batch in as many fabrics and patterns as you like. I think these animal print and black ones are super fun but of course, you can use any fabric that you like! Select a fun fabric just right for a friend or loved one’s favorite style and you have a fabulous little gift of a hair tie to give!
This would also be a fun craft for a little girl or boy just getting started with crafting or sewing and a great way to teach a few basics and a fun new skill.
Supplies for No Sew Scrunchies
Cotton fabric
Elastic
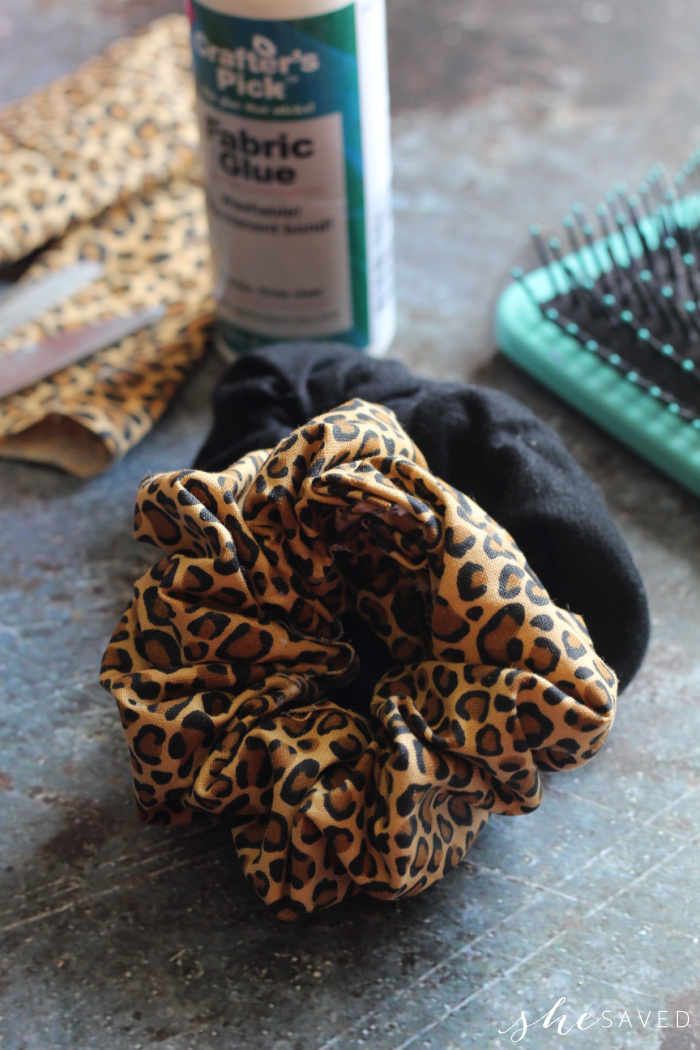
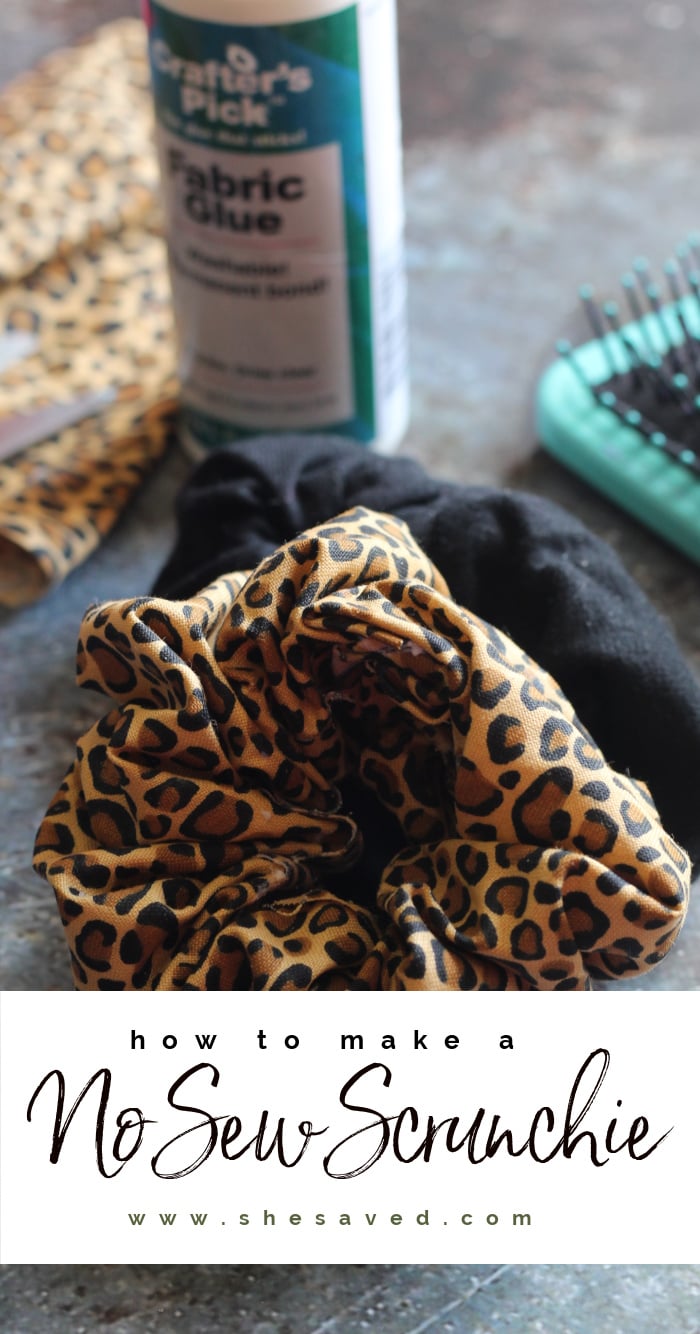
Fabric Glue
Scissors
Measuring tape
How to Make No Sew Scrunchies
Step by step instructions for making these DIY scrunchies:
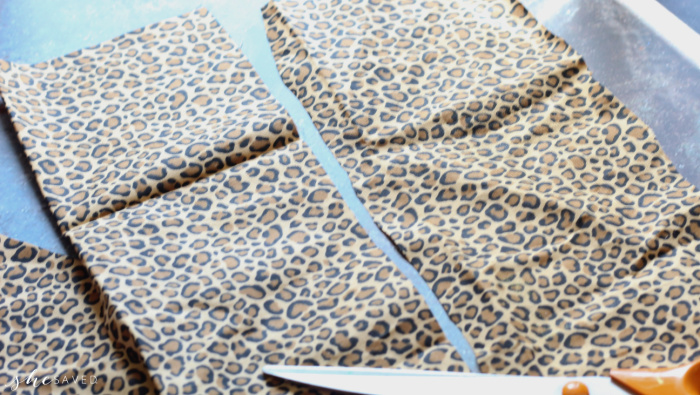
The first thing that you need to do is measure and cut your fabric- if you’re using pre-cut fat quarters like I did they are already at the 18” lengths that we need. You just need to cut them each into a 4-inch strip of fabric .
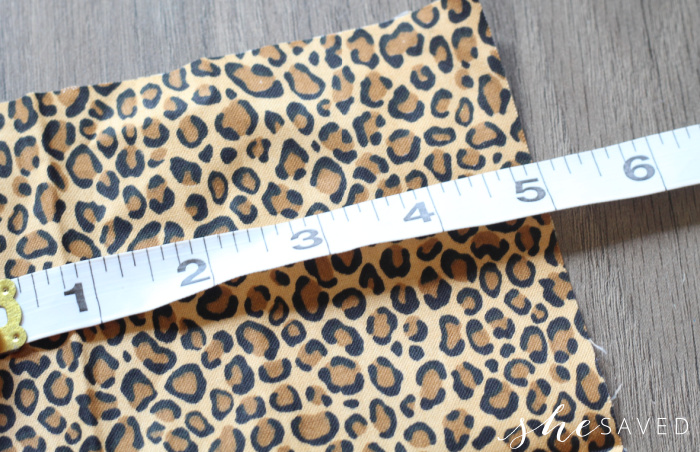
We were able to make four scrunchies out of every fat quarter of fabric. Walmart by far has the best selection of pre-cut fat quarters and they’re only a dollar apiece so it makes a very economical DIY as well. Sometimes you can even find scraps of fabric in the clearance section at Walmart, sometimes the fun thing is searching for the deals and finding a favorite fabric, am I right?
I love finding just the perfect scrap that then ends up being the perfect hair accessory or gift.
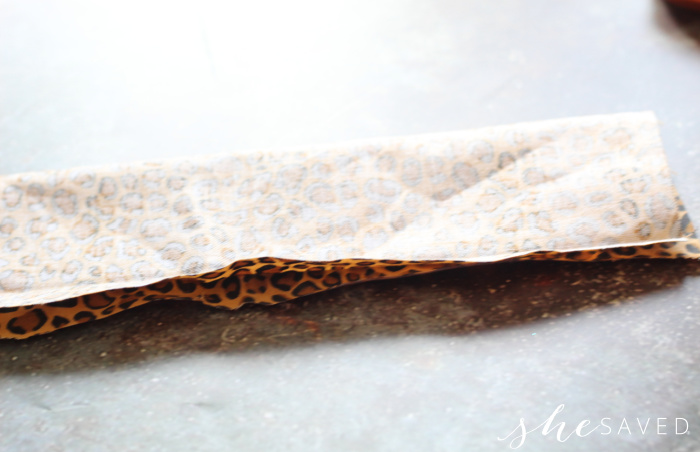
Once you cut your fat quarters into strips you’re going to fold the wrong side to the wrong side leaving a quarter-inch overhang along one length.
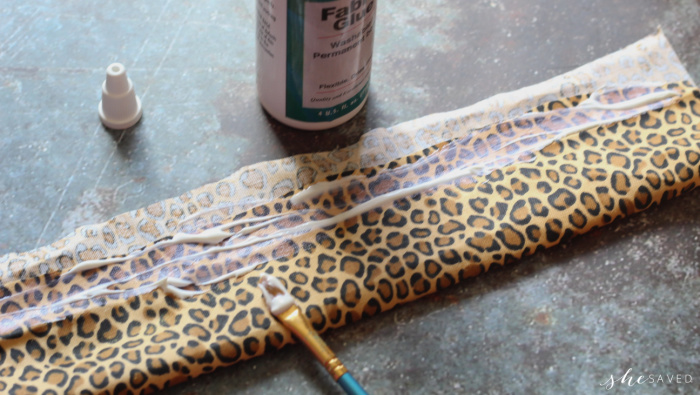
Run a generous bead of fabric glue down the length of the shorter side of the fabric strip. I used a paintbrush to apply it a bit more evenly.
Make sure you are applying the glue to the right sides of the fabric.
*you could also use hot glue along the long raw edges, depending on the type of fabric you use. That would be a really easy way to make these (watch out for burns) if you were rushed or didn’t have fabric glue.
Fold over the quarter-inch excess and press firmly into place to create a seam. You can use a craft stick or something else to press the glue down.
Go ahead and cut and glue as many as you want to make because you need to let the glue dry overnight.
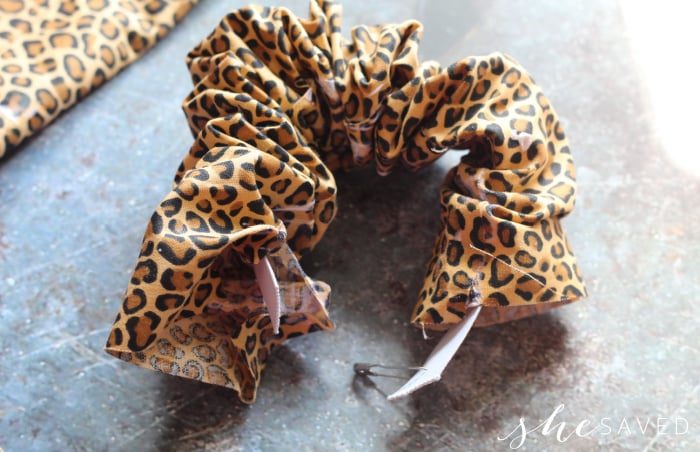
Once the glue is dry cut an 8 ½” piece of elastic strip for every scrunchie you want to make.
Pin a safety pin to one end and work it through the tube of fabric. Be sure not to lose either end.
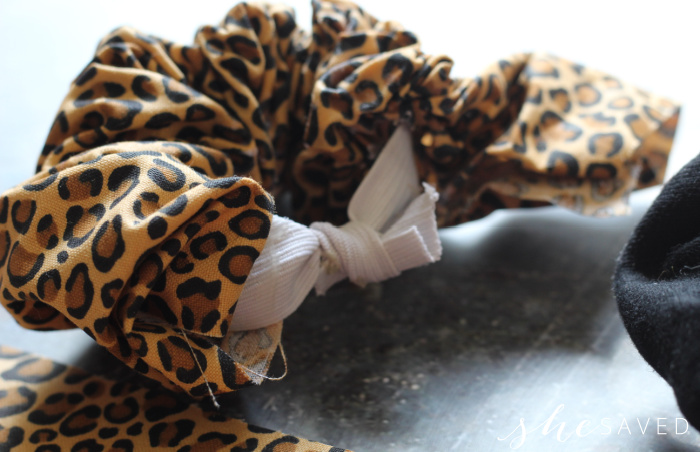
Tie the ends of the elastic into a tight knot, trim off the extra.
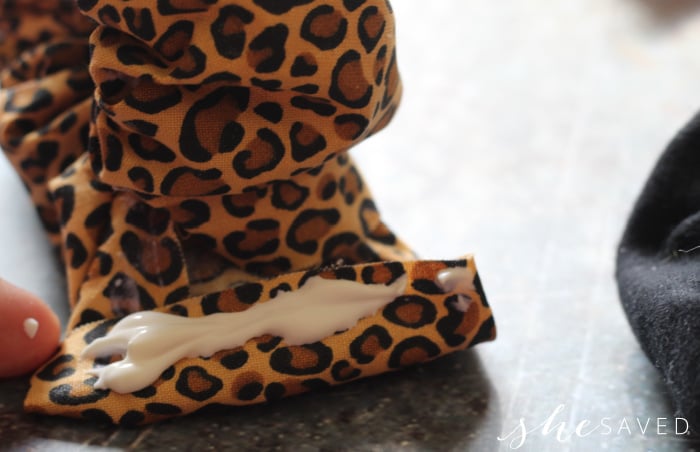
Fold one end of the fabric inward ⅛” to give it a clean edge.
Apply fabric glue and then pull it over the other edge to finish it off. Allow to dry completely.
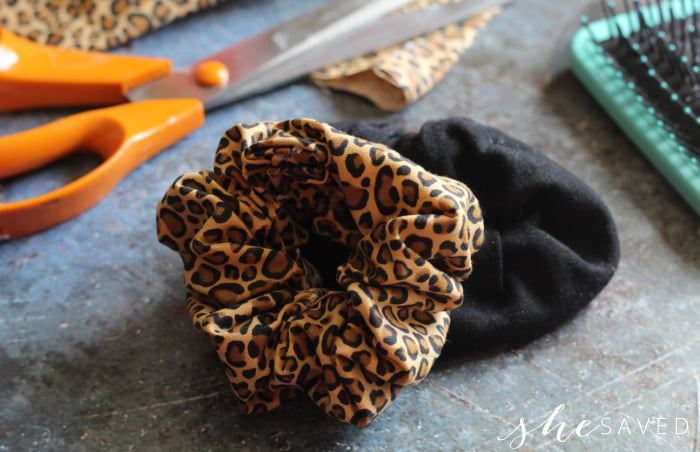
Obviously there are different ways that these can be done and once you get the basics down you can adjust things a little bit to make finished scrunchie hair accessories with all kinds of cute fabric! I love this craft because it doesn’t matter what your skill level is – you can make a lot of scrunchies and it’s a great project to share with young ones just learning to craft and sew. Best of all, this scrunchie tutorial works for both children’s and adult scrunchie accessories.
Who knows, this might be the beginning of your little handmade business!
I think the possibilities are endless once you know how to make a scrunchie, especially with this easy no sew hair scrunchie tutorial! Next you can try a scrunchie bow or a scrunchie headband, it’s all about personal preference and finding different methods the work for you!
Happy sewing (or should I say “no-sewing”), friends!!
More Craft Ideas
Looking for more easy craft ideas for kids? We’ve shared quite a few over the years, here are a few other favorites:
DIY Pom Pom Rainbow Craft
Yarn PomPom Garland Craft
Handmade Unicorn Bookmark
Make sure to follow me on Pinterest for more of my favorite DIY craft and recipe ideas!
Print the Instructions for this No Sew Hair Scrunchie Craft

DIY No Sew Scrunchie Craft
So fun and super affordable, make these DIY no sew hair scrunchies with fabric that you already have OR buy some on the cheap. A fun activity for tweens and teens, this easy to make scrunchie project will be a hit and she can make scrunchies to match all her favorite outfits!
Materials
- Cotton Fabric
- Elastic
- Fabric Glue
Tools
- Scissors
- Measuring tape
Instructions
How to Make No Sew Scrunchies
The first thing that you need to do is measure and cut your fabric- if you're using pre-cut fat quarters like I did they are already at the 18” lengths that we need. You just need to cut them into 4-inch strips.
We were able to make four scrunchies out of every fat quarter. Walmart by far has the best selection of pre-cut fat quarters and they're only a dollar apiece so it makes a very economical DIY as well.
Once you cut your fat quarters into strips you're going to fold the wrong side to the wrong side leaving a quarter-inch overhang along one length.
Run a generous bead of fabric glue down the length of the shorter side, I used a paintbrush to apply it a bit more evenly. Fold over the quarter-inch excess and press firmly into place to create a seam, you can use a craft stick or something else to press the glue down. Go ahead and cut and glue as many as you want to make because you need to let the glue dry overnight.
Once the glue is dry cut an 8 ½” piece of elastic for every scrunchie you want to make. Pin a safety pin to one end and work it through the tube of fabric, be sure not to lose either end.
Tie the ends of the elastic into a tight knot, trim off the extra.
Fold one end of the fabric inward ⅛” to give it a clean edge, apply fabric glue and then pull it over the other edge to finish it off. Allow to dry completely.

Meet the author – Keri Lyn
The creative and frugal mind behind She Saved for over 12 years now, Keri Lyn shares her adventures in parenting along with her love for family travel, country living and brand marketing. A self-proclaimed “brand loyalist”, Keri Lyn is known for her strong and enthusiastic voice when it comes to the products and brands that she loves. She Saved has become a community for like-minded consumers who appreciate saving money, time and sanity by getting the best deals on quality products and experiences.