Paper Quilling Christmas Craft: Quilled Reindeer
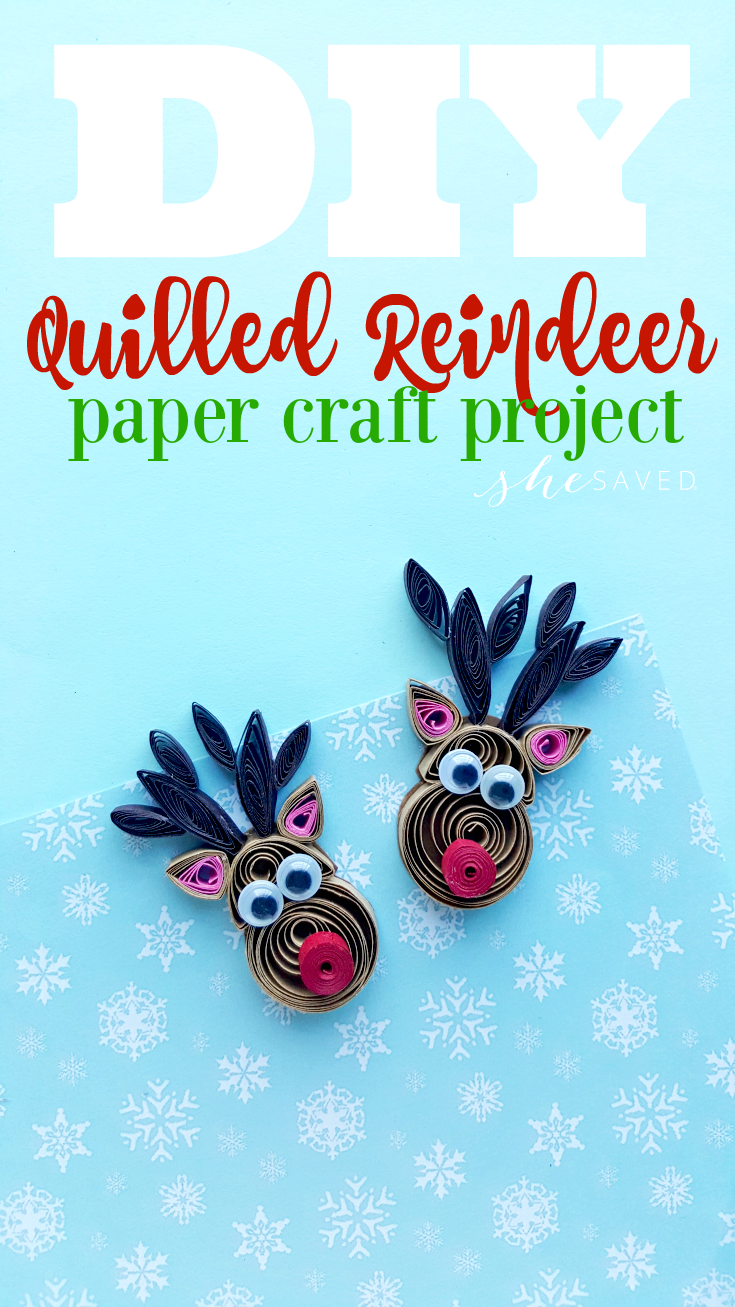
Paper Quilling Christmas Craft: Quilled Reindeer
I love Christmas crafts and this quilled reindeer is such a fun one, great for all ages!
This would be a lovely craft for a classroom and also makes a neat gift idea. We’ve shared quite a few of our DIY projects lately on the blog, and we’ve really been into paper quilling, so make sure to check out our other DIY and Paper Quilling projects here.
My favorite thing about paper quilling is that it’s a very inexpensive hobby that requires very few supplies and the end results are wonderful keepsake art pieces to be enjoyed for years!
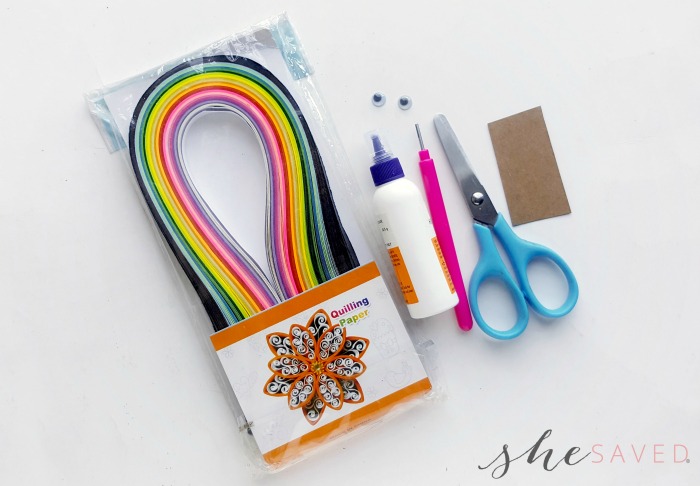
List of Supplies:
- Craft paper – brown
- Quilling strips – light brown, dark brown, pink and red
- Googly eyes
- Scissors
- Craft glue or glue stick
- Slotted quilling tool
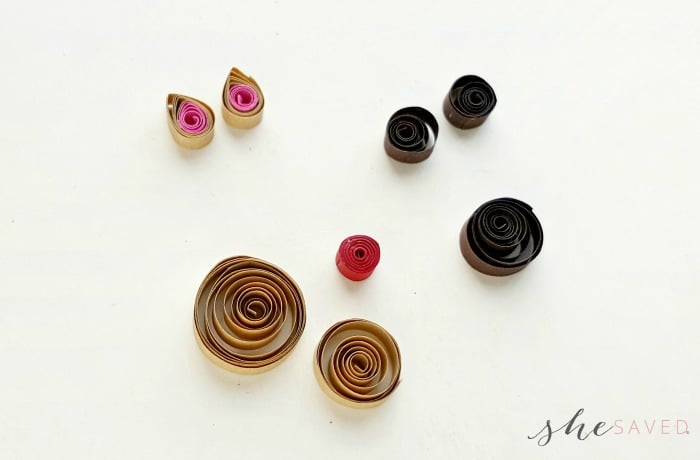
Step 1:
To make the quilled reindeer pattern like these check out the list including each strip color, size and shape made from them-
- 20 inches light brown strip – loose coil
- 12 inches light brown strip – loose coil
- 12 inches dark brown strip (2) – loose coils
- 6 inches loose strips (4) – 2 loose coils
- 12 inches red strip – tight coil
- 3 inches pink strip and 6 inches light brown strip (2 set) – 2 teardrop shapes (with the pink strip inside the shape)
Step 2:
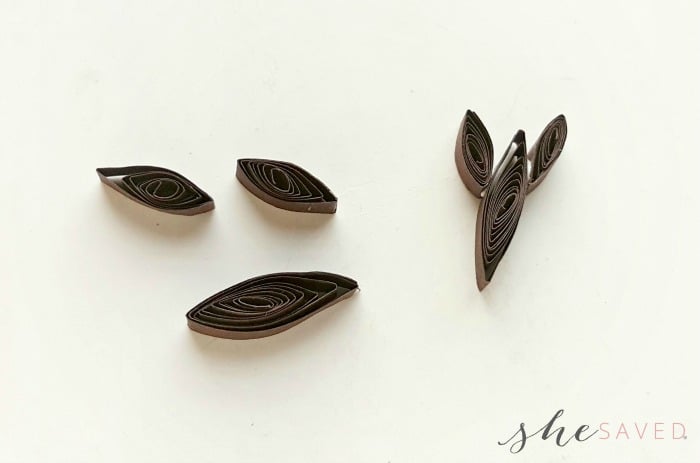
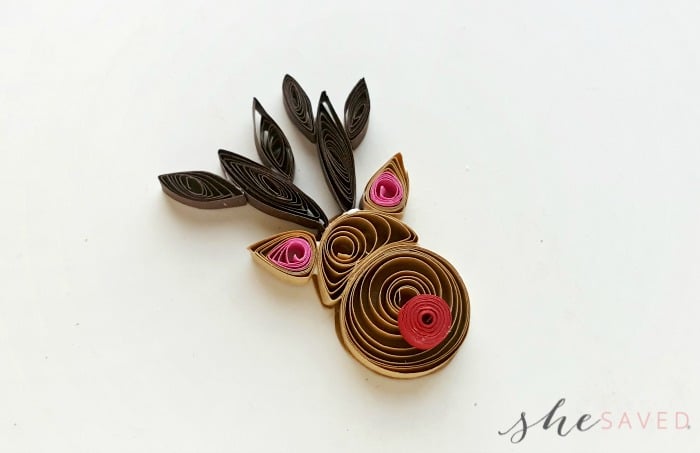
Take any 2 small dark brown loose coils and 1 big dark brown loose coil. Press all of them to create thin lens shapes. Attach the 2 small thin lens shapes on 2 sides of the big thin lens shape. This will be the horn of the reindeer. Similarly make the other horn.
Step 3:
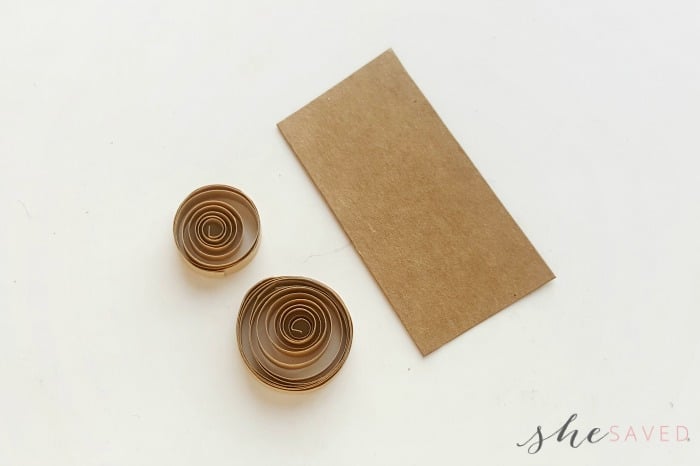
Cut out a small piece of light brown craft paper or cardstock paper and the 2 light brown loose coils.
Step 4:
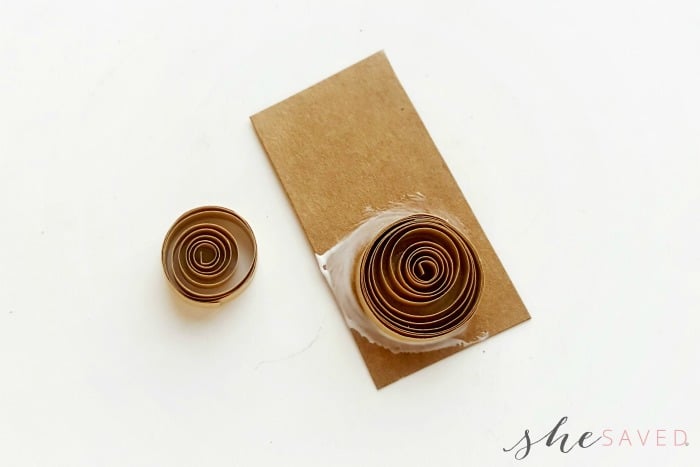
Glue the big loose coil on the craft paper, keeping enough space for the other light brown loose coil.
Step 5:
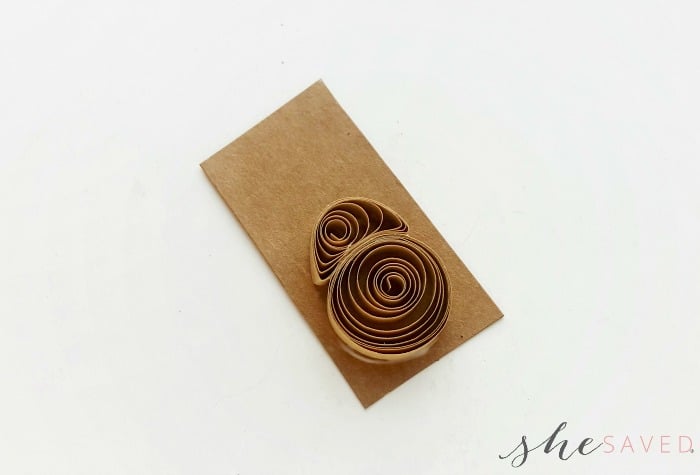
Press the small loose coil and create a half moon shape. Glue the half moon shape on the craft paper, adjacent to the big loose coil. Allow the glue to dry for a while.
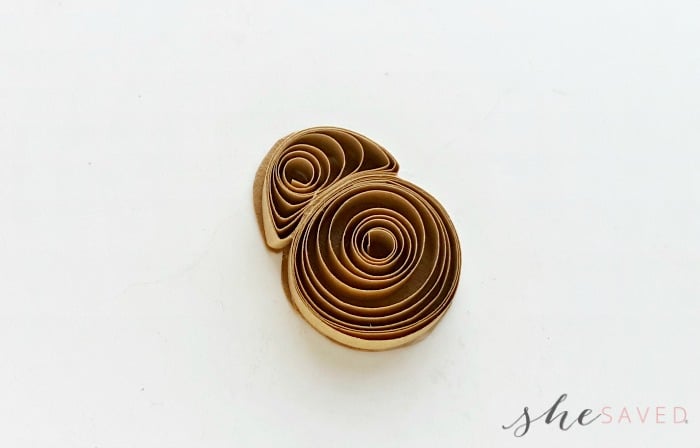
Step 6:
Cut the craft paper around the outer sides of the quilled shapes.
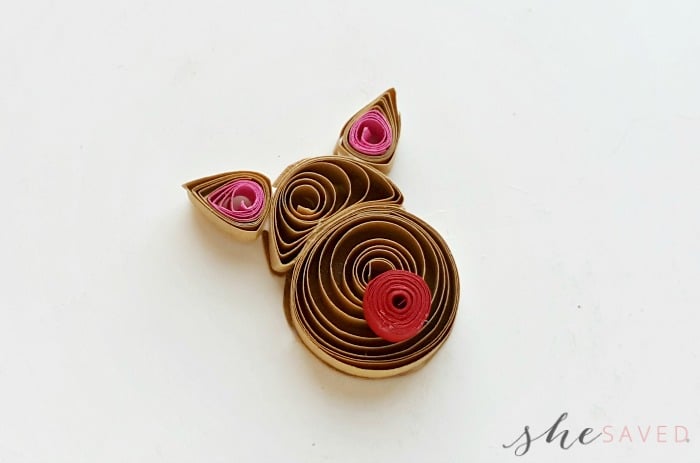
Step 7:
Take the red tight coil and glue it on the light brown loose coil, slightly near its bottom part. Also glue the pink and light brown teardrop shapes (ears) on the top side of the half moon shape.
Step 8:
Take the horn patterns prepared in step two and attach them with the half moon shape, between the ears.
Step 9:
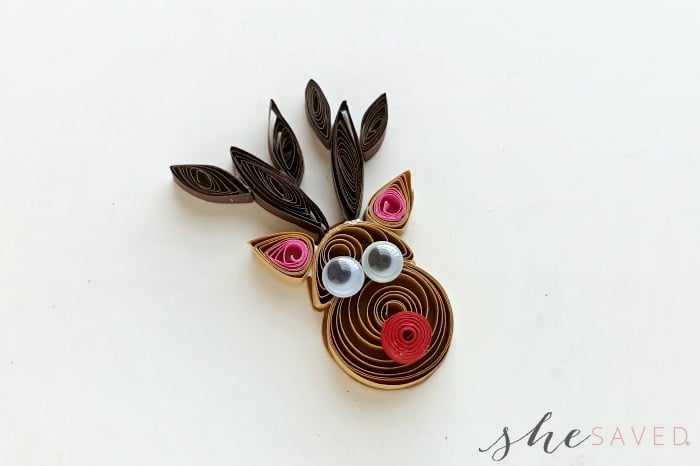
Attach the googly eyes on the half moon shape.

Allow the glue to dry and you are done! You can glue your quilled reindeer to a greeting card or even put him in a frame. Get creative and you can make an entire herd of these cute reindeer!

Meet the author – Keri Lyn
The creative and frugal mind behind She Saved for over 12 years now, Keri Lyn shares her adventures in parenting along with her love for family travel, country living and brand marketing. A self-proclaimed “brand loyalist”, Keri Lyn is known for her strong and enthusiastic voice when it comes to the products and brands that she loves. She Saved has become a community for like-minded consumers who appreciate saving money, time and sanity by getting the best deals on quality products and experiences.