Art & Project Ideas for Kids | Arts and Crafts | FREE Printable | free stuff Free Crayola Printable Easter Coloring Pages and More!
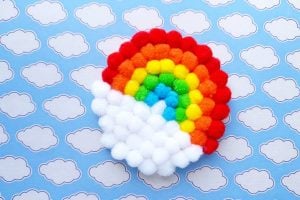
Art & Project Ideas for Kids | Arts and Crafts | Classroom Party Ideas | Fun Stuff to do with the Kids | She's Crafty | She's Creative DIY Pompom Rainbow Craft
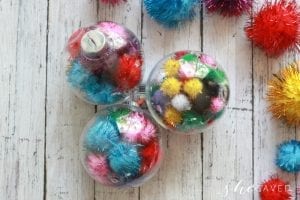
Art & Project Ideas for Kids | Arts and Crafts | Christmas Party Ideas & Recipes | Classroom Party Ideas | Featured Craft | Handmade Christmas Ornaments | Homemade Gift Ideas Easy DIY Pom Pom Ornament Christmas Craft for Kids
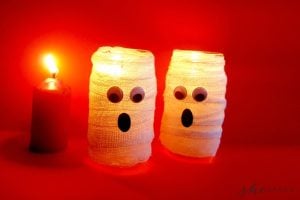
Art & Project Ideas for Kids | Classroom Party Ideas | Fun Stuff to do with the Kids | Halloween Crafts & Recipes | Home Decor Ideas | She's Crafty | She's Creative Easy Halloween Candle Holder
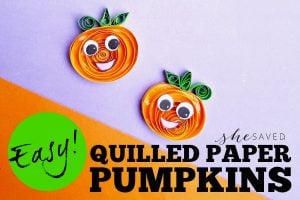
Art & Project Ideas for Kids | Arts and Crafts | Fun Stuff to do with the Kids | Halloween Crafts & Recipes | Homemade Gift Idea | Homemade Gift Ideas | She's Crafty | She's Creative Paper Quilling Craft: Quilled Pumpkin
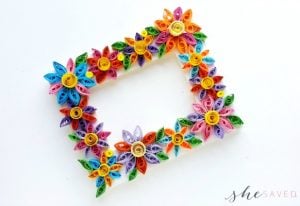
Art & Project Ideas for Kids | Fun Stuff to do with the Kids | Homemade Gift Ideas | She's Crafty | She's Creative Easy Paper Quilling Craft: Quilled Flower Frame
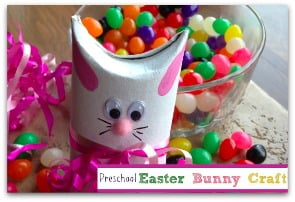
Art & Project Ideas for Kids | Arts and Crafts | Easter Ideas | She's Crafty Toilet Paper Roll Craft: Easter Bunny
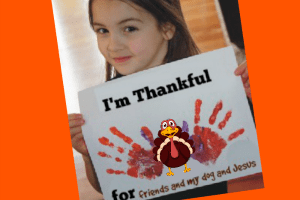
Art & Project Ideas for Kids | Arts and Crafts | Classroom Party Ideas | Fun Stuff to do with the Kids | She's Creative FREE Thankful Turkey Printable for Kids
Art & Project Ideas for Kids | Arts and Crafts | Fun Stuff to do with the Kids Halloween Snack: Oreo Cookie Spiders
Art & Project Ideas for Kids | Fun Stuff to do with the Kids | Homemade Gift Idea Duct Tape Wallet | Perfect For Father’s Day
Art & Project Ideas for Kids | Fun Stuff to do with the Kids Tape Measure Card | Perfect For Father’s Day
Art & Project Ideas for Kids | Arts and Crafts | Classroom Party Ideas | Fun Stuff to do with the Kids | She's Crafty | She's Creative Halloween Arts & Crafts: Pumpkin and Ghost Pop Up Lollipop Puppets