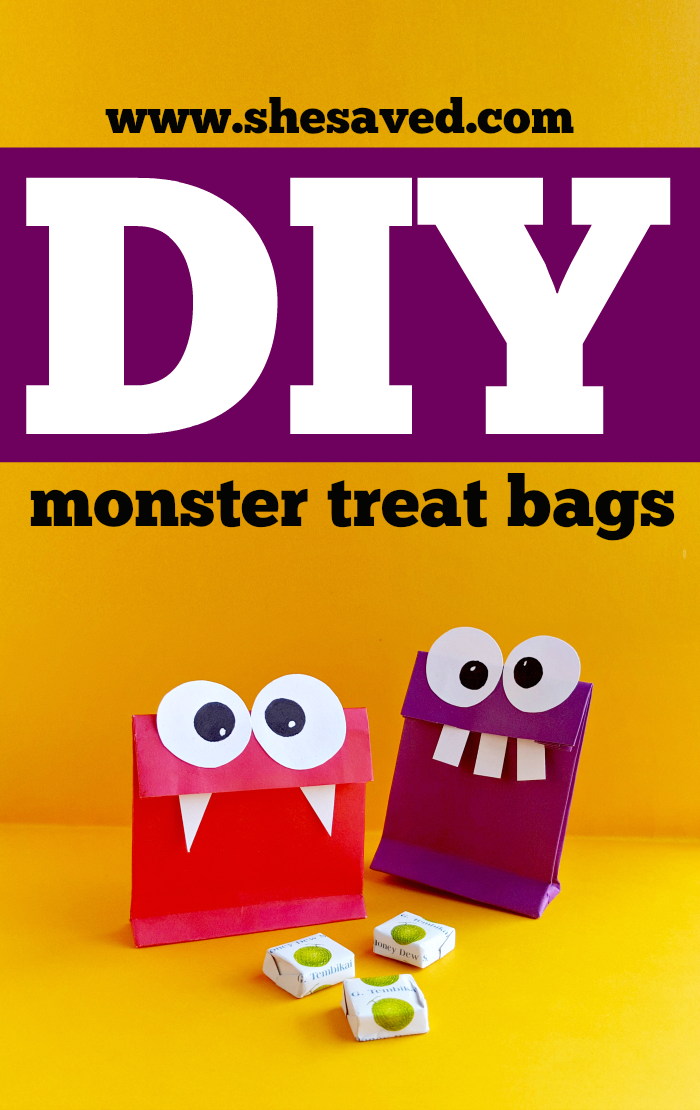
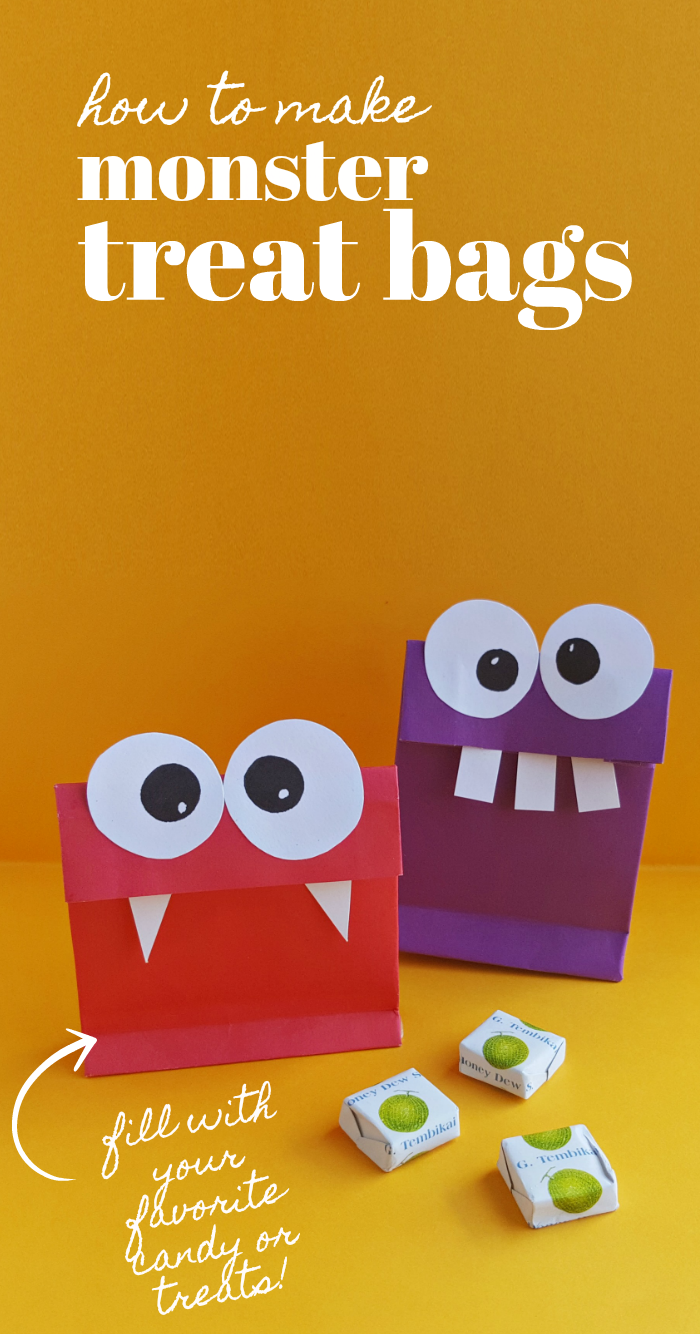
DIY Halloween Craft: Monster Treat Bags
One of my favorite things about parties is coming up with fun ways to share treats.
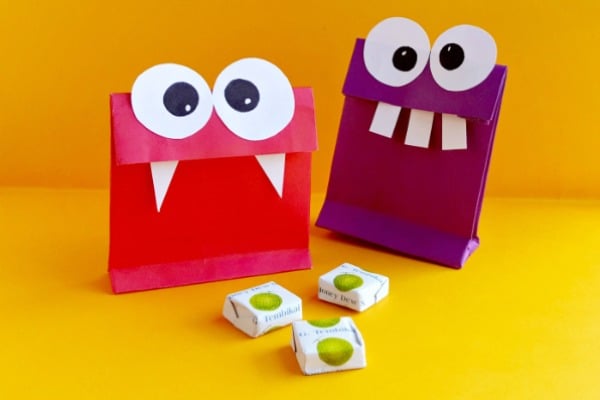
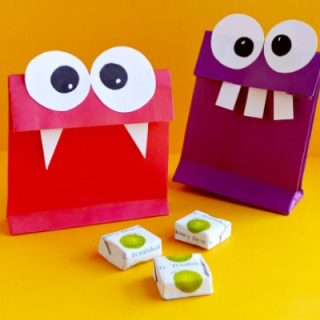
This fun DIY Halloween craft will be a hit when you share these Monster Treat bags filled with your favorite treats!
DIY Halloween Craft: Monster Treat Bags
This craft is also a great way for little ones to work on their cutting and pasting skills and depending on their ages, maybe even some paper folding too!
Either way, it’s a fun craft that you can do together to create some colors monster fun!
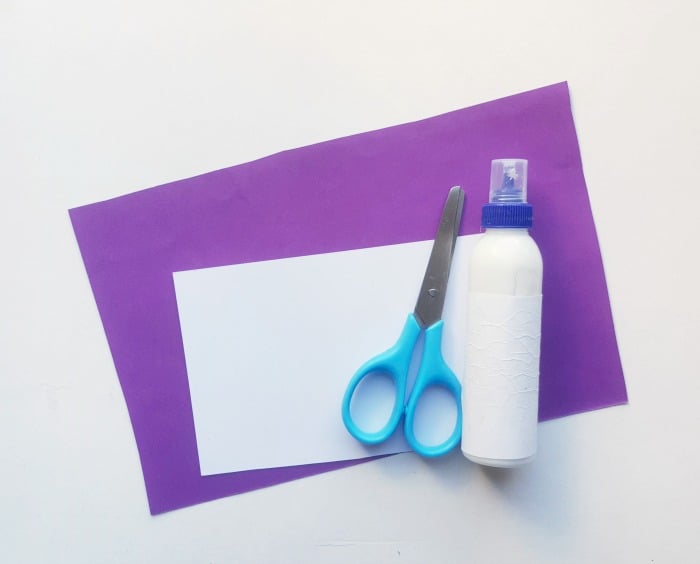
One of my very favorite things about paper crafts like this is that there are very simple and can be made with just a few supplies!
Supplies for making Monster Treat Bags for Halloween
- Colored craft paper
- Craft glue
- Scissors
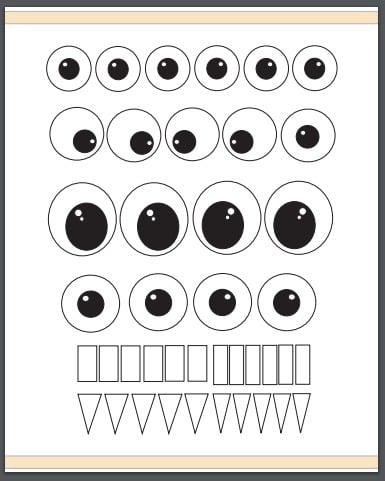
- Monster Eyes and Teeth FREE Printable (printed)
How to Make Monster Treat Bags
To make things extra simple for you, we’ve compiled these instructions into a video to show you how to make these Monster Treat bags:
Instructions for making Monster Treat Bags
*make sure to watch the step by step video to see how to make these bags. I’ll also be uploading photos in the next few days for those that can’t see the video.
Step ONE:
Select a colored craft paper and cut out a rectangular shape (14.5 inch x 8 inch). By keeping about 0.5 inch intact along any one side of the width, fold the 14 inch into half.
Step TWO:
Apply glue along the 0.5 inch part; fold and stick the glued part with the other open end of the folded paper.
Step THREE:
Fold up 2 inches of the folded paper from any one open ends; do not fold the closed ends.
Step FOUR:
Keep the paper on a flat surface and open the bottom side of it from a side; this will create a triangular pattern on that side.
Step FIVE:
Similarly open the other side of the bottom and flatten the open parts neatly. This will create 2 open sides, like flaps.
Step SIX:
Hold any one of the open sides and fold half of it downwards.
Step SEVEN:
Similarly hold the other open side and fold half of it upwards, overlapping the open edge of the previous side. Apply glue along the overlapped parts to secure the bottom of the bag.
Step EIGHT:
Notice the 2 squares formed on both sides of the bottom. Fold along the sides (left and right). Match the opposite corners of the squares on the sides of the bottom part to make perfect fold along the left and right side. This will create crease lines on both front and back side of the bag and a center line for each pair of creases.
Step NINE:
Unfold the folds and pop open the bag.
Step TEN:
Carefully tuck the center line (on both sides) inwards and the bag will be ready.
Step ELEVEN:
Print out the Monster Eyes and Teeth FREE Printable and cut out the eyes and teeth you like.
Step TWELVE:
Take the bag and fold 2 inches from the top open end. Stick the eyes on the folded part, keeping about half of the eye outside the folded part.
Step THIRTEEN:
Similarly glue the other eye.
Step FOURTEEN:
Glue the tooth inside (between the 2 parts of the fold) the fold along the top open end. One by one attach the other details of the bat to complete the bag.
Allow the glue to dry.
Wouldn’t these treat bags be fun for a classroom Halloween party?
You could even pass them out during story time in which you read some fun monster books!
There are so many different ways you could turn this into a learning activity as well: counting monster teeth, eyes (monsters can have more than two eyes!), bag colors and more!
This craft doesn’t just have to be used for Halloween! This would also make for a fun treat bag for a Monster Themed Birthday party!
So many fun ways to incorporate these happy monsters into a treat that kids will love and you’ll enjoy it because it’s so simple and affordable! Those are our favorite kinds of activities.
Here’s hoping that you have a monsterously wonderful time with your little monsters enjoying these fun Monster treat bags!
DIY Halloween Craft: Monster Treat Bag
This fun DIY Halloween craft will be a hit when you share these Monster Treat bags filled with your favorite treats!
Materials
- Colored craft paper
- Craft glue
- Monster Eyes and Teeth FREE Printable (printed)
Tools
- Scissors
Instructions
Step ONE:
Select a colored craft paper and cut out a rectangular shape (14.5 inch x 8 inch). By keeping about 0.5 inch intact along any one side of the width, fold the 14 inch into half.
Step TWO:
Apply glue along the 0.5 inch part; fold and stick the glued part with the other open end of the folded paper.
Step THREE:
Fold up 2 inches of the folded paper from any one open ends; do not fold the closed ends.
Step FOUR:
Keep the paper on a flat surface and open the bottom side of it from a side; this will create a triangular pattern on that side.
Step FIVE:
Similarly open the other side of the bottom and flatten the open parts neatly. This will create 2 open sides, like flaps.
Step SIX:
Hold any one of the open sides and fold half of it downwards.
Step SEVEN:
Similarly hold the other open side and fold half of it upwards, overlapping the open edge of the previous side. Apply glue along the overlapped parts to secure the bottom of the bag.
Step EIGHT:
Notice the 2 squares formed on both sides of the bottom. Fold along the sides (left and right). Match the opposite corners of the squares on the sides of the bottom part to make perfect fold along the left and right side. This will create crease lines on both front and back side of the bag and a center line for each pair of creases.
Step NINE:
Unfold the folds and pop open the bag.
Step TEN:
Carefully tuck the center line (on both sides) inwards and the bag will be ready.
Step ELEVEN:
From the template print and cut out the eyes and teeth you like.
Step TWELVE:
Take the bag and fold 2 inches from the top open end. Stick the eyes on the folded part, keeping about half of the eye outside the folded part.
Step THIRTEEN:
Similarly glue the other eye.
Step FOURTEEN:
Glue the tooth inside (between the 2 parts of the fold) the fold along the top open end. One by one attach the other details of the bat to complete the bag.
Allow the glue to dry.

Meet the author – Keri Lyn
The creative and frugal mind behind She Saved for over 12 years now, Keri Lyn shares her adventures in parenting along with her love for family travel, country living and brand marketing. A self-proclaimed “brand loyalist”, Keri Lyn is known for her strong and enthusiastic voice when it comes to the products and brands that she loves. She Saved has become a community for like-minded consumers who appreciate saving money, time and sanity by getting the best deals on quality products and experiences.