DIY Growth Chart
Little ones grow so fast that it seems hard to keep up with them at times.
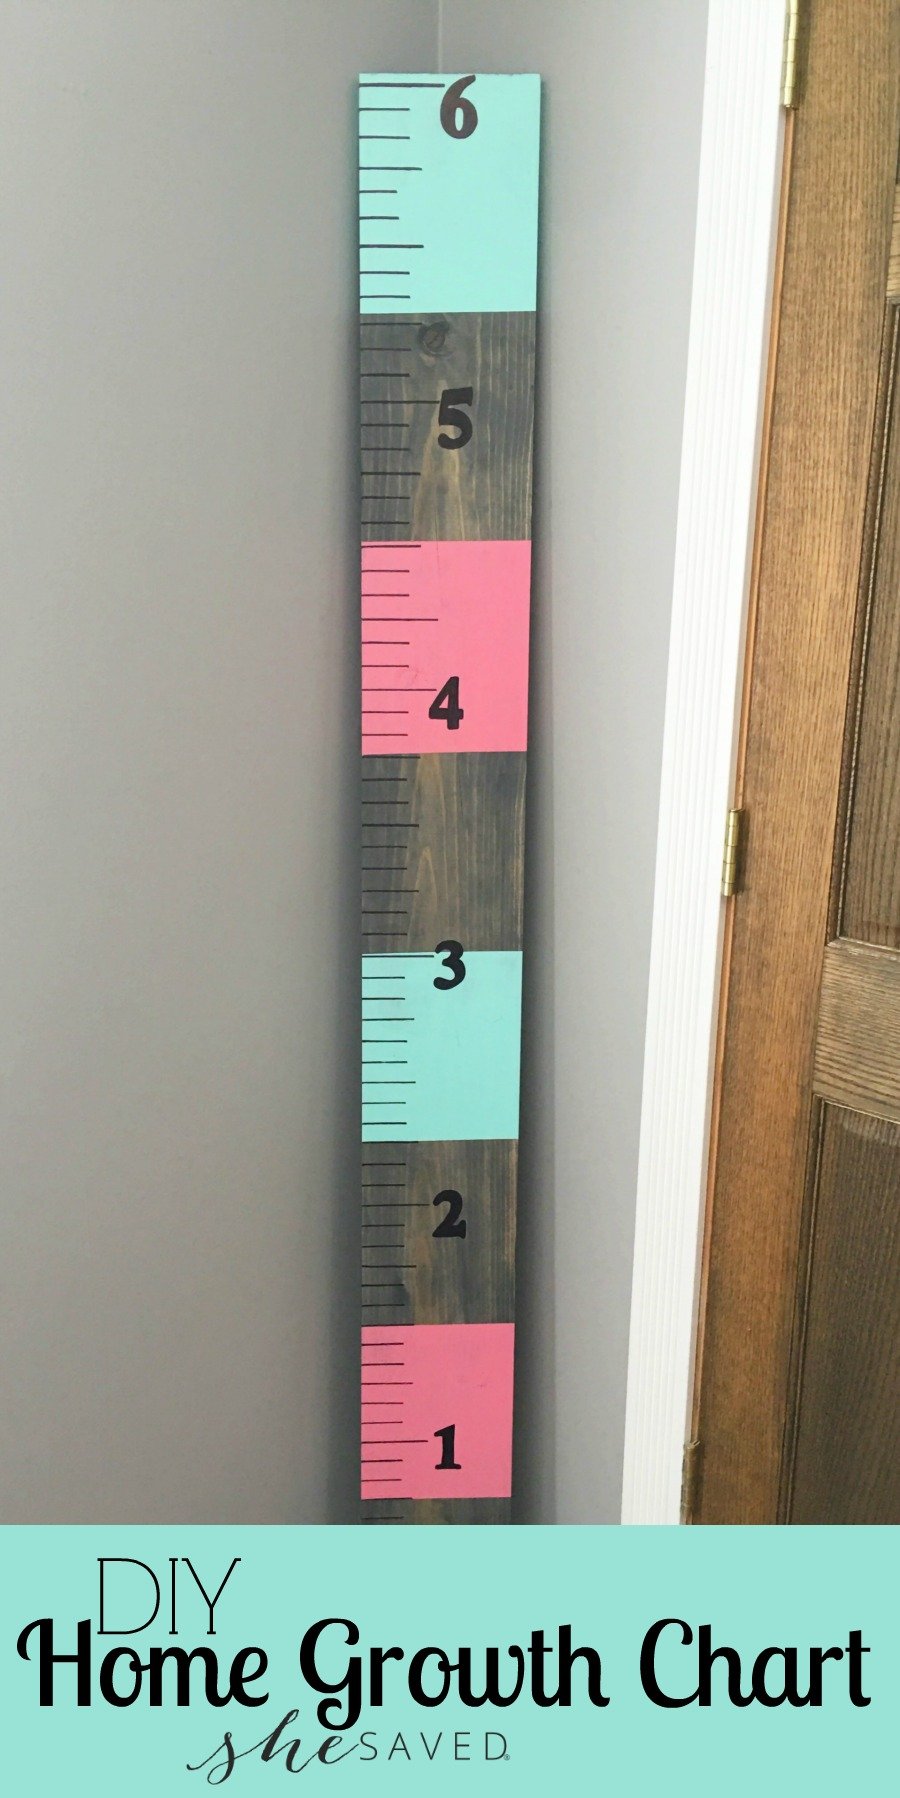
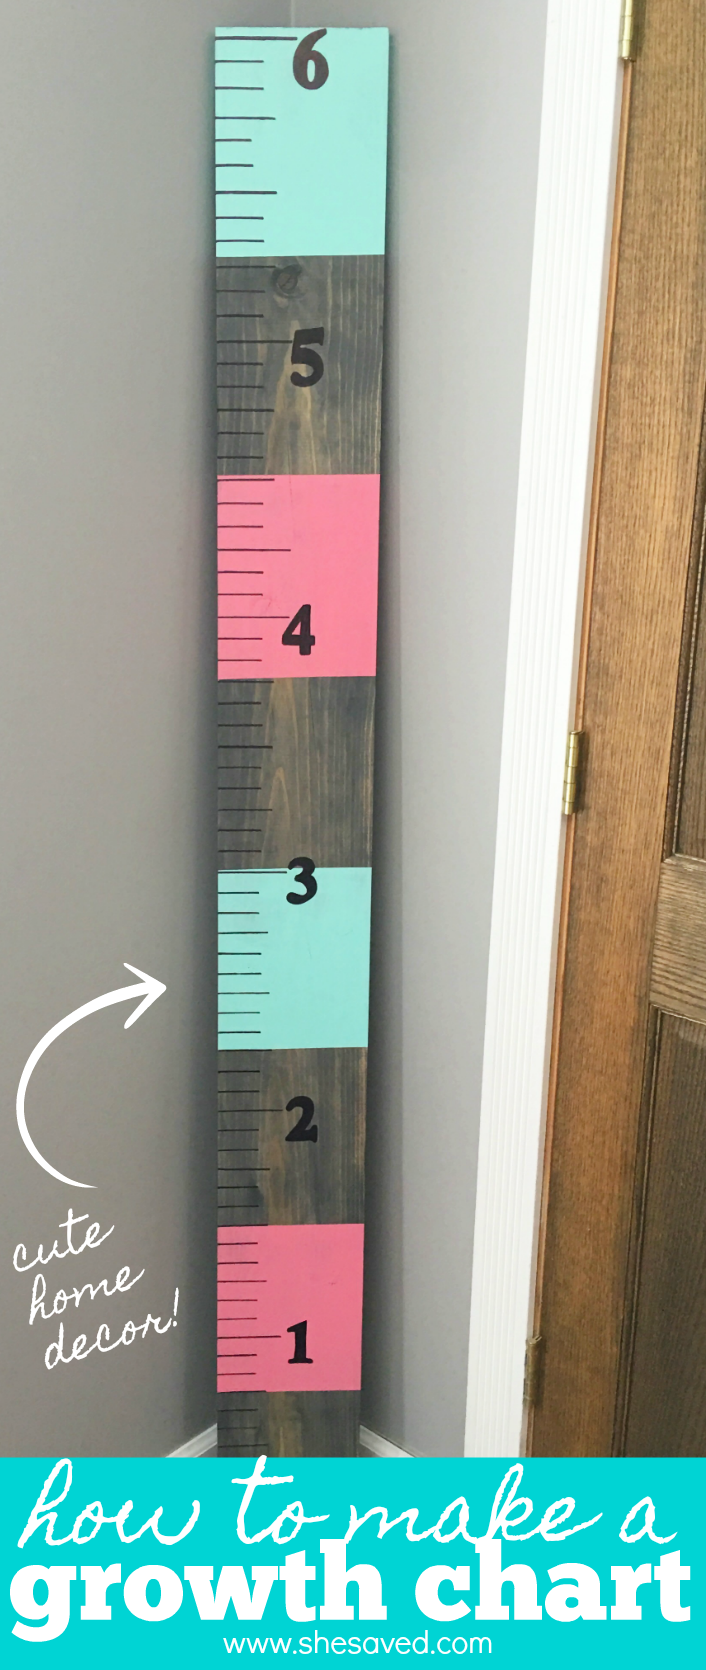
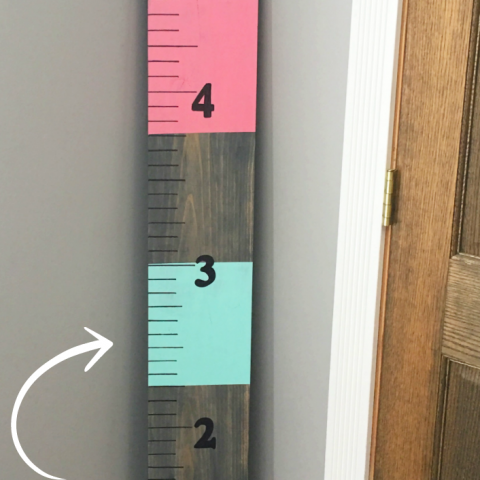
Creating a fun home wooden DIY Growth Chart that looks like a ruler from a bit of wood and paint will make wonderful memories to look back on through the years as your child grows.
Not only is this a great way to spare your walls (says the lady who had her pantry wall covered in sharpie marker growth notes!) but it is also a nice way to be able to take your Home Growth Chart with you should you move!
I also love the idea of giving this as a gift! Very inexpensive to make, but it will be come a cherished keepsake as the years pass by!
Make Your Own Children’s DIY Growth Chart
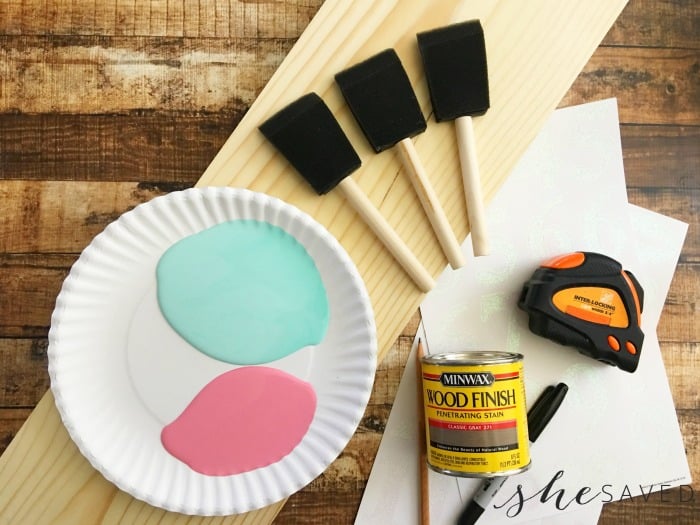
Materials for making a Growth Chart from Wood
- 1x8x6″ common board
- Classic gray stain
- Teal and pink indoor paint
- 3 foam paint brushes
- Painters tape
- Black sharpie marker
- Tape measure
- Large 3″ stickers
- Pencil
How to make a Growth Chart out of Wood
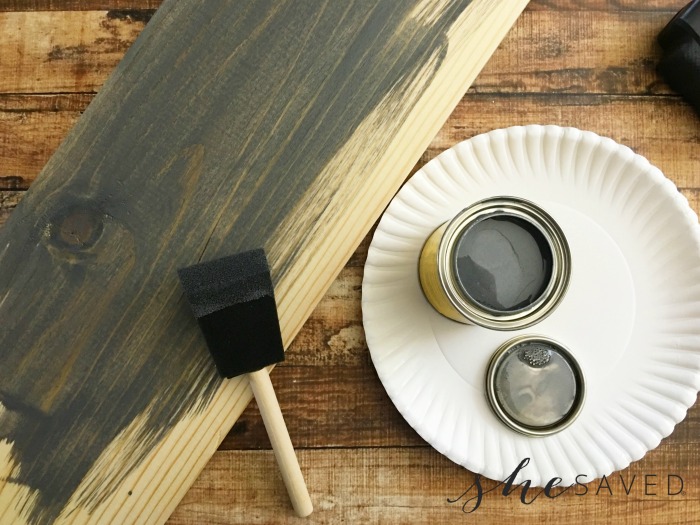
1. In a well ventilated area, use a foam paint brush to stain your wood board, and let dry
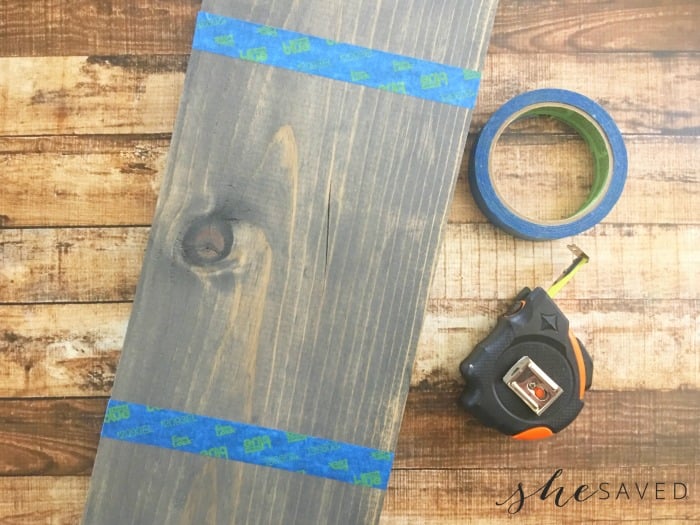
2. Because you want this growth chart to look like a giant ruler, you’ll tape your board off in 9″ sections (but since you will be painting every other section, you will need to tape it so that every other stripe is outlined by the tape)
3. Press your tape onto the board tightly

4. Paint the 1st and 5th section with about 4 coats of teal paint
5. Paint the 3rd and 7th section of your board with 4 coats of your pink paint

6. Carefully peel your tape off while your paint is still damp and let your paint dry for a few hours
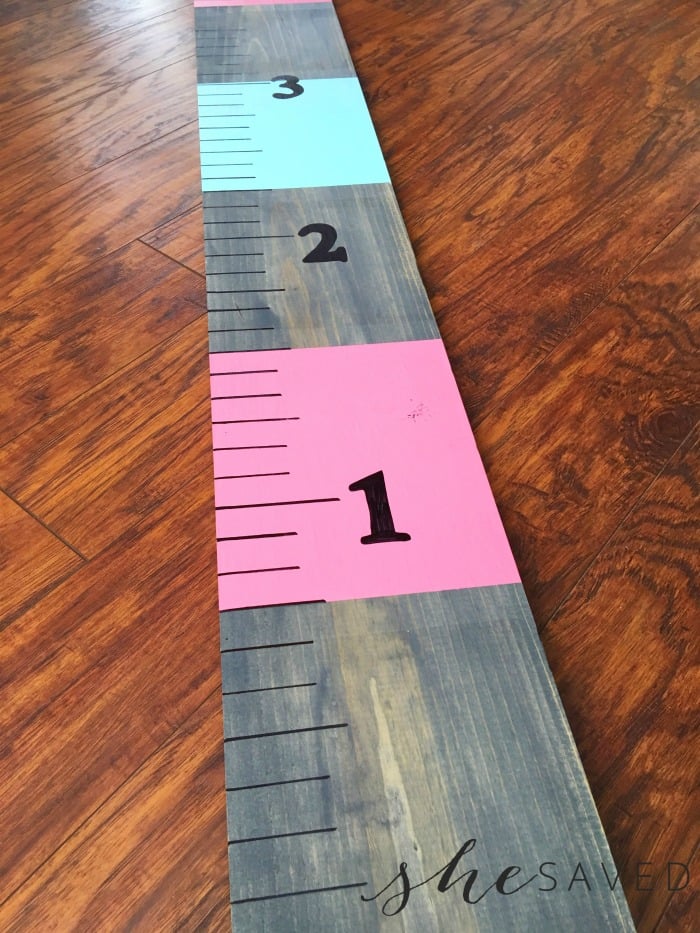
7. Place your tape measure from the top of your board to the bottom and use a pencil to mark every inch
8. Use a ruler and a sharpie to draw straight lines over your pencil marks (2 short, 1 long, and then at the foot mark, draw a little longer)
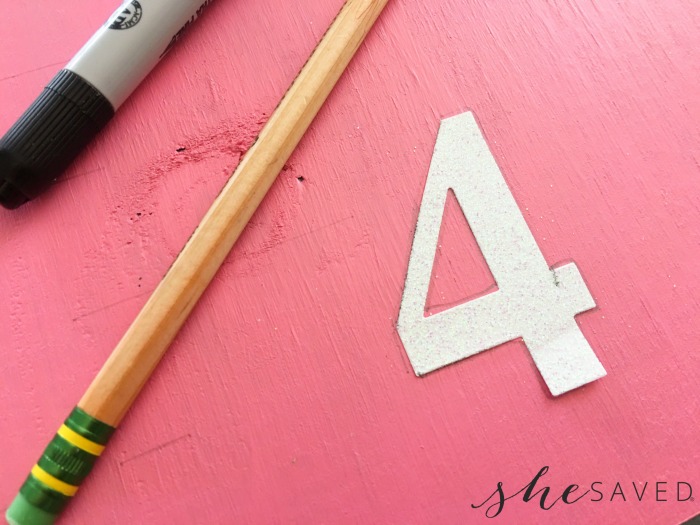
9. Stock on your number stickers to mark off each foot and trace with a pencil
10. Peel your stickers off and use your sharpie to trace and fill in your numbers
** if you want to hang above your baseboard, start the bottom of your measuring chart at 6″ instead of 1″
Easy, right? These not only make great fits, but this is also a wonderful item to consider making for craft shows and sales. Very little cost, and something that almost every mama can appreciate!
Wouldn’t this homemade growth chart make a great baby shower gift idea?
Love this DIY craft? Make sure to check out my other fun homemade gift ideas, such a fun way to show your love and give gifts from the heart!
Also, make sure to follow She Saved on Pinterest for more fun DIY craft ideas, recipes and more!
Print the Instructions for Making Your Own DIY Wooden Growth Chart
DIY Growth Chart
A great baby shower gift idea and a fun addition to your home decor, follow our tutorial to make this darling DIY Growth Chart that is a great way to track the height of your children as they grow!
Materials
- 1x8x6" common board
- Classic gray stain
- Teal and pink indoor paint
- 3 foam paint brushes
- Painters tape
- Black sharpie marker
- Tape measure
- Large 3" stickers
- Pencil
Tools
- 1. In a well ventilated area, use a foam paint brush to stain your wood board, and let dry
- 2. Tape your board off in 9" sections (but since you will be painting every other section, you will need to tape it so that every other stripe is outlined by the tape)
- 3. Press your tape onto the board tightly
- 4. Paint the 1st and 5th section with about 4 coats of teal paint
- 5. Paint the 3rd and 7th section of your board with 4 coats of your pink paint
- 6. Carefully peel your tape off while your paint is still damp and let your paint dry for a few hours
- 7. Place your tape measure from the top of your board to the bottom and use a pencil to mark every inch
- 8. Use a ruler and a sharpie to draw straight lines over your pencil marks (2 short, 1 long, and then at the foot mark, draw a little longer)
- 9. Stock on your number stickers to mark off each foot and trace with a pencil
- 10. Peel your stickers off and use your sharpie to trace and fill in your numbers
- ** if you want to hang above your baseboard, start the bottom of your measuring chart at 6" instead of 1"

Meet the author – Keri Lyn
The creative and frugal mind behind She Saved for over 12 years now, Keri Lyn shares her adventures in parenting along with her love for family travel, country living and brand marketing. A self-proclaimed “brand loyalist”, Keri Lyn is known for her strong and enthusiastic voice when it comes to the products and brands that she loves. She Saved has become a community for like-minded consumers who appreciate saving money, time and sanity by getting the best deals on quality products and experiences.