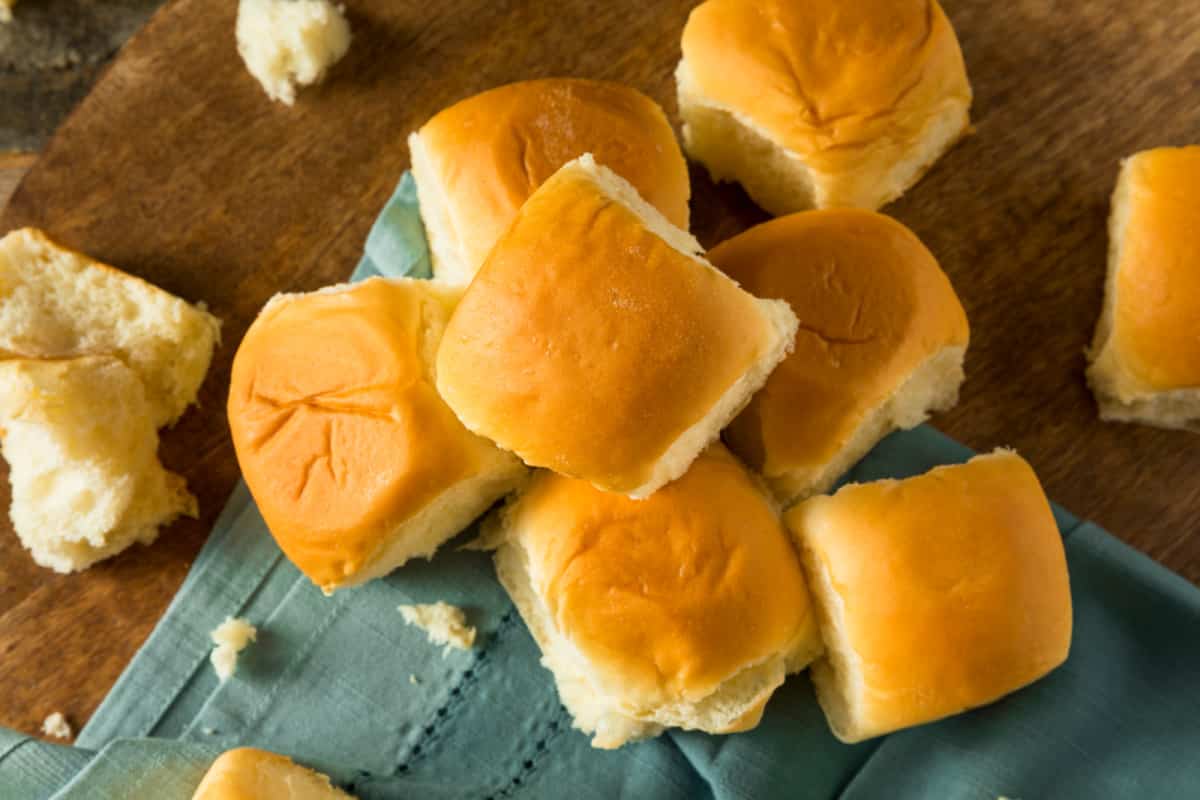
Funeral Sandwiches Recipe

Have you ever had funeral sandwiches? This funeral sandwich recipe (also often called Hawaiian Sliders or Ham and Cheese Sliders) is one of our favorite simple recipes and makes one of the best sandwiches so we make these quite often!

Funeral Sandwiches Recipe
Wondering why they call them funeral sandwiches? I think it’s because they are a quick and easy – and some times last minute – great recipe to make for grieving family members. This makes them a great funeral sandwich recipe, although we obviously eat them all year long. Sometimes it’s hard to come up with funeral foods, so I also think that these easy funeral rolls are a great and inexpensive solution to feed a lot of people this type of sandwich quickly.
And good food gifts are always welcome so if you are making these for a family during a difficult time, I know they will be greatly appreciated!
Ingredients for Funeral Sandwiches
- Hawaiian sweet rolls (we prefer King’s Hawaiian Rolls)
- Thinly sliced ham (Honey Ham works great)
- Swiss Cheese (thin slices)
- Melted Butter
- Dijon Mustard
- Poppy Seeds
- Onion Powder
- Worcestershire sauce
- Salt, or to taste
- Pepper, or to taste
How to Make Funeral Sandwiches
- Preheat oven to 350F.
- Cut each roll in half, lengthwise and place bottom halves on the bottom of a baking pan or casserole dish. *You might consider lining the bottom of your baking dish or pan with aluminum foil for easy clean up of the bottom of the pan.

- Layer bottom half of the rolls with a slice of ham and on top of the ham place a slice of swiss cheese. Place the top half of the rolls back on.
- In a bowl, mix together the butter, dijon mustard, Worcestershire sauce, poppy seeds and onion powder. Brush generously over the tops of the rolls.
- Let sit for 10-20 minutes.
- Bake uncovered on the center rack for 10-15 minutes or until cheese is melted and bun tops are a light golden color.

The best part about these hot sandwiches is that funeral sandwiches are great for a large group of people and you can throw them together quickly with little prep or expense. They are one of our favorite party foods, but I also make them every now and then for a quick lunch or dinner recipe and then serve them with a side salad.
Great Recipe for Leftover Ham
During the holidays, they are a great way to use up leftover ham. Such an easy recipe and while they have a kind of depressing name, they definitely are not depressing to eat! The ultimate comfort food, I usually make extra and store them wrapped in tin foil and then my kids can just warm sandwiches individually in the microwave.
If you are looking for great game day food, these also are a great appetizer idea. And I usually keep Hawaiian dinner rolls on hand for the very reason that these are a quick and easy appetizer recipe should you need to come up with something quick.

Variations of Funeral Sandwiches
I’ve seen people make these cheese sandwiches several different ways over the years. If you want some variety, you can add brown sugar into your sauce OR even change up the type of mustard that you are using. (I did make them once with yellow mustard and we didn’t like them nearly as well, but I’m sure that is a personal preference.
I’ve also tried making them with sesame seeds instead of the poppy seeds, and my family enjoys them both ways. The best way to find out how your family likes these yummy sandwiches is to make this original recipe the first time and then try new ways each time you make them!

Favorite Sandwich Recipes
- Easy Gourmet Air Fryer Burger
- Homemade Corn Dogs
- Easy Chicken Dinner Recipes
- Instant Pot Chili Recipe
- Easy Beef Tips Crock Pot Recipe
- Instant Pot Meatballs
- Avocado Chicken Salad
Having easy and favorite recipes on hand makes for quick and easy shops at the grocery store and a huge stress reliever for those moments when you need to get dinner on the table quick, but don’t have much time to think about it or plan!
If you are looking for more easy meal ideas made with King’s Hawaiian Rolls, make sure to check out this Hawaiian Rolls Cheeseburger Slider recipe!
Print the Recipe for Funeral Sandwiches

Funeral Sandwiches Recipe
This Funeral Sandwiches recipe is so easy to make and will be your new favorite for all gatherings. Originally named Funeral Sandwiches (depressing, we know!) these yummy ham and cheese sliders get their name because they are so easy to make for a crowd, yet filling and delicious. Packed with flavor, they are also affordable and quick to throw together. Our version of these funeral rolls doesn't require you to soak them overnight, so you can literally have them made within an hour.
Ingredients
- 12 Count Bag of Hawaiian sweet rolls (we prefer King's Hawaiian Rolls)
- 1 lb Thinly sliced ham (Honey Ham works great)
- 12 Slices of Swiss Cheese (thin slices)
- 1/2 Stick of Melted Butter
- 1 Tablespoon Dijon Mustard
- 1 Tablespoon of Poppy Seeds
- 1 Teaspoon Onion Powder
- 2 Teaspoons Worcestershire sauce
- Salt, or to taste
- Pepper, or to taste
Instructions
- Preheat oven to 350F.
- Cut each roll in half, lengthwise and place bottom halves on the bottom of a baking pan or casserole dish. *You might consider lining the bottom of your baking dish or pan with aluminum foil for easy clean up of the bottom of the pan.
- Layer bottom half of the rolls with a slice of ham and on top of the ham place a slice of Swiss cheese. Place the top half of the rolls back on.
- In a bowl, mix together the butter, dijon mustard, Worcestershire sauce, poppy seeds and onion powder. Brush lightly over the tops of the rolls. I personally just like a light coating but I do know some people really love a lot of sauce on top, so do so based on your personal preference.
- Let sit for 10-20 minutes.
- Bake uncovered on the center rack for 10-15 minutes or until cheese is melted and bun tops are a light golden color.
Nutrition Information:
Yield: 12 Serving Size: 1Amount Per Serving: Calories: 209Total Fat: 15gSaturated Fat: 8gTrans Fat: 0gUnsaturated Fat: 5gCholesterol: 60mgSodium: 556mgCarbohydrates: 3gFiber: 0gSugar: 1gProtein: 16g
*This is just an estimate. Results may vary.

Meet the author – Keri Lyn
The creative and frugal mind behind She Saved for over 12 years now, Keri Lyn shares her adventures in parenting along with her love for family travel, country living and brand marketing. A self-proclaimed “brand loyalist”, Keri Lyn is known for her strong and enthusiastic voice when it comes to the products and brands that she loves. She Saved has become a community for like-minded consumers who appreciate saving money, time and sanity by getting the best deals on quality products and experiences.


great recipe! I have used this for many years and sometimes mix it up… to share- double the meat by using ham and turkey/chicken then add cheese for a more filling meal (I have 3 sons so this was a must, LOL) also I like to use whole grain mustard or even spicy mustard, lastly I skip the poppy seeds due to not being able to keep them on hand and very little flavor add, but do use dehydrated onion which makes a nice looking top bun and great flavor.
also, I cut all the serving squares prior to pouring the sauce on. saves you sticky hot fingers after they are baked and gets the sauce in deep.
I often double the recipe and it works out great but do 2.5 the sauce. If I refrigerate overnight before I bake, I leave the foil on for 5-9 mins then remove for 10 mins when baking or the buns get too dark and the cheese doesn’t melt good.
Hello!! Can you freeze these after they’ve been cooked?