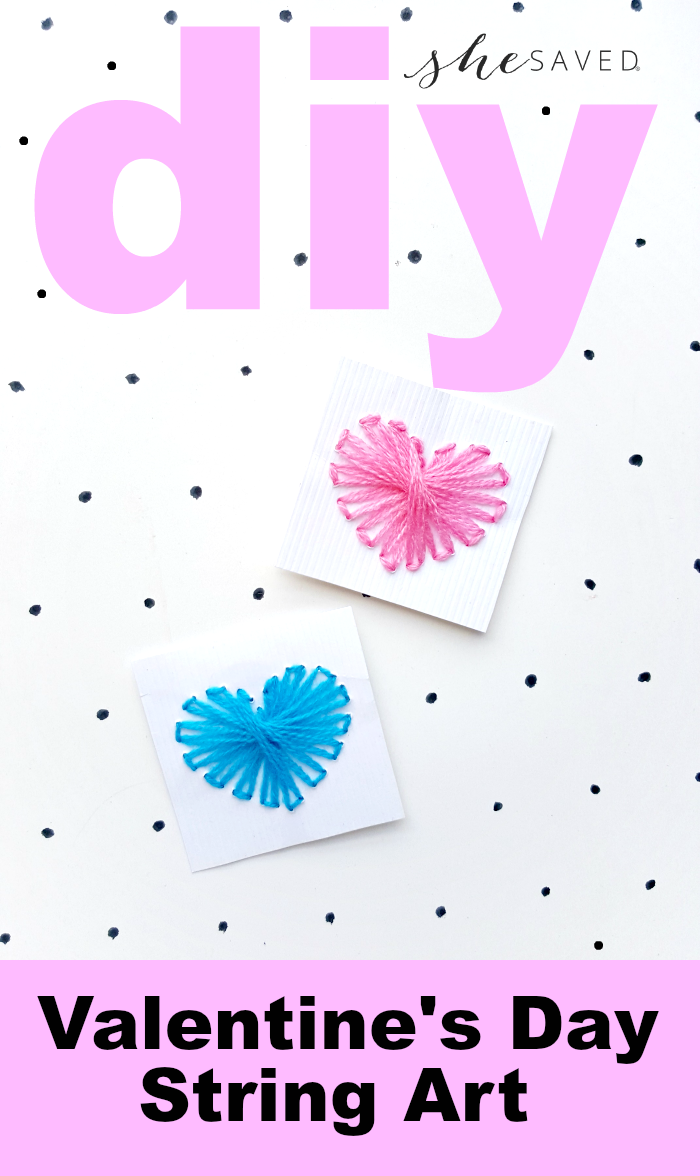
Valentine’s Day Craft: String Heart Art
Valentine’s Day Craft: String Heart Art
We’ve been loving paper crafts around here lately and they are the perfect project for homemade Valentine’s Day gift giving.
I’ve recently shared some of our other favorite crafty paper projects and this Valentine’s Day craft String Heart is so fun!
One thing that I really love about it is that it’s something that takes very few supplies, but makes a neat little gift. It’s also time consuming enough to be a thoughtful homemade gift but not so complicated that it can’t be done easy and quickly with little prep or supplies.
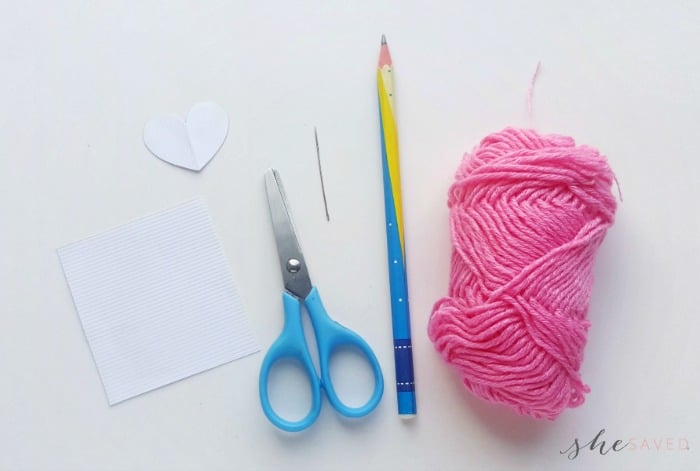
List of Supplies for Making Valentine String Heart Art
Cardstock paper
Yarn or embroidery floss
Needle
Scissors
Pencil
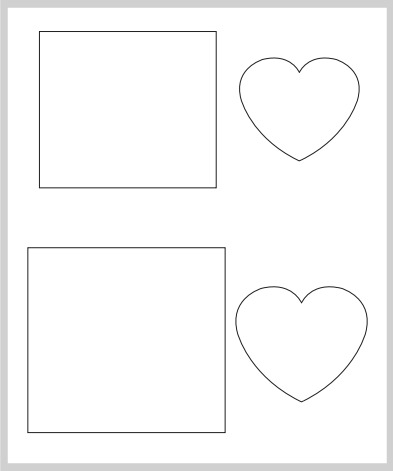
Template (print it here)
How to Make String Heart Art
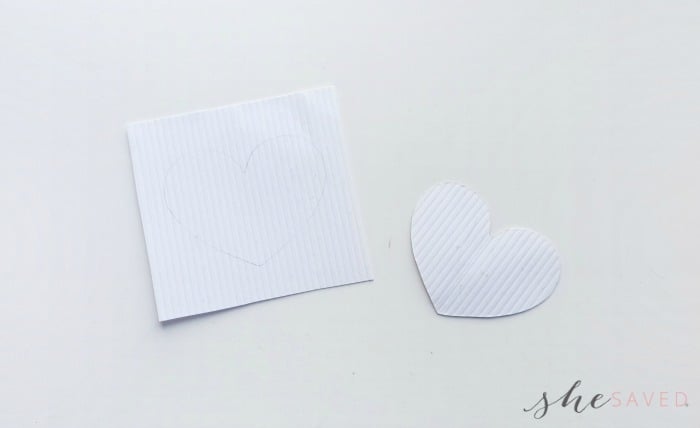
Step ONE:
The template includes 2 different sizes of heart and square sets, choose the one you want and prepare the template. Trace the template patterns on the cardstock paper selected for the craft. Trace the heart shape on the middle of the square cut.
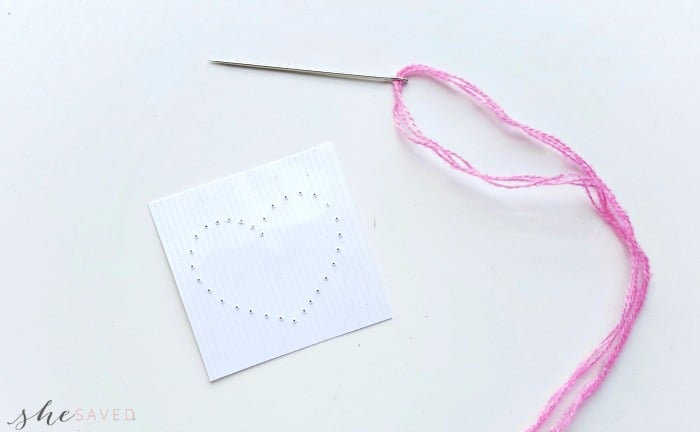
Step TWO:
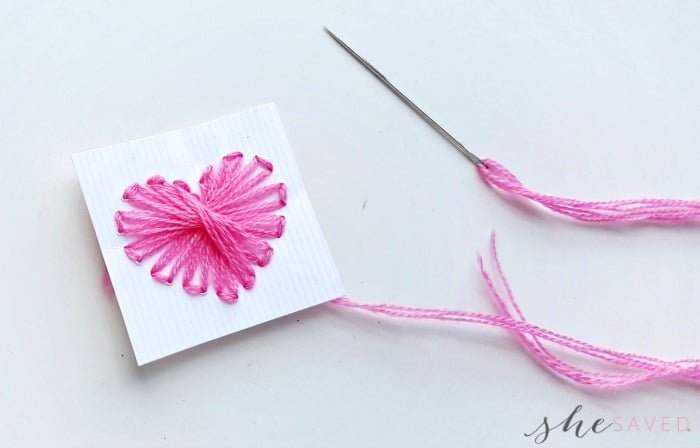
Use needle to pop small holes along the line of the traced heart. Keep at least 0.5 cm gap between each holes. Prepare the needle with the thread of your choice. Tie a knot at the end of the thread.
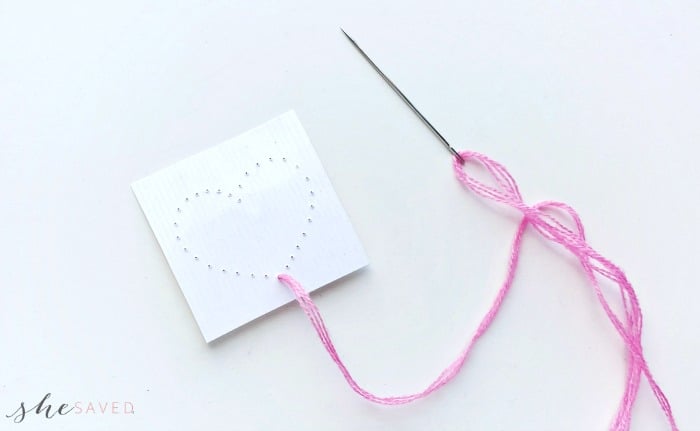
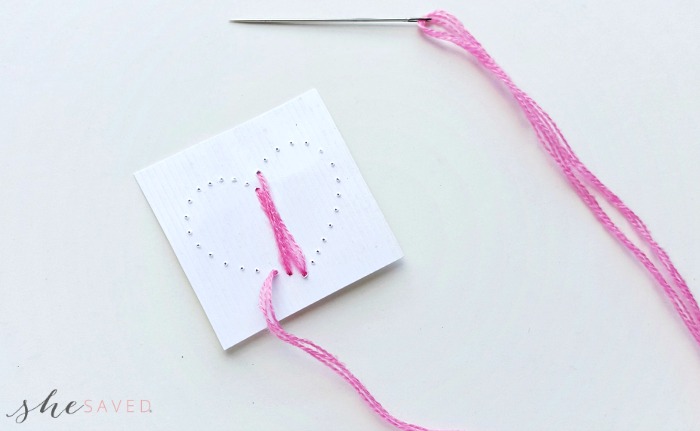
Step THREE:
Start from the bottom hole of the heart. Draw the needle to the front side from the back side. Pull the needle (along with the thread) all the way through.
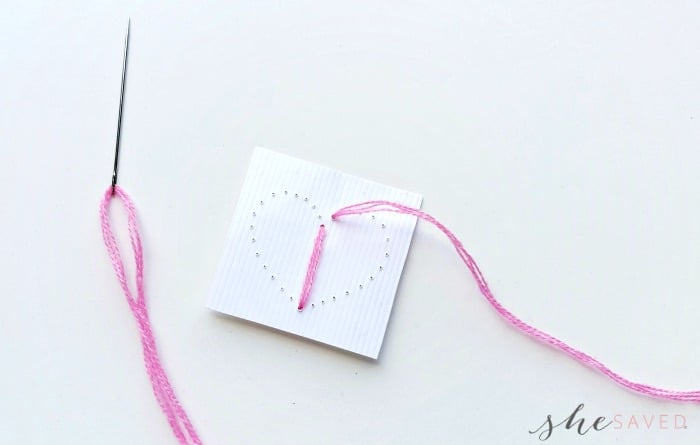
Step FOUR:
Draw the needle to the hole opposite to the current one and draw it to the back side. Now pull out the needle to the front, from the hole next to the current one (left or right hole; choose any one side to continue the stitch).
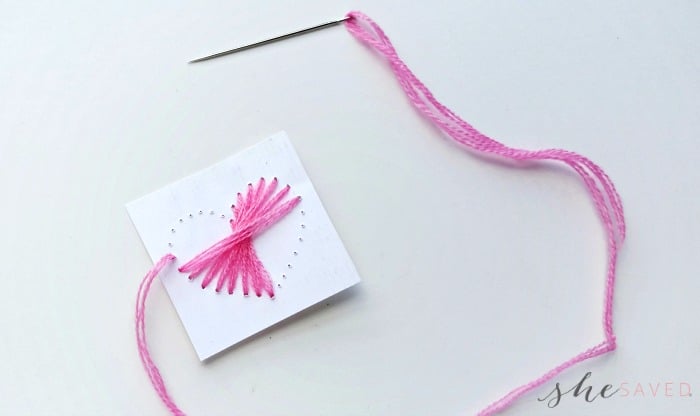
Step FIVE:
Draw the needle to the hole opposite to the current hole again. Draw it to the front again through the hole next to the current hole. Keep the sequence of either left or right. I am doing clockwise stitching.
Step SIX:
Continue to repeat the steps (step-4 and step-5).
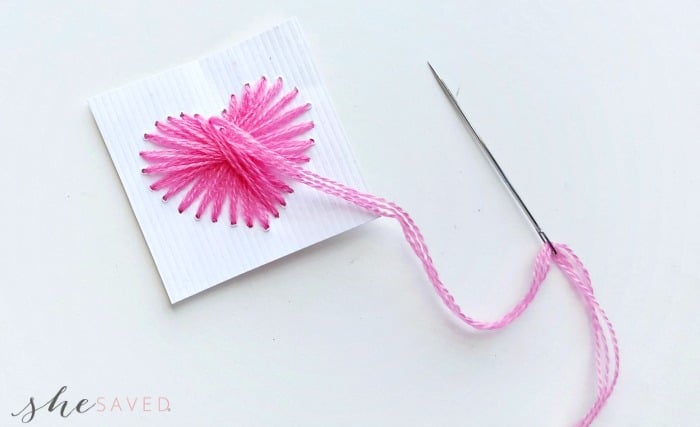
Step SEVEN:
Continue to do this stitch until reaching near the first hole again.
Step EIGHT:
After reaching the first hole, start doing running stitch through the holes.
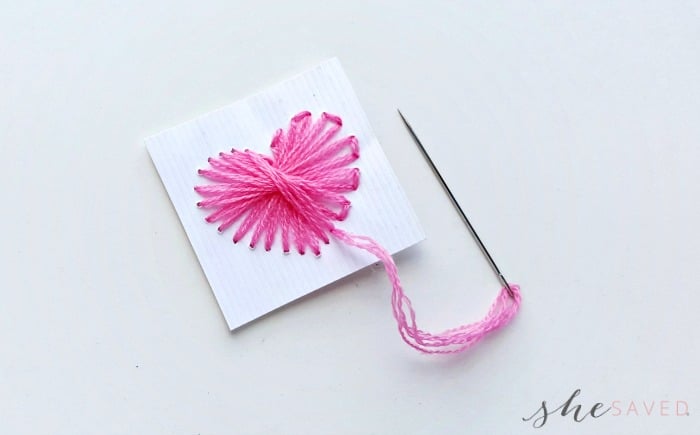
Step NINE:
Doing running stitch through the holes creates a nice dash border around the stitched heart pattern.
Done stitching? Draw the needle to the back side and tie a knot with any random stitch at the back side. Cut off extra thread and done!
More Valentine’s Day Ideas
Looking for more fun Valentine’s Day ideas? Here are a few of my other favorites:
Frugal Valentine’s Day Gift Ideas
DIY Paper Craft Birdhouse Valentine
Favorite Heart Treats for Valentine’s Day
Print the Instructions for this Valentine’s Day String Heart Art Craft
Valentine’s Day Craft: String Heart Art
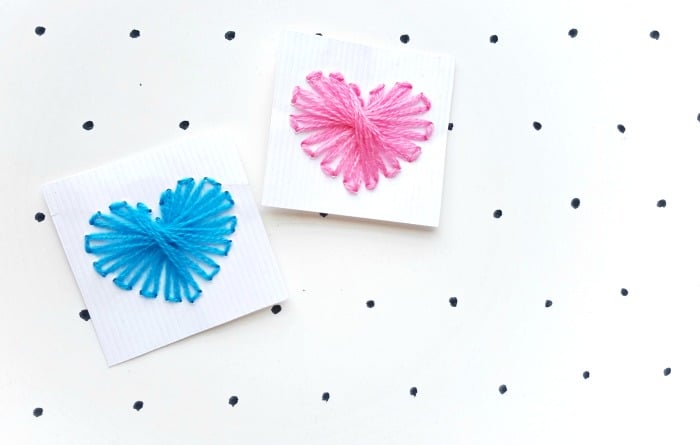
Cute and fun to make, this Valentine's Day craft is easy for all ages! Follow our instructions to make this fun string heart art as Valentine card gifts or even a fun handmade homemade gift that you can frame and share with your sweetheart on Valentine's Day!
Materials
- Cardstock paper
- Yarn or embroidery floss
- Pencil
- Template (print from post)
Tools
- Needle
- Scissors
Instructions
The template includes 2 different sizes of heart and square sets, choose the one you want and prepare the template. Trace the template patterns on the cardstock paper selected for the craft. Trace the heart shape on the middle of the square cut.
Use needle to pop small holes along the line of the traced heart. Keep at least 0.5 cm gap between each holes. Prepare the needle with the thread of your choice. Tie a knot at the end of the thread.
Start from the bottom hole of the heart. Draw the needle to the front side from the back side. Pull the needle (along with the thread) all the way through.
Draw the needle to the hole opposite to the current one and draw it to the back side. Now pull out the needle to the front, from the hole next to the current one (left or right hole; choose any one side to continue the stitch).
Draw the needle to the hole opposite to the current hole again. Draw it to the front again through the hole next to the current hole. Keep the sequence of either left or right. I like doing clockwise stitching.
Continue to repeat the last steps.
Continue to do this stitch until reaching near the first hole again.
After reaching the first hole, start doing running stitch through the holes.
Lastly, do a running stitch through the holes which creates a nice dash border around the stitched heart pattern.
Draw the needle to the back side and tie a knot with any random stitch at the back side. Cut off extra thread and done!

Meet the author – Keri Lyn
The creative and frugal mind behind She Saved for over 12 years now, Keri Lyn shares her adventures in parenting along with her love for family travel, country living and brand marketing. A self-proclaimed “brand loyalist”, Keri Lyn is known for her strong and enthusiastic voice when it comes to the products and brands that she loves. She Saved has become a community for like-minded consumers who appreciate saving money, time and sanity by getting the best deals on quality products and experiences.