Candy Bar Snowman Craft
We LOVE this craft because it is SO easy and so fun to give!
This fun Candy Bar Snowman Craft is one that the whole family can work on, and these are fun to give to just about everyone from bus drivers to neighbors.
Kids love them, so they make great party favors too! This is also a great way to re-purpose those mismatched baby socks.
Supplies for making a Candy Bar Snowman
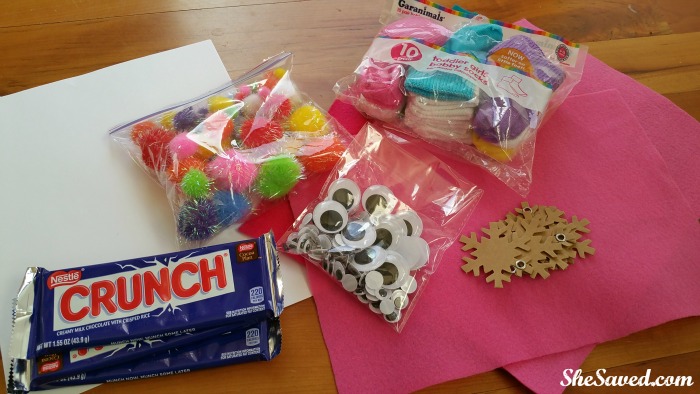
Candy Bars (Hershey’s or Nestle Crunch work great)
Pom Poms
Google Eyes
White Paper to wrap around candy bar
Baby Socks for hats
*we used the Garanimals Bobby Socks 6-18 months (assorted color 10 pack)
that we found at our local Walmart. This would be a really cute way to use
mismatched socks!
Felt Sheet for scarves
Fimo Oven Hardening Clay for making noses
Glue Gun
How to Make a Candy Bar Snowman from a Nestle Crunch Bar
Putting these together is easy and fun! Before you start, you will want to use your Fimo Oven Hardening Clay (orange) to make little carrot noses. If you don’t have clay, you can also color them on OR you could use a small piece of orange felt cut in the shape of a carrot.
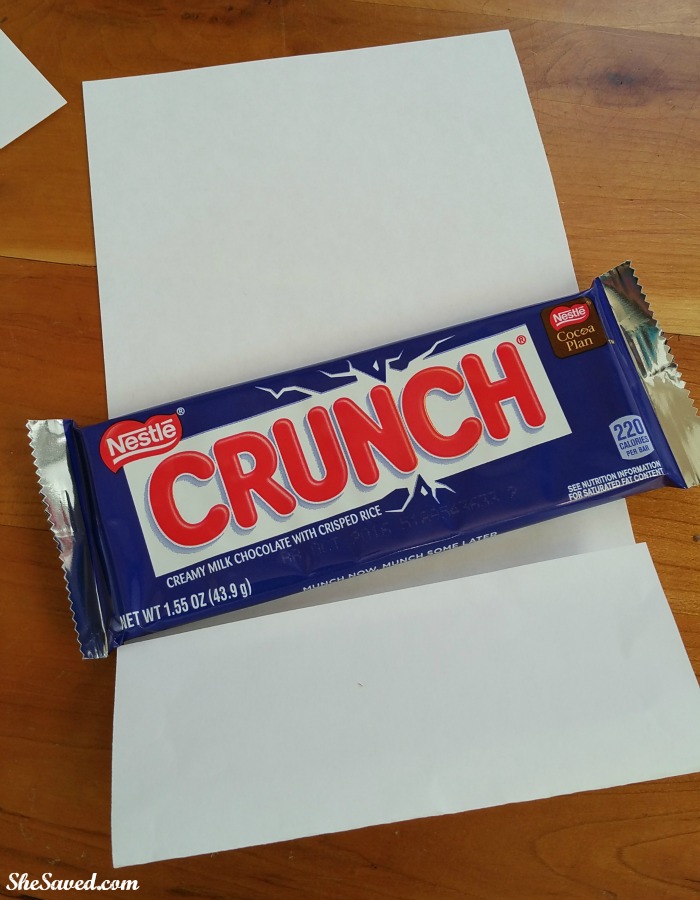
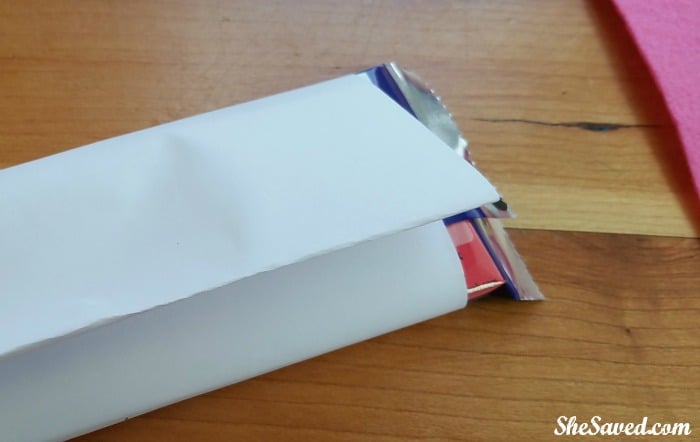
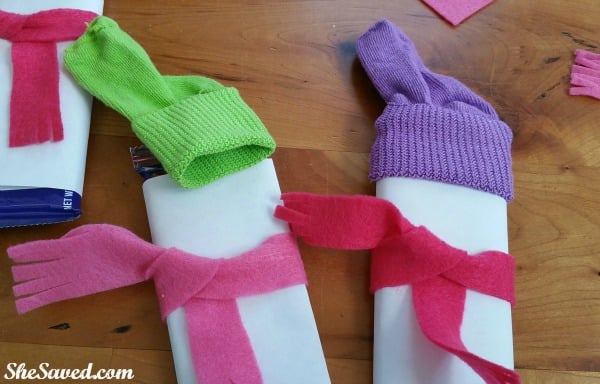
Start making your snowman by wrapping your candy bar in plain white printer paper. We used the glue gun to seal it shut.
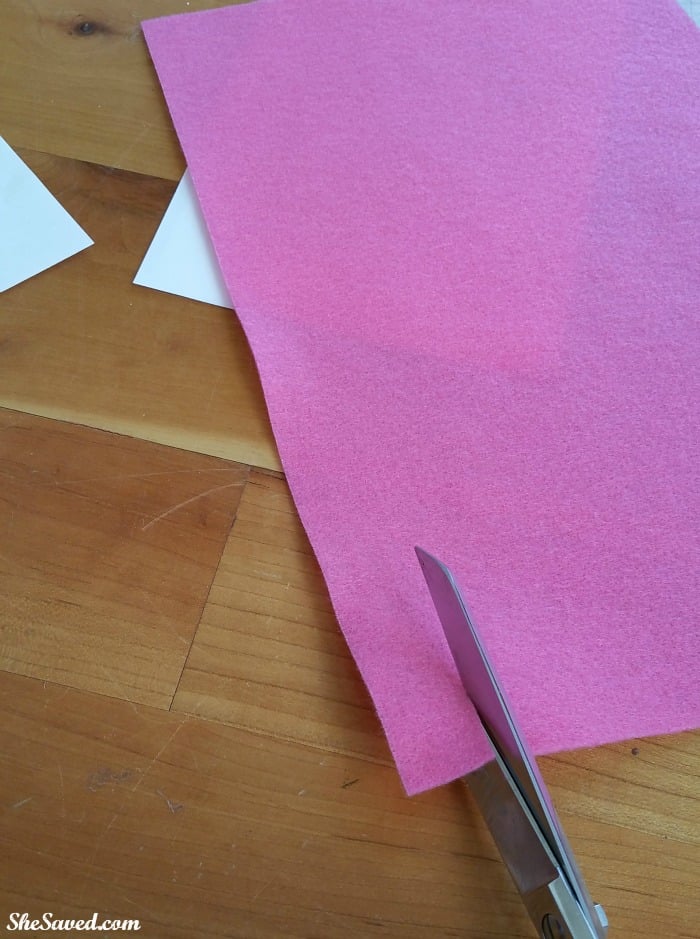
Next, cut your scarves by cutting strips up the long side of a sheet of felt.
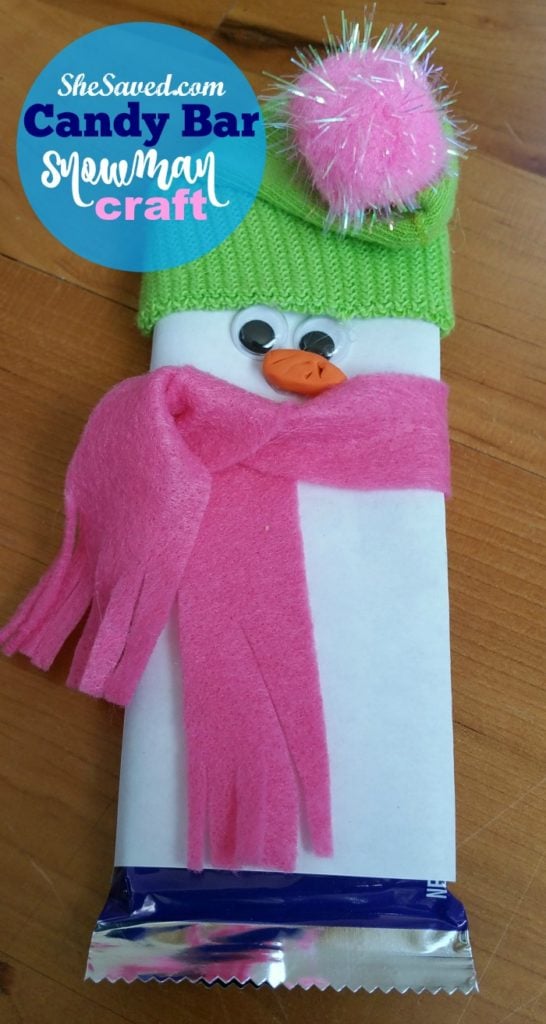
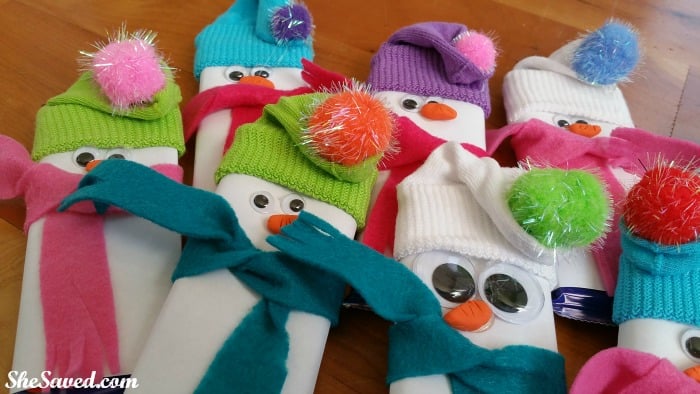
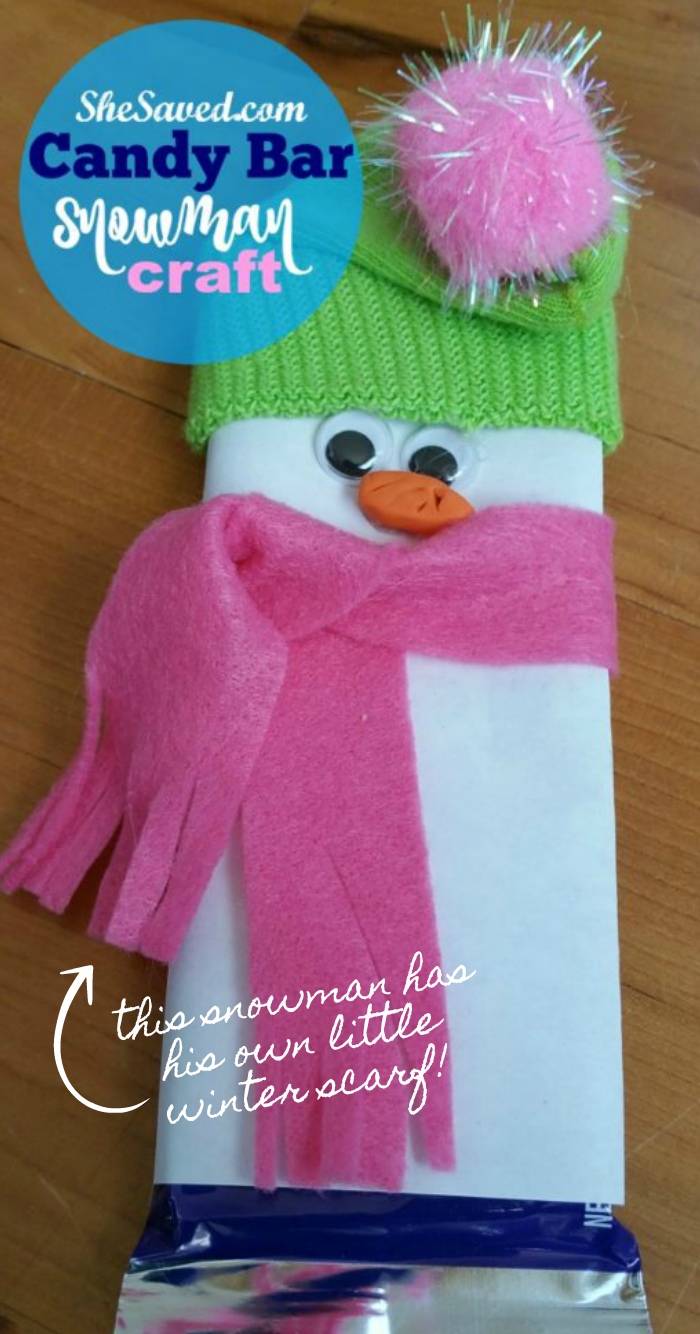
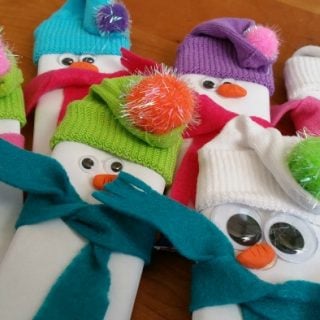
Cut fringe on the end of the scarf pieces and then tie them around the snowman’s neck. Next, take the baby socks and put them on the snowman’s head for his hat.
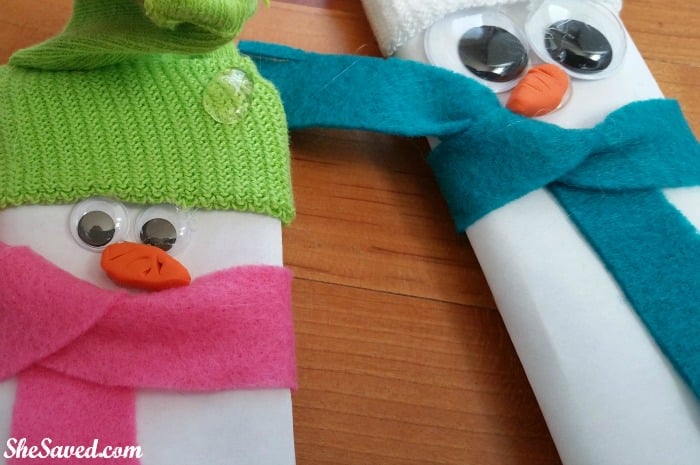
Glue your eyes and nose into place and then arrange the snowman’s hat the way you want it. You can then fold down the sock to make it look like the hat is slouched over. Use a drop of glue to do this as shown.
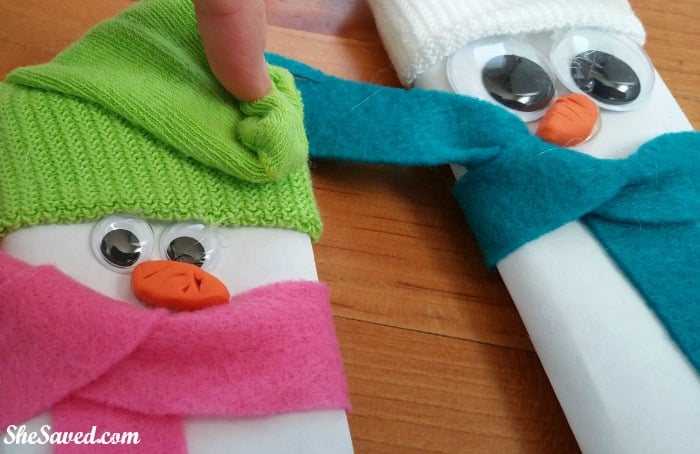
One your hat is glued down and in place, you can then add another drop of glue to attach the pom pom to the end of the hat!
As you can see, we made a whole group of these cute little Snowmen, so much fun and my kids loved passing them out to friends and family!
More Homemade Christmas and Holiday Gift Ideas
Aren’t these the cutest little homemade snowmen? These would be great for homemade gift ideas and perfect for giving to those people in your life who you just want to acknowledge with a winter greeting: bus drivers, school secretaries, teachers, librarians and these also make wonderful neighbor and nursing home gifts.
Here are some of our other fun and favorite homemade gift ideas:
- Homemade Simmering Potpourri Jars
- Paper Quilled Reindeer Craft
- Popsicle Stick Christmas Tree Craft
- DIY Wood Holiday Joy Sign
- Santa Candy Christmas Sleigh Craft
- Snowman Cheese Ball
- Easy Snowman Chocolate Bark
- Melted Snowman Cupcakes
- Snowman Water Bottle Printables
- Candy Bar Snowmen Craft
Print the Instructions for these Candy Bar Snowmen
Candy Bar Snowman Craft
I love finding unique and affordable gifts to pass out during the holidays for teachers, secretaries, bus drivers and neighbors - just a little something to say I'm thinking of you. This fun Candy Bar Snowman craft is perfect as a craft activity for little ones at daycare, preschool or pre-k / kindergarten and also makes a fun Christmas party favor. Plus, after they enjoy their cute snowman, they have a yummy candy bar to eat!
Materials
- Candy Bars
- Pom Poms
- Google Eyes
- White Paper to wrap around candy bar
- Baby Socks for hats
- *we used the Garanimals Bobby Socks 6-18 months (assorted color 10 pack)
- that we found at our local Walmart. This would be a really cute way to use
- mismatched socks!
- Felt Sheet for scarves
- Fimo Oven Hardening Clay for making noses
Tools
- Glue Gun
- Scissors
Instructions
Putting these together is easy and fun! Before you start, you will want to use your Fimo Oven Hardening Clay (orange) to make little carrot noses. If you don't have clay, you can also color them on OR you could use a small piece of orange felt cut in the shape of a carrot.
Start making your snowman by wrapping your candy bar in plain white printer paper. We used the glue gun to seal it shut.
Next, cut your scarves by cutting strips up the long side of a sheet of felt.
Cut fringe on the end of the scarf pieces and then tie them around the snowman's neck. Next, take the baby socks and put them on the snowman's head for his hat.
Glue your eyes and nose into place and then arrange the snowman's hat the way you want it. You can then fold down the sock to make it look like the hat is slouched over. Use a drop of glue to do this as shown.
One your hat is glued down and in place, you can then add another drop of glue to attach the pom pom to the end of the hat!

Meet the author – Keri Lyn
The creative and frugal mind behind She Saved for over 12 years now, Keri Lyn shares her adventures in parenting along with her love for family travel, country living and brand marketing. A self-proclaimed “brand loyalist”, Keri Lyn is known for her strong and enthusiastic voice when it comes to the products and brands that she loves. She Saved has become a community for like-minded consumers who appreciate saving money, time and sanity by getting the best deals on quality products and experiences.

These are just darling! We made something similar using packages of microwave popcorn for a family movie basket we gave away last Christmas.
Great.
www. rsrue.blogspot.com
What a fun and cute way to dress up a candy bar. Thanks for sharing on Merry Monday.
Very cute! I came over from The Creative Collection. Would love it if you join my link party too. Best wishes, Annemarie
These candy bar snowmen are so cute! Thanks for sharing your ideas at the #HomeMattersParty last week. Hope you will link up with us again at this Friday’s party.
Thanks for sharing! I definitely want to make the candy bar. Have a blessed day