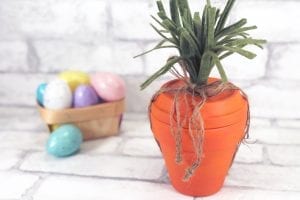
Arts and Crafts | Easter Ideas | Fun Stuff to do with the Kids | Homemade Gift Ideas | She Shared | She's Crafty Terra Cotta Pot Carrot Craft for Easter!
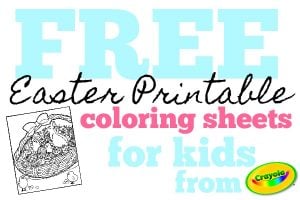
Art & Project Ideas for Kids | Arts and Crafts | FREE Printable | free stuff Free Crayola Printable Easter Coloring Pages and More!
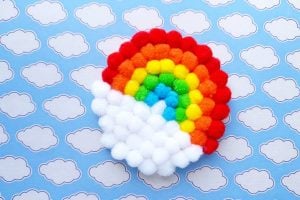
Art & Project Ideas for Kids | Arts and Crafts | Classroom Party Ideas | Fun Stuff to do with the Kids | She's Crafty | She's Creative DIY Pompom Rainbow Craft
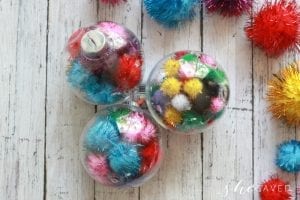
Art & Project Ideas for Kids | Arts and Crafts | Christmas Party Ideas & Recipes | Classroom Party Ideas | Featured Craft | Handmade Christmas Ornaments | Homemade Gift Ideas Easy DIY Pom Pom Ornament Christmas Craft for Kids
Arts and Crafts | Fun Stuff to do with the Kids | Thanksgiving Ideas Thanksgiving Paper Bag Turkey Craft
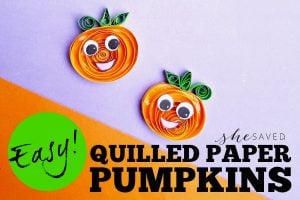
Art & Project Ideas for Kids | Arts and Crafts | Fun Stuff to do with the Kids | Halloween Crafts & Recipes | Homemade Gift Idea | Homemade Gift Ideas | She's Crafty | She's Creative Paper Quilling Craft: Quilled Pumpkin
Arts and Crafts | DIY | Home Decor Ideas | She's Creative | Valentines Day Ideas Home Decor Project: Easy DIY Floral Arrangement
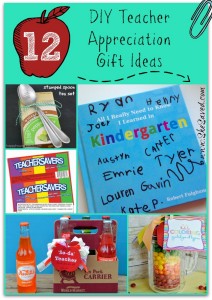
Arts and Crafts | Classroom Party Ideas | Fun Stuff to do with the Kids | Homemade Gift Idea | She's Crafty 12 DIY Teacher Appreciation Gift Ideas