Easter Bunny Cupcake Toppers
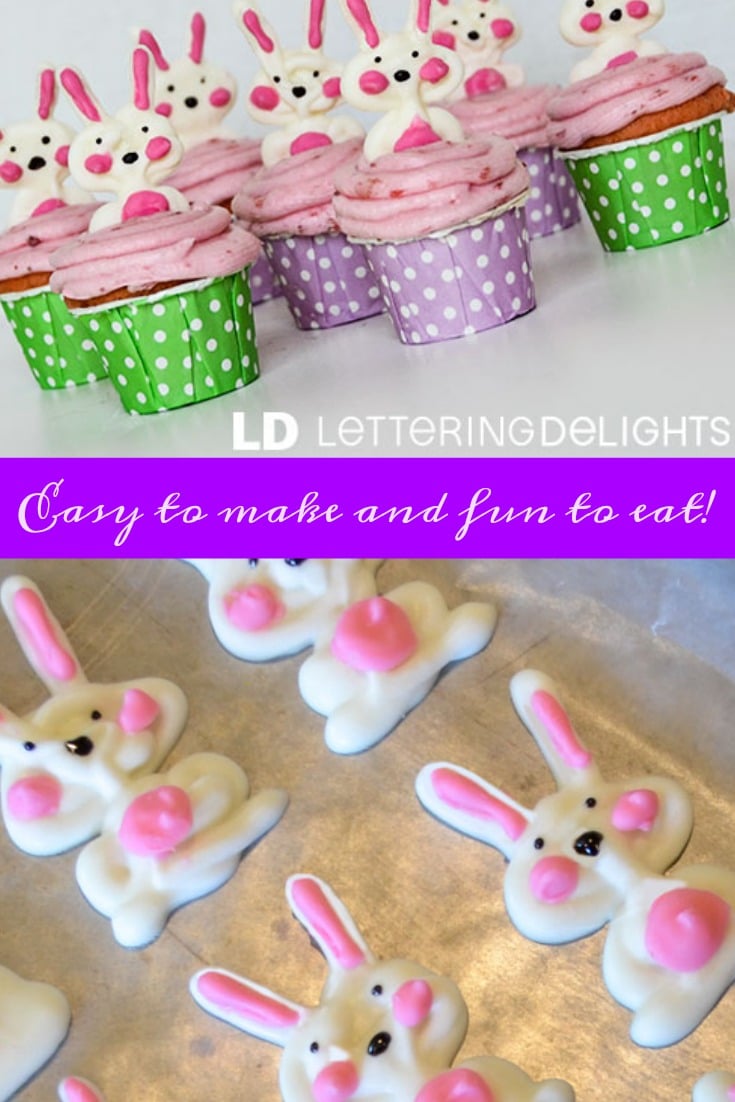
Easter Bunny Cupcake Toppers
Easter Bunny cupcake toppers that YOU can make, super easy – affordable and so much fun!!
Back by popular demand from Lettering Delights is another fun creative idea just in time for Easter.
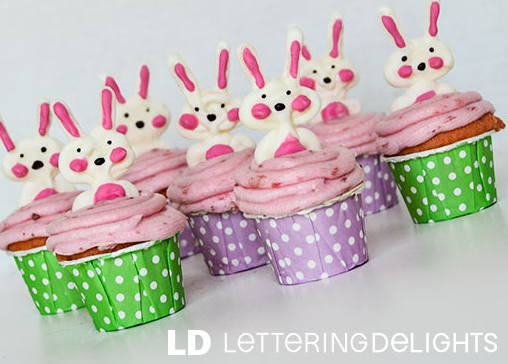
Check out these ADORABLE Candy Melt Bunny Toppers:
Get into the spirit of the holiday and make this special treat for that some “bunny” special!
These fun toppers are easy to make and entirely edible!
Materials for making these cute chocolate bunny candy toppers:
Little Peanuts Graphic Set
Candy Melts in pink and white
wax paper
black decorating gel
toothpicks
plastic bags
Candy Melts in pink and white
wax paper
black decorating gel
toothpicks
plastic bags
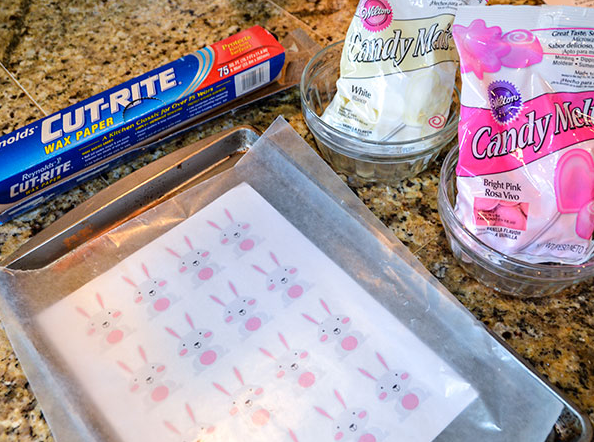
Directions:Begin by printing out an army of bunnies from the Little Peanuts Graphic Set.
*it looks like this graphic is no longer available, but maybe you can look at the images and improvise? I”m so sorry … I came back to check on this post and realized that our original guest poster pulled the image, their site is not longer working.
How to make these Chocolate Toppers
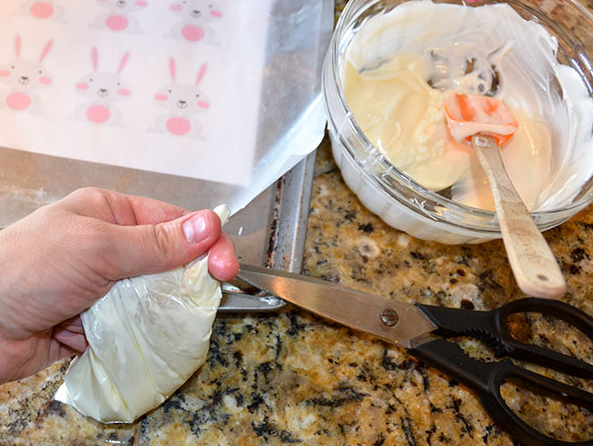
Lay the print out on a cookie sheet and cover with wax paper.
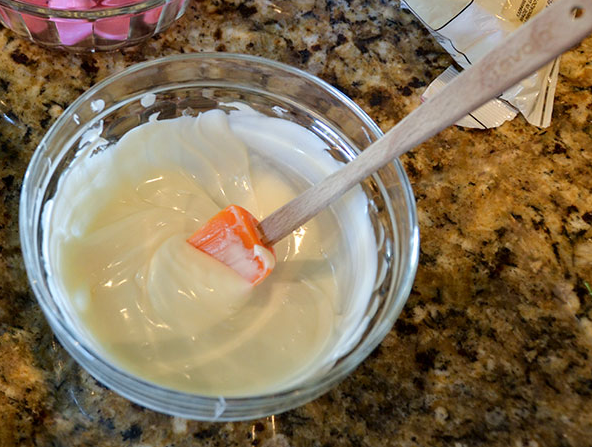
Starting with the white candy melts, pour about half the bag into a microwave safe bowl, and follow the directions to melt them.
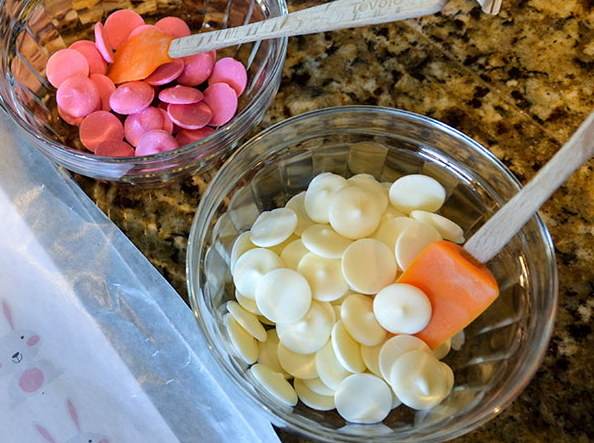
Melted product should look like this:
Scoop the melted candy into a plastic sandwich bag. Then we are going to cut off a tiny corner.
Then you carefully start to trace over the bunnies with your melted chocolate. It may take a few tries before perfection, the melt is easy to scrap back off and put back into the bowl. I start down with one ear, circle around the head and up the other ear, back down and do the body.
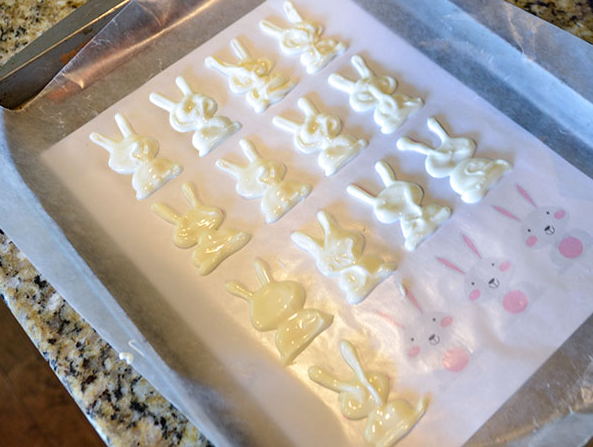
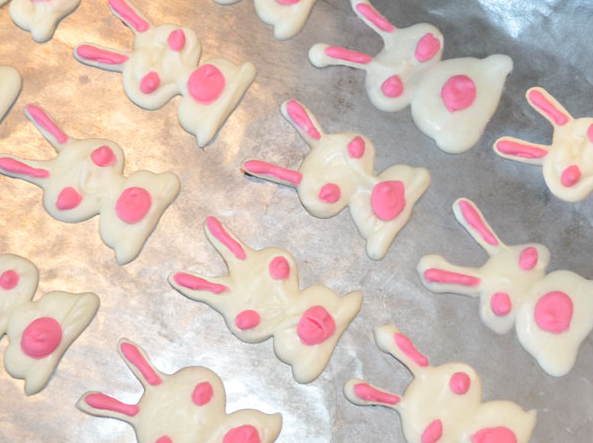
Then once the white sets up, remove it from the tray, and put a fresh piece of wax paper on for the pink.
Following the same directions as before, trace over the ears, cheeks and stomach with the pink candy melt.
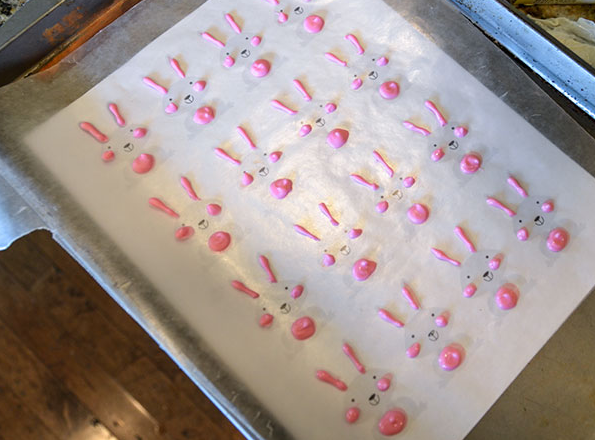
Wait for both sides to completely set up, then you will remelt some more pink candy melt.
Peel off your ears, cheeks and tummy one at a time and use a tooth pick to adhere a little melted candy melt to the pieces and stick to the bunny body.
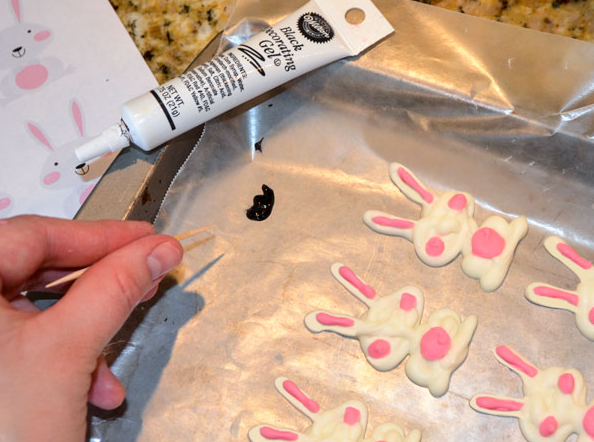
Squirt out a little bit of the black decorating gel, and use a toothpick to apply eyes and a nose.
Finished bunnies should look like this:
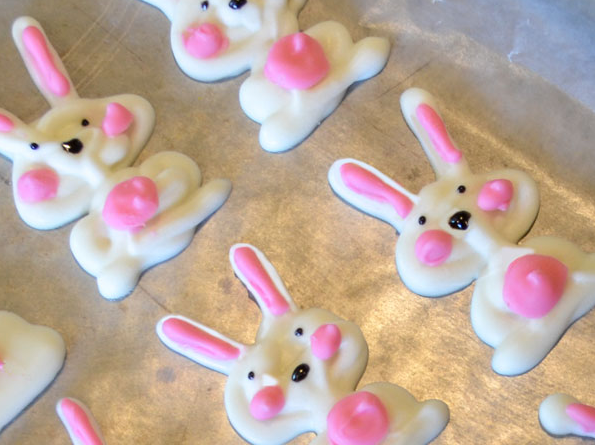
Aren’t these the cutest?
Lettering Delights offers an entire selection of digital product for all digital solutions.
Files are all available for instant download after purchase. Sign up for a FREE account at Lettering Delights today and get over $40 in product absolutely FREE!
If you love these kinds of fun activities, make sure to follow She Saved on Pinterest for more fun recipes and craft ideas!

Meet the author – Keri Lyn
The creative and frugal mind behind She Saved for over 12 years now, Keri Lyn shares her adventures in parenting along with her love for family travel, country living and brand marketing. A self-proclaimed “brand loyalist”, Keri Lyn is known for her strong and enthusiastic voice when it comes to the products and brands that she loves. She Saved has become a community for like-minded consumers who appreciate saving money, time and sanity by getting the best deals on quality products and experiences.


Hello Keri Lyn…it’s lovely to meet you! These are just adorable and very do-able too! I’d love you to come and share with us at Five Star Frou-Frou at A Tray of Bliss. We would welcome a clever bunny like you with open arms 😉 Mimi xxx
These are so cute! I love making toppers from the candy melts. Found you from the IFM hop.
Love these, they are so cute! (Wine’d Down Wed)
Good Morning!
These are adorable and I think I already have some of the ingredients in my pantry.
Our family would love these!
We would love to have your join us at Thoughts Of Home On Thursday and share you time and talent with us too!
Happy Friday.
Jemma
http://www.athomewithjemma.com/2016/03/thoughts-of-home-on-thursday-4.html#.Vtl8SZw4GM8
My daughter love this. Thanks for sharing.
Jealous over this. It’s really really nice.Thanks for sharing.
What a great idea to make a cupcake topper from a printable! Love it! Thanks for sharing these cupcakes with us at Merry Monday this week. 🙂